Pages
Click on the Pages link from the nav menu, and the pages list page will open, as shown in Figure 1 below.
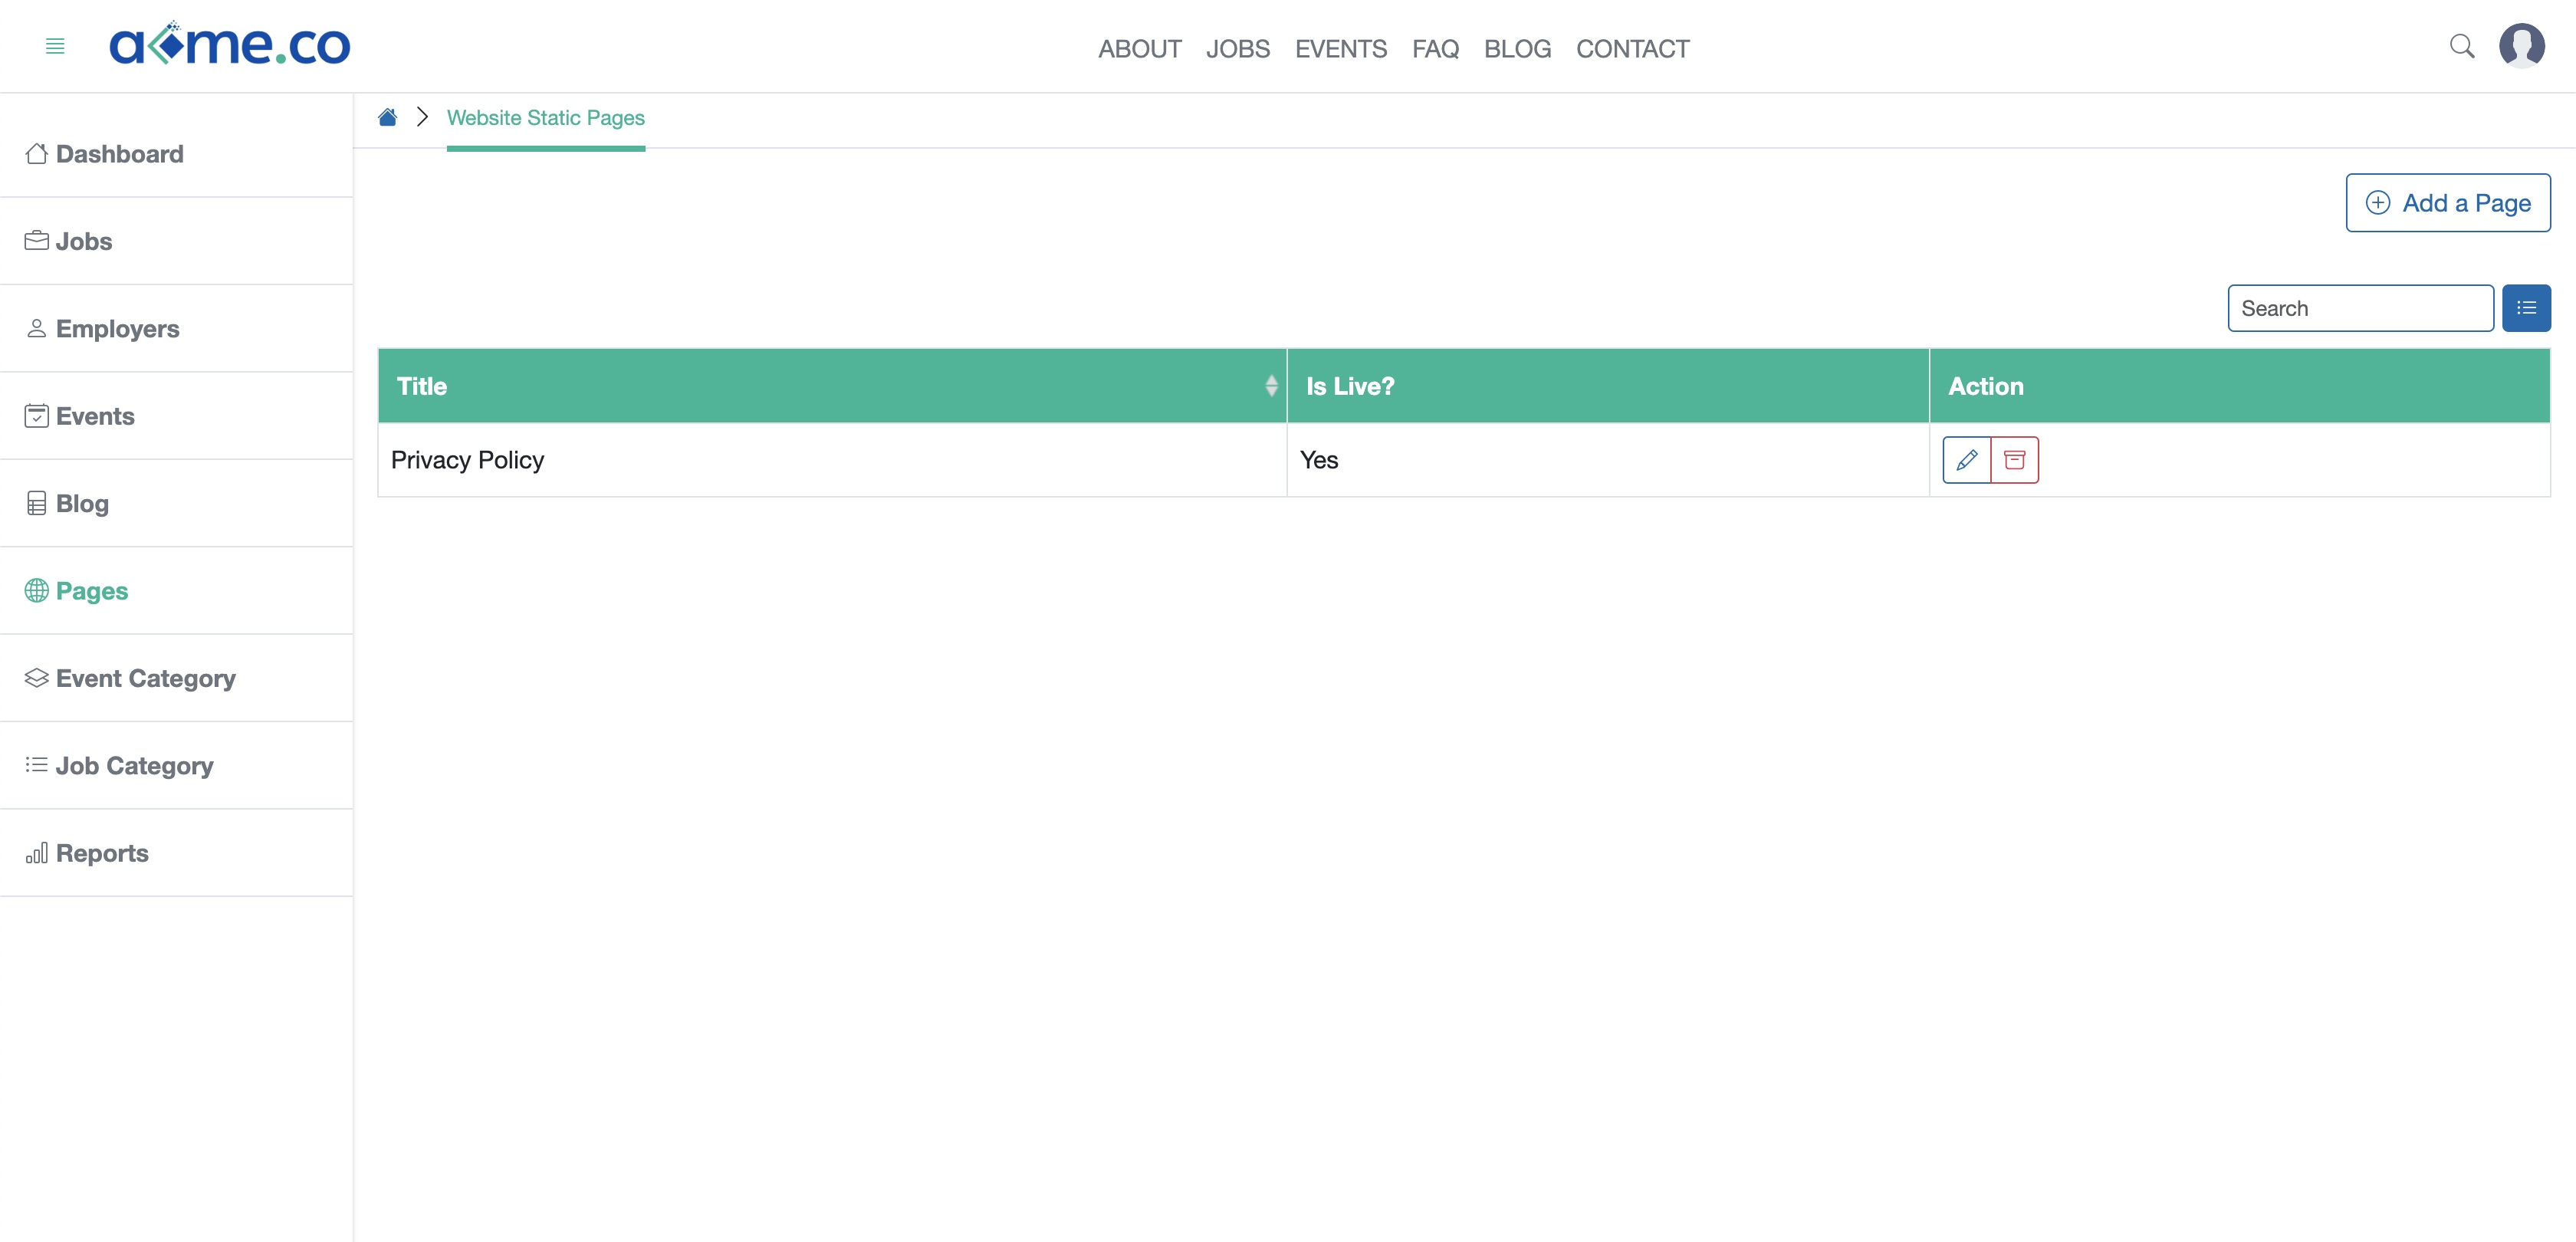
All the pages will be available in a tabular form, as shown in Figure 1 above.
Click the Add a Page button available on the top right corner of the screen, and a new page will open, as shown in Figure 2 below.
Click the Edit icon available on the right side of the individual page on the Action column, as shown in Figure 1 above and the system will open the edit page, as shown in Figure 3 below.
Click the Archive icon available on the right side of the individual blog on the Action column to remove the blog from the website, as shown in Figure 1 above.
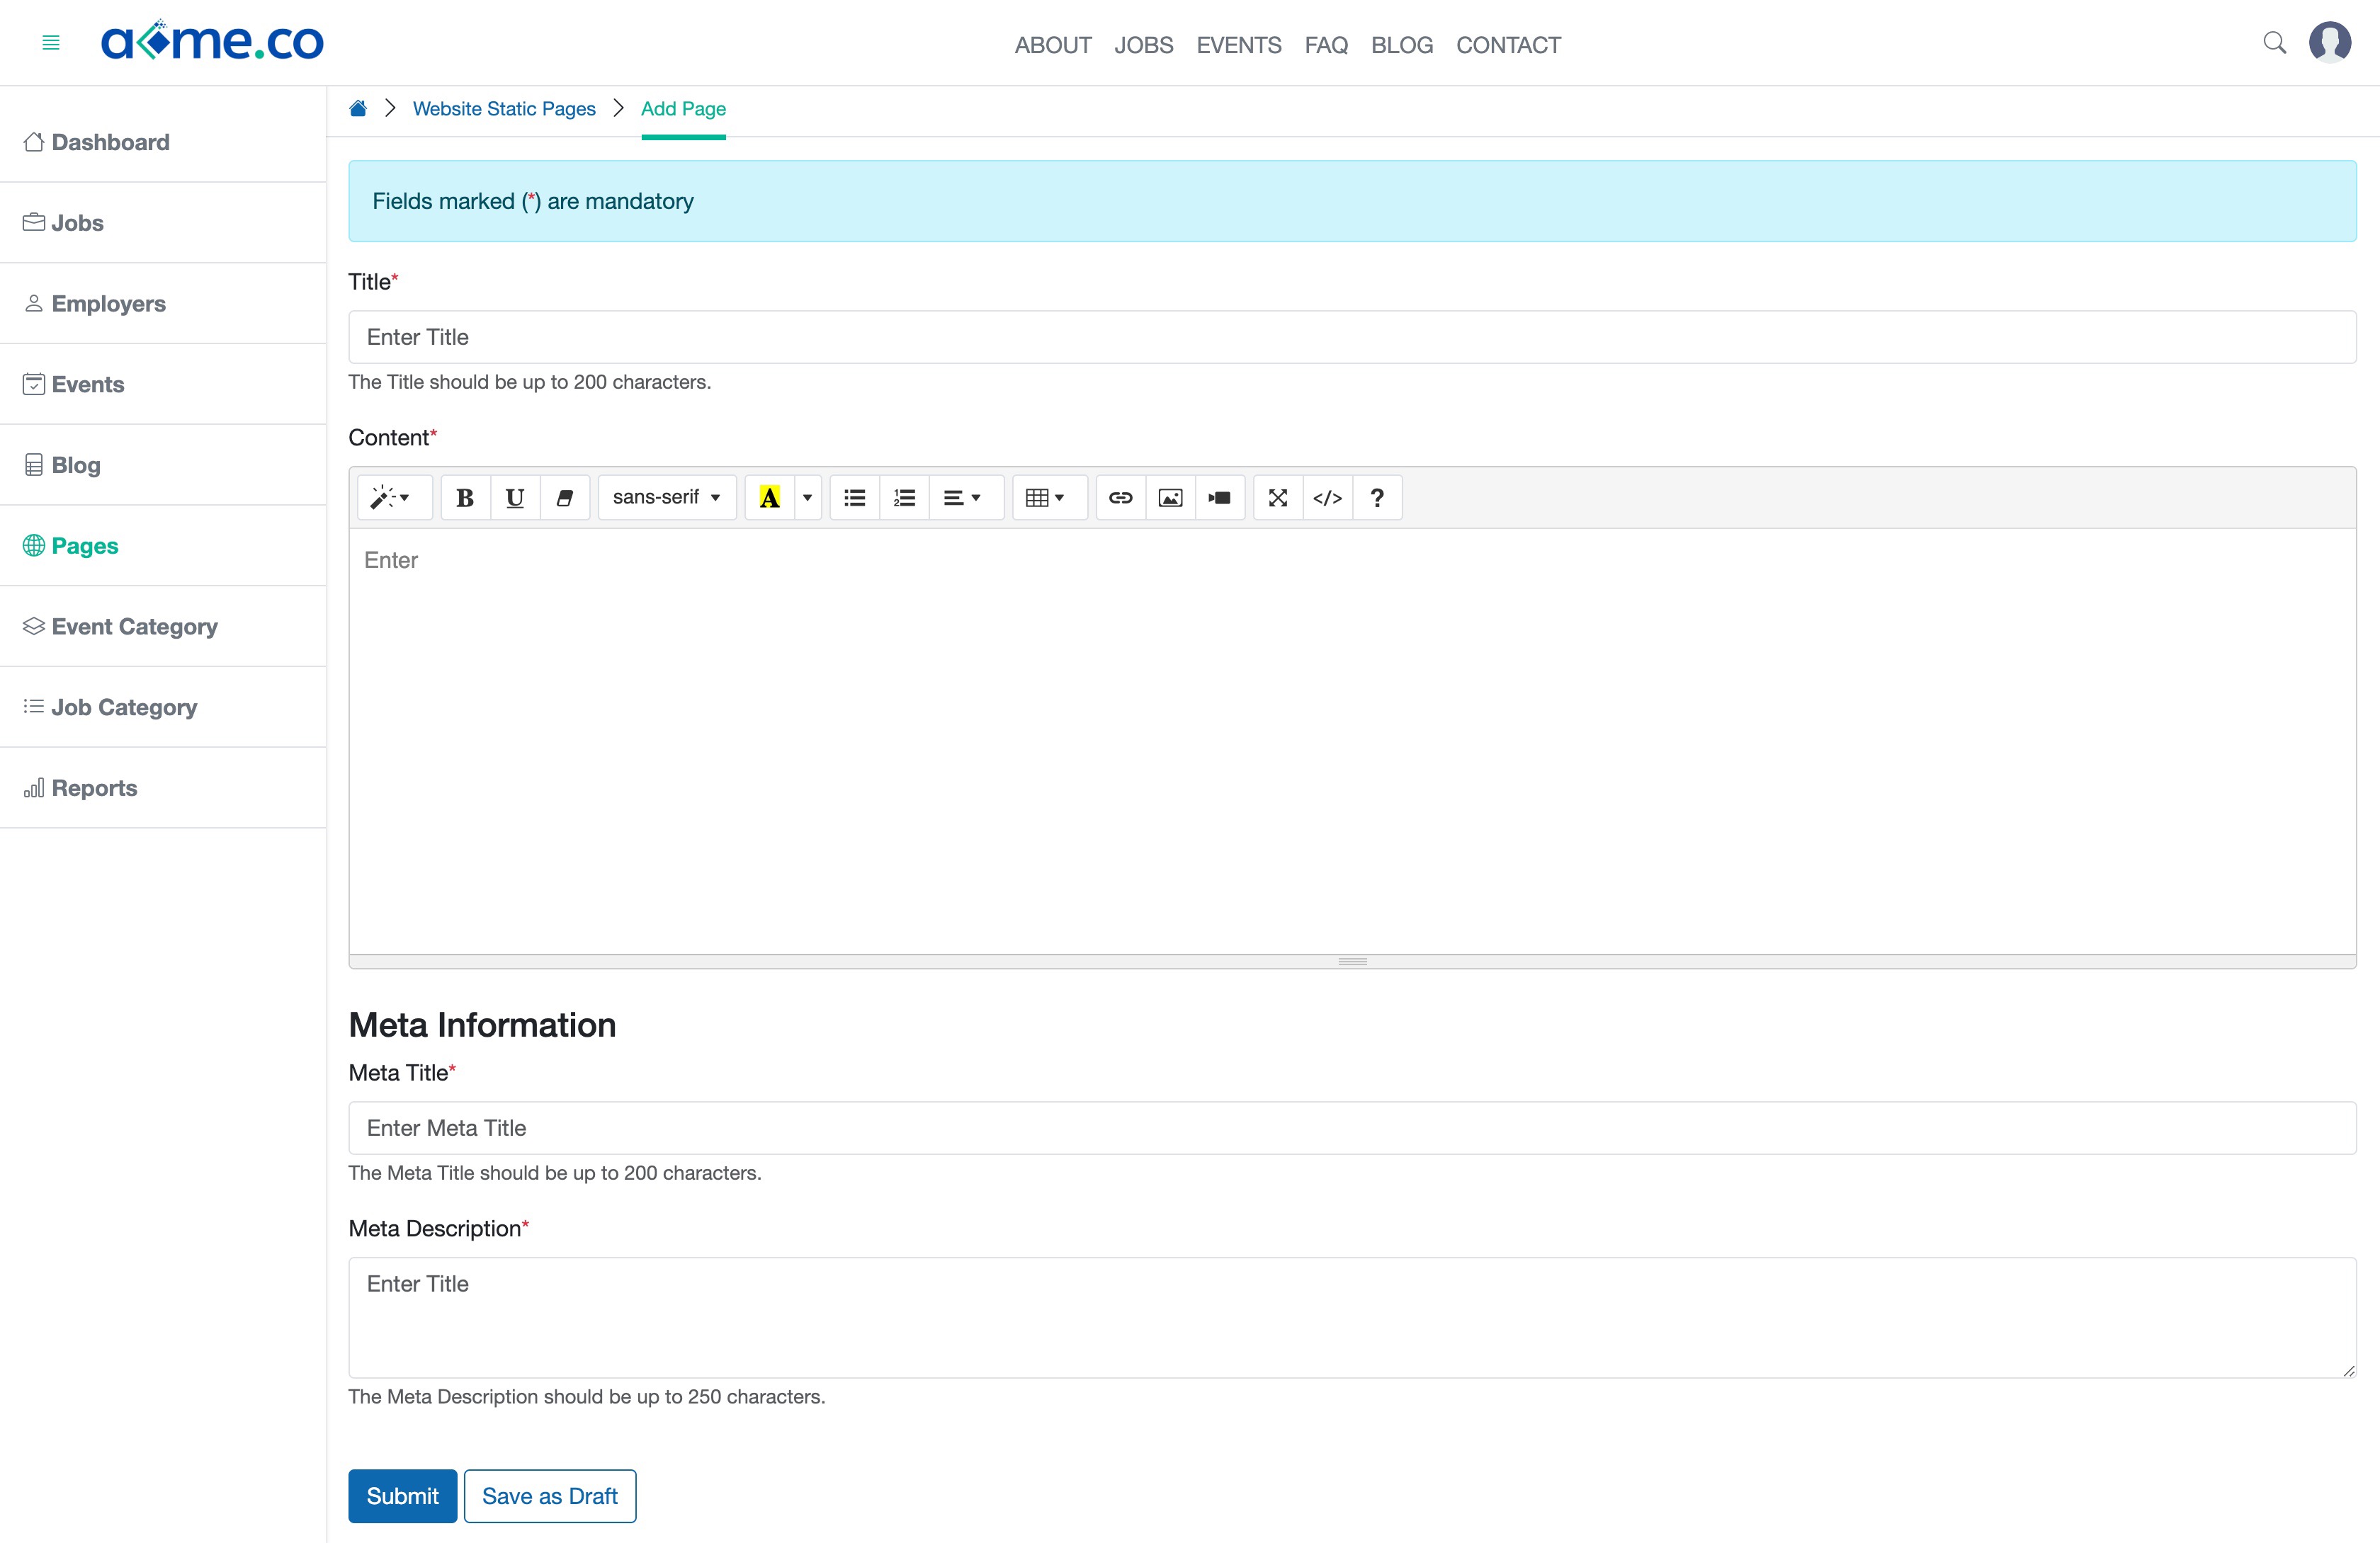
Fill in the details and click the Submit button to create a new page. The details that need to be filled in are:
- Title (text box - Mandatory): Title of the Page
- Content (text editor - Mandatory): Content of the page in the text editor. You can use the visual or code mode to write the content in the text editor.
- Meta Title (text box - Mandatory): Meta Title of the Page
- Meta Description (text area - Mandatory): A short description of the page for Meta
Click the Save as Draft button to save the page or click the Submit button to publish the page, as shown in Figure 2 above.
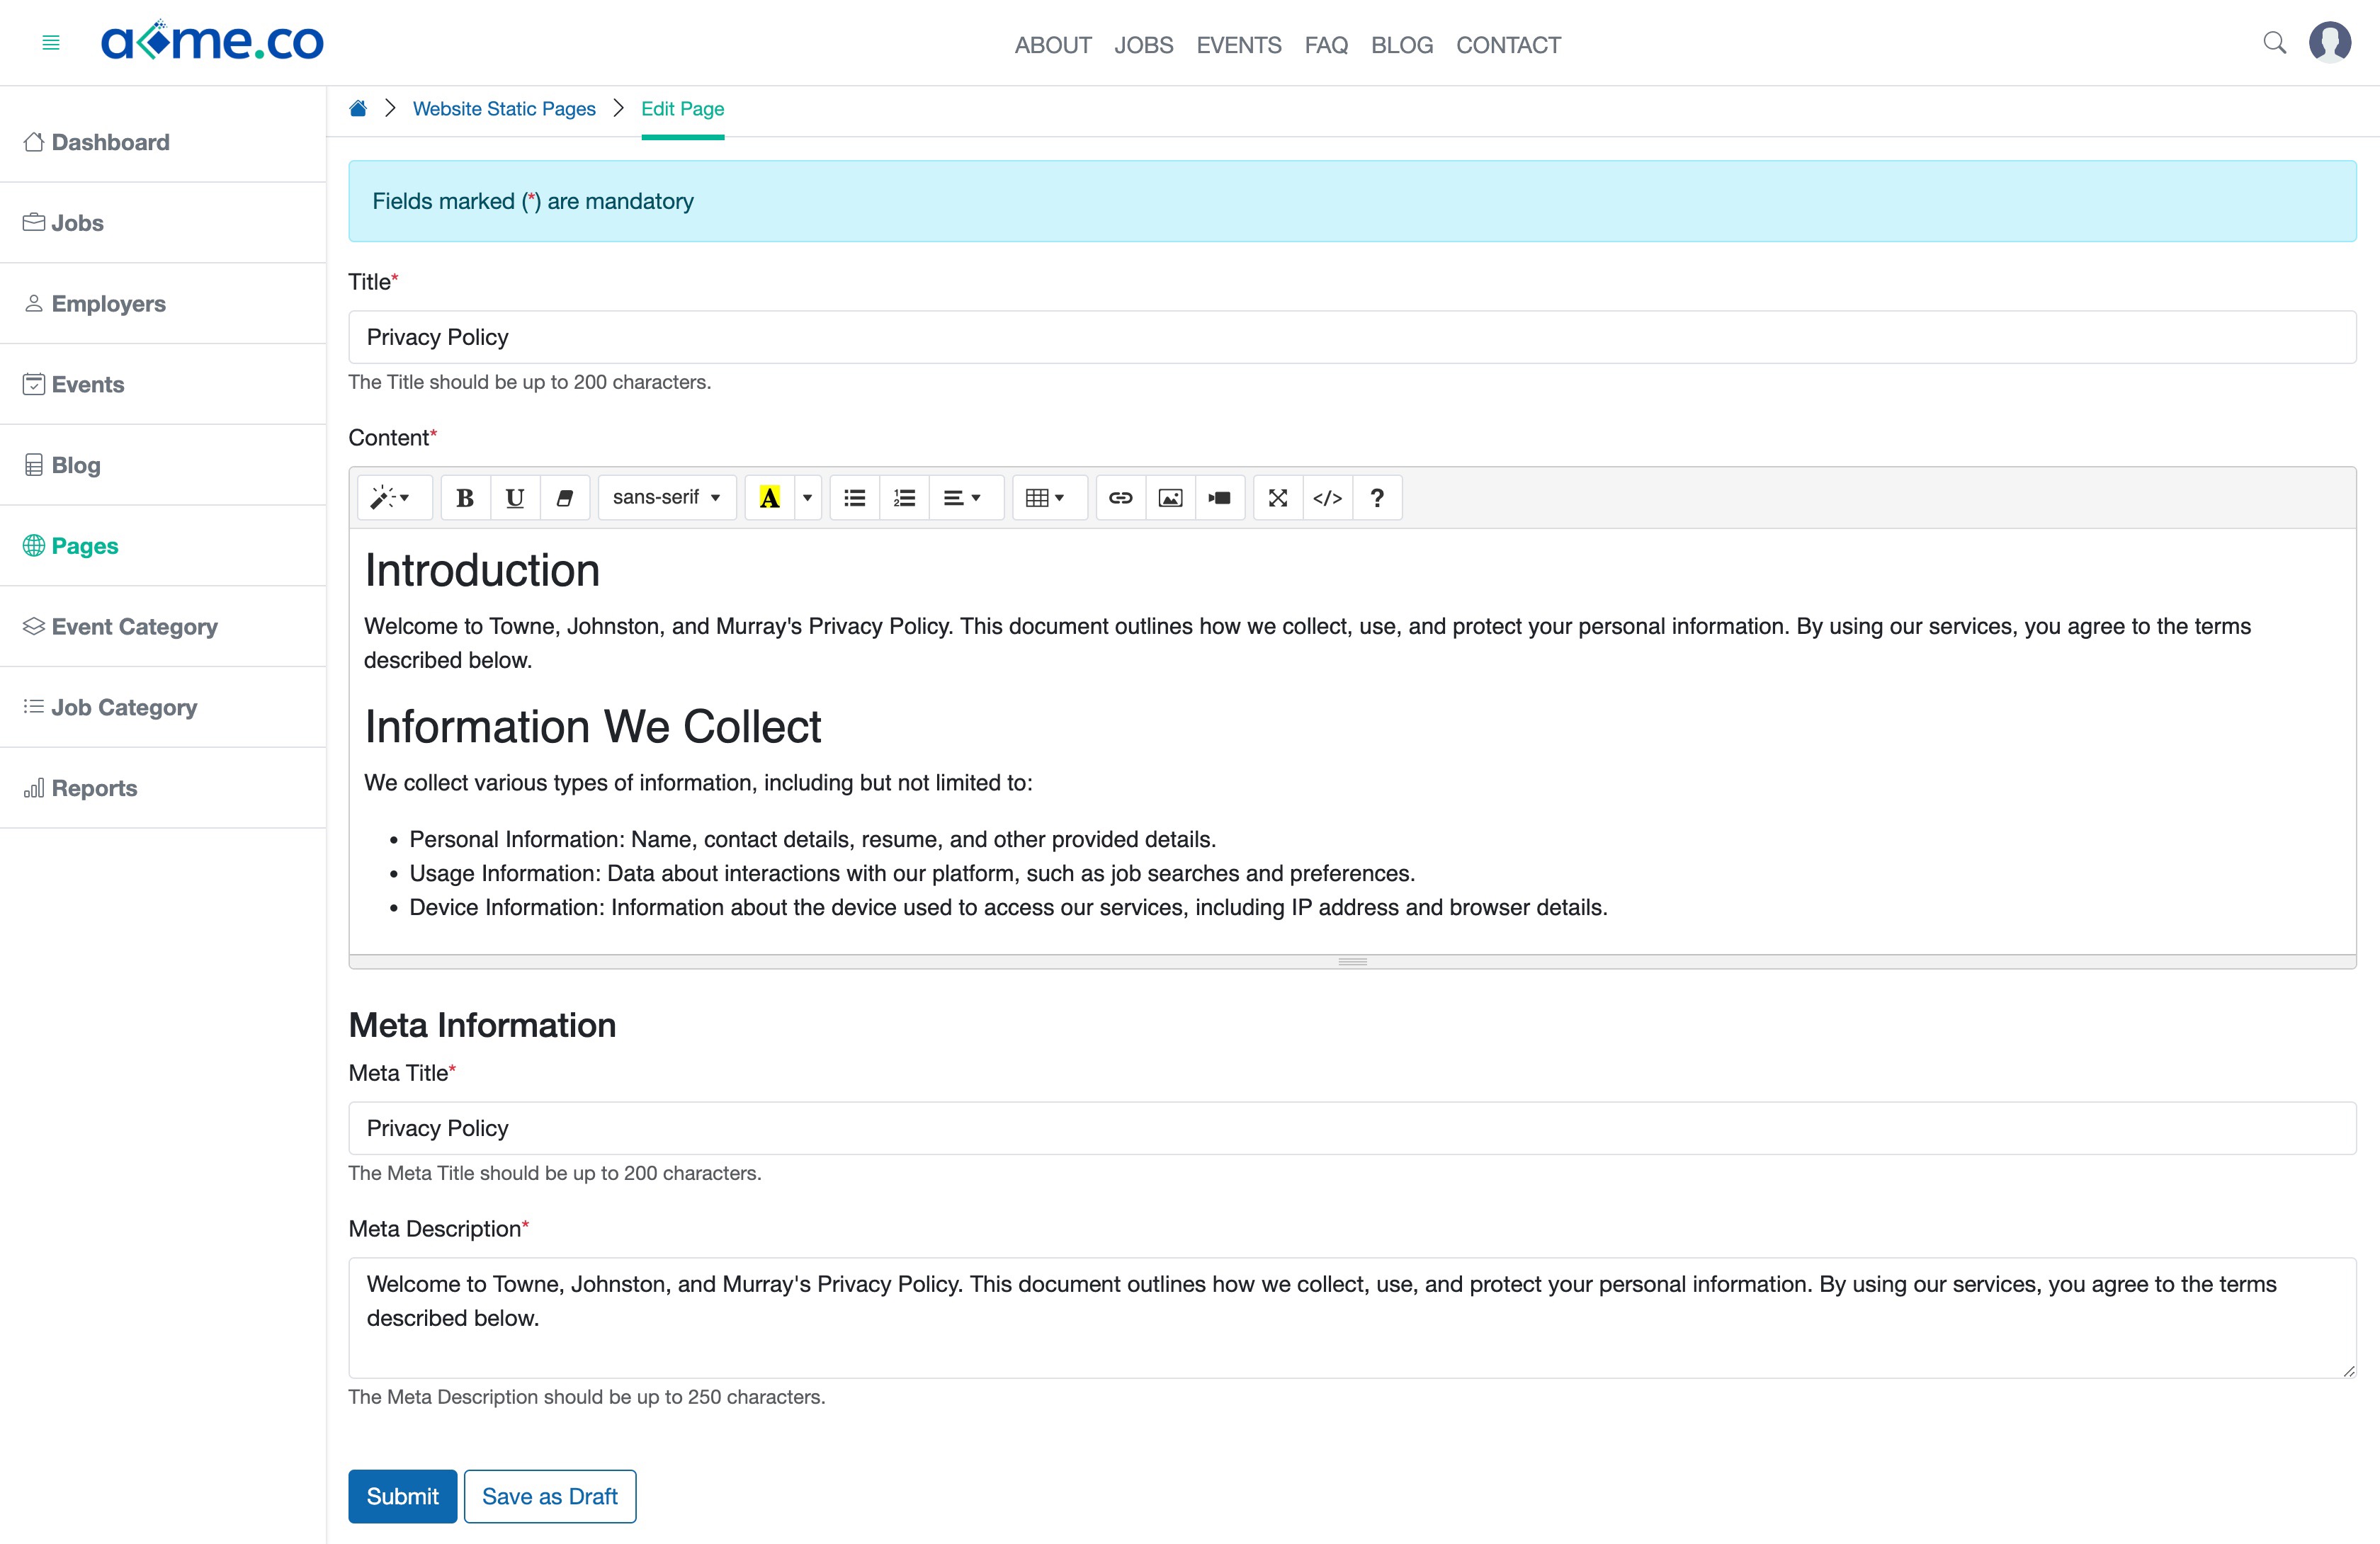
You can edit the Page Title, Content, Meta Title, and Meta Descriptions and click the Submit button, as shown in Figure 3 above to update the page.
Click the Save as Draft button to save the page, as shown in Figure 3 above.


