Jobs
Click on the Jobs link from the nav menu, and the job list page will open, as shown in Figure 1 below.
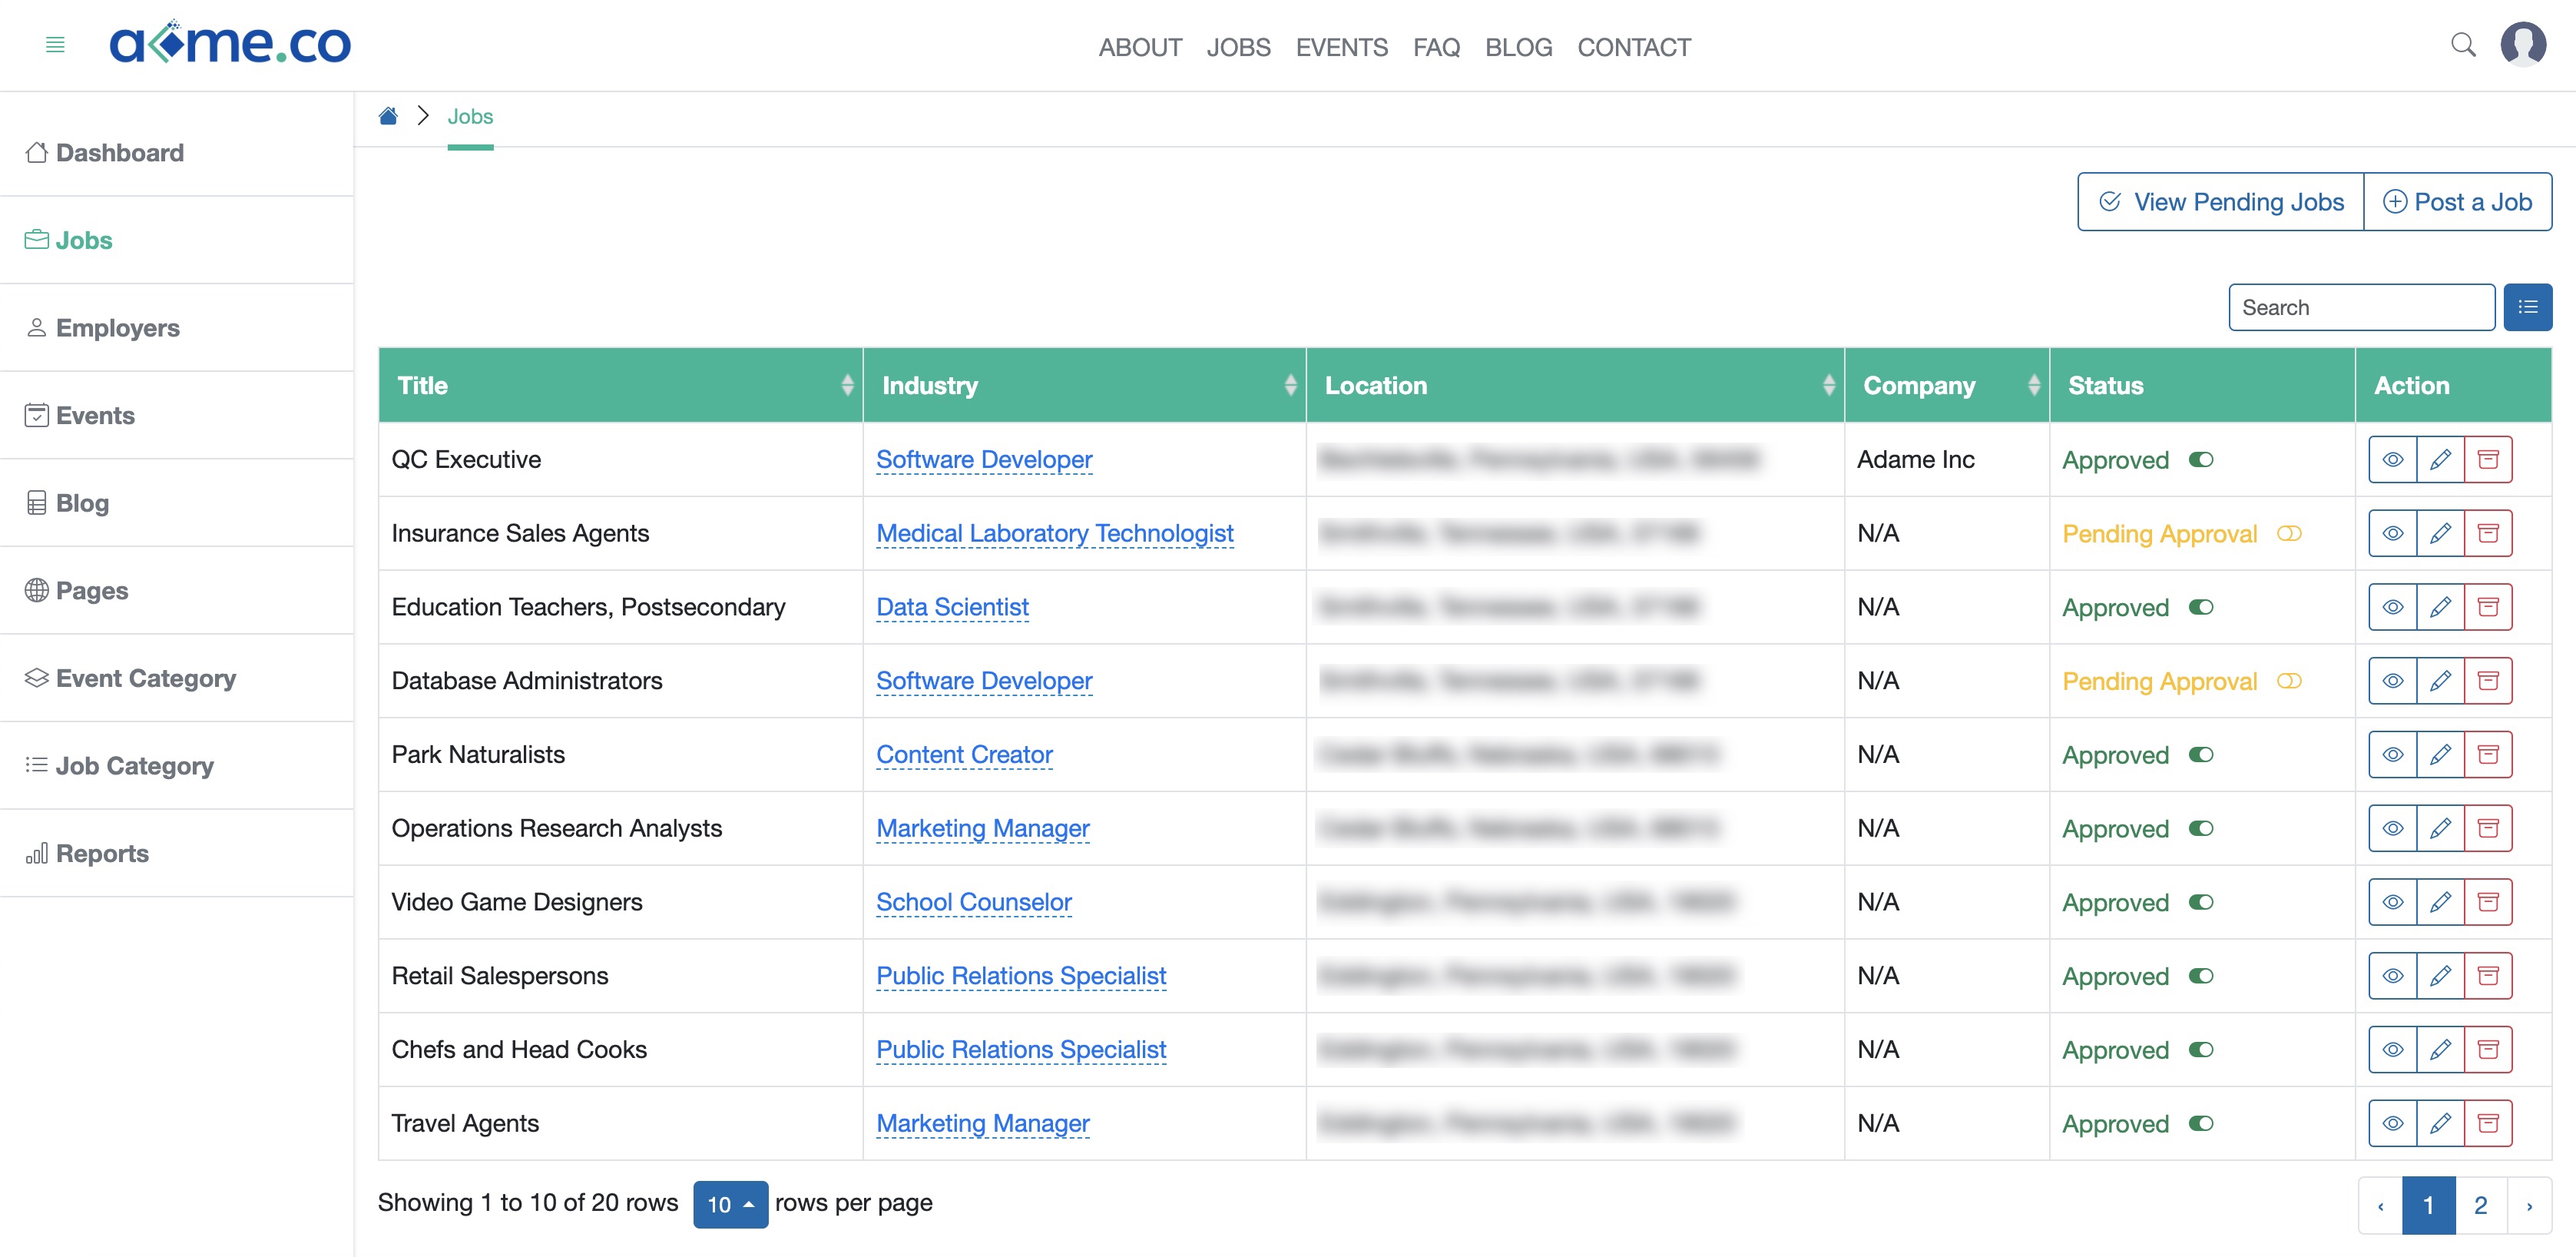
Jobs will be available in a tabular form on the list page, as shown in Figure 1 above.
If a job is posted by the Admin user, the status will be automatically marked as Approved, as shown in Figure 1 above. The approved jobs will be visible on the portal.
The Admin can toggle the switch on the status column to mark the status of a job as Approved or Pending Approval, as shown in Figure 1 above.
If a job is posted by an Employer, then the status will be automatically marked as Pending Approval, as shown in Figure 1 above.
To view a job, click the View icon associated with it, as shown in Figure 1 above.
To edit a job, click the Edit icon associated with it, as shown in Figure 1 above.
To archive a job, click the Archive icon associated with it, as shown in Figure 1 above.
View Pending Jobs
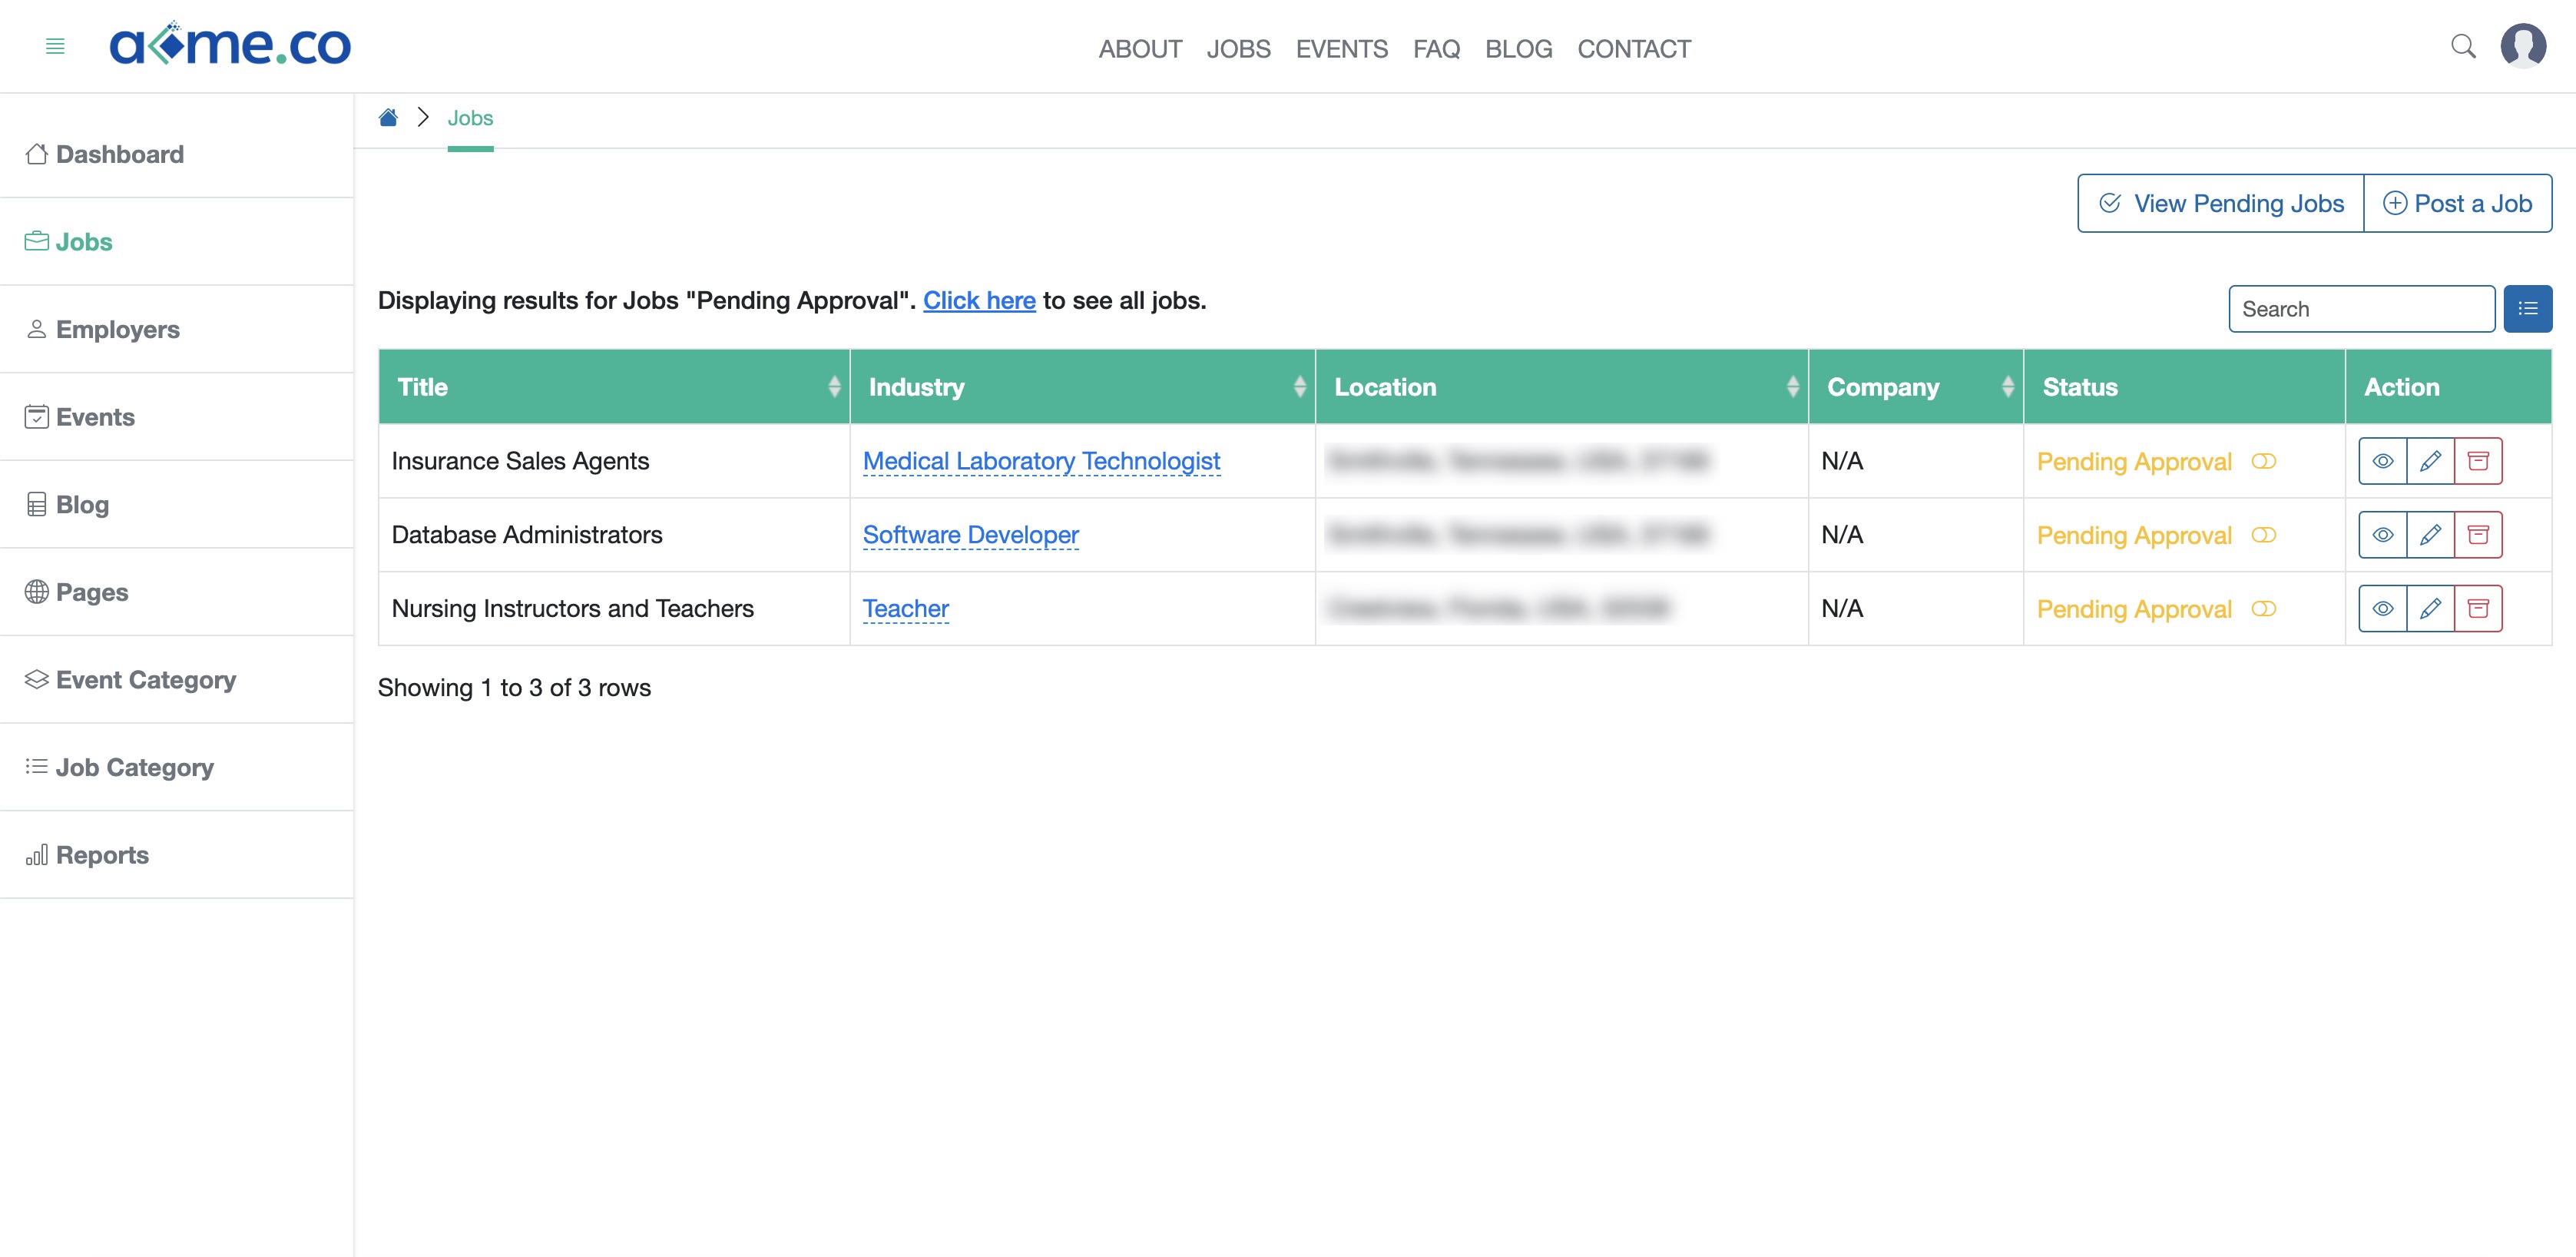
Click the View Pending Jobs button to view all the jobs pending approval, as shown in Figure 1 above and the list page will open with all the jobs pending approval, as shown in Figure 2 below.
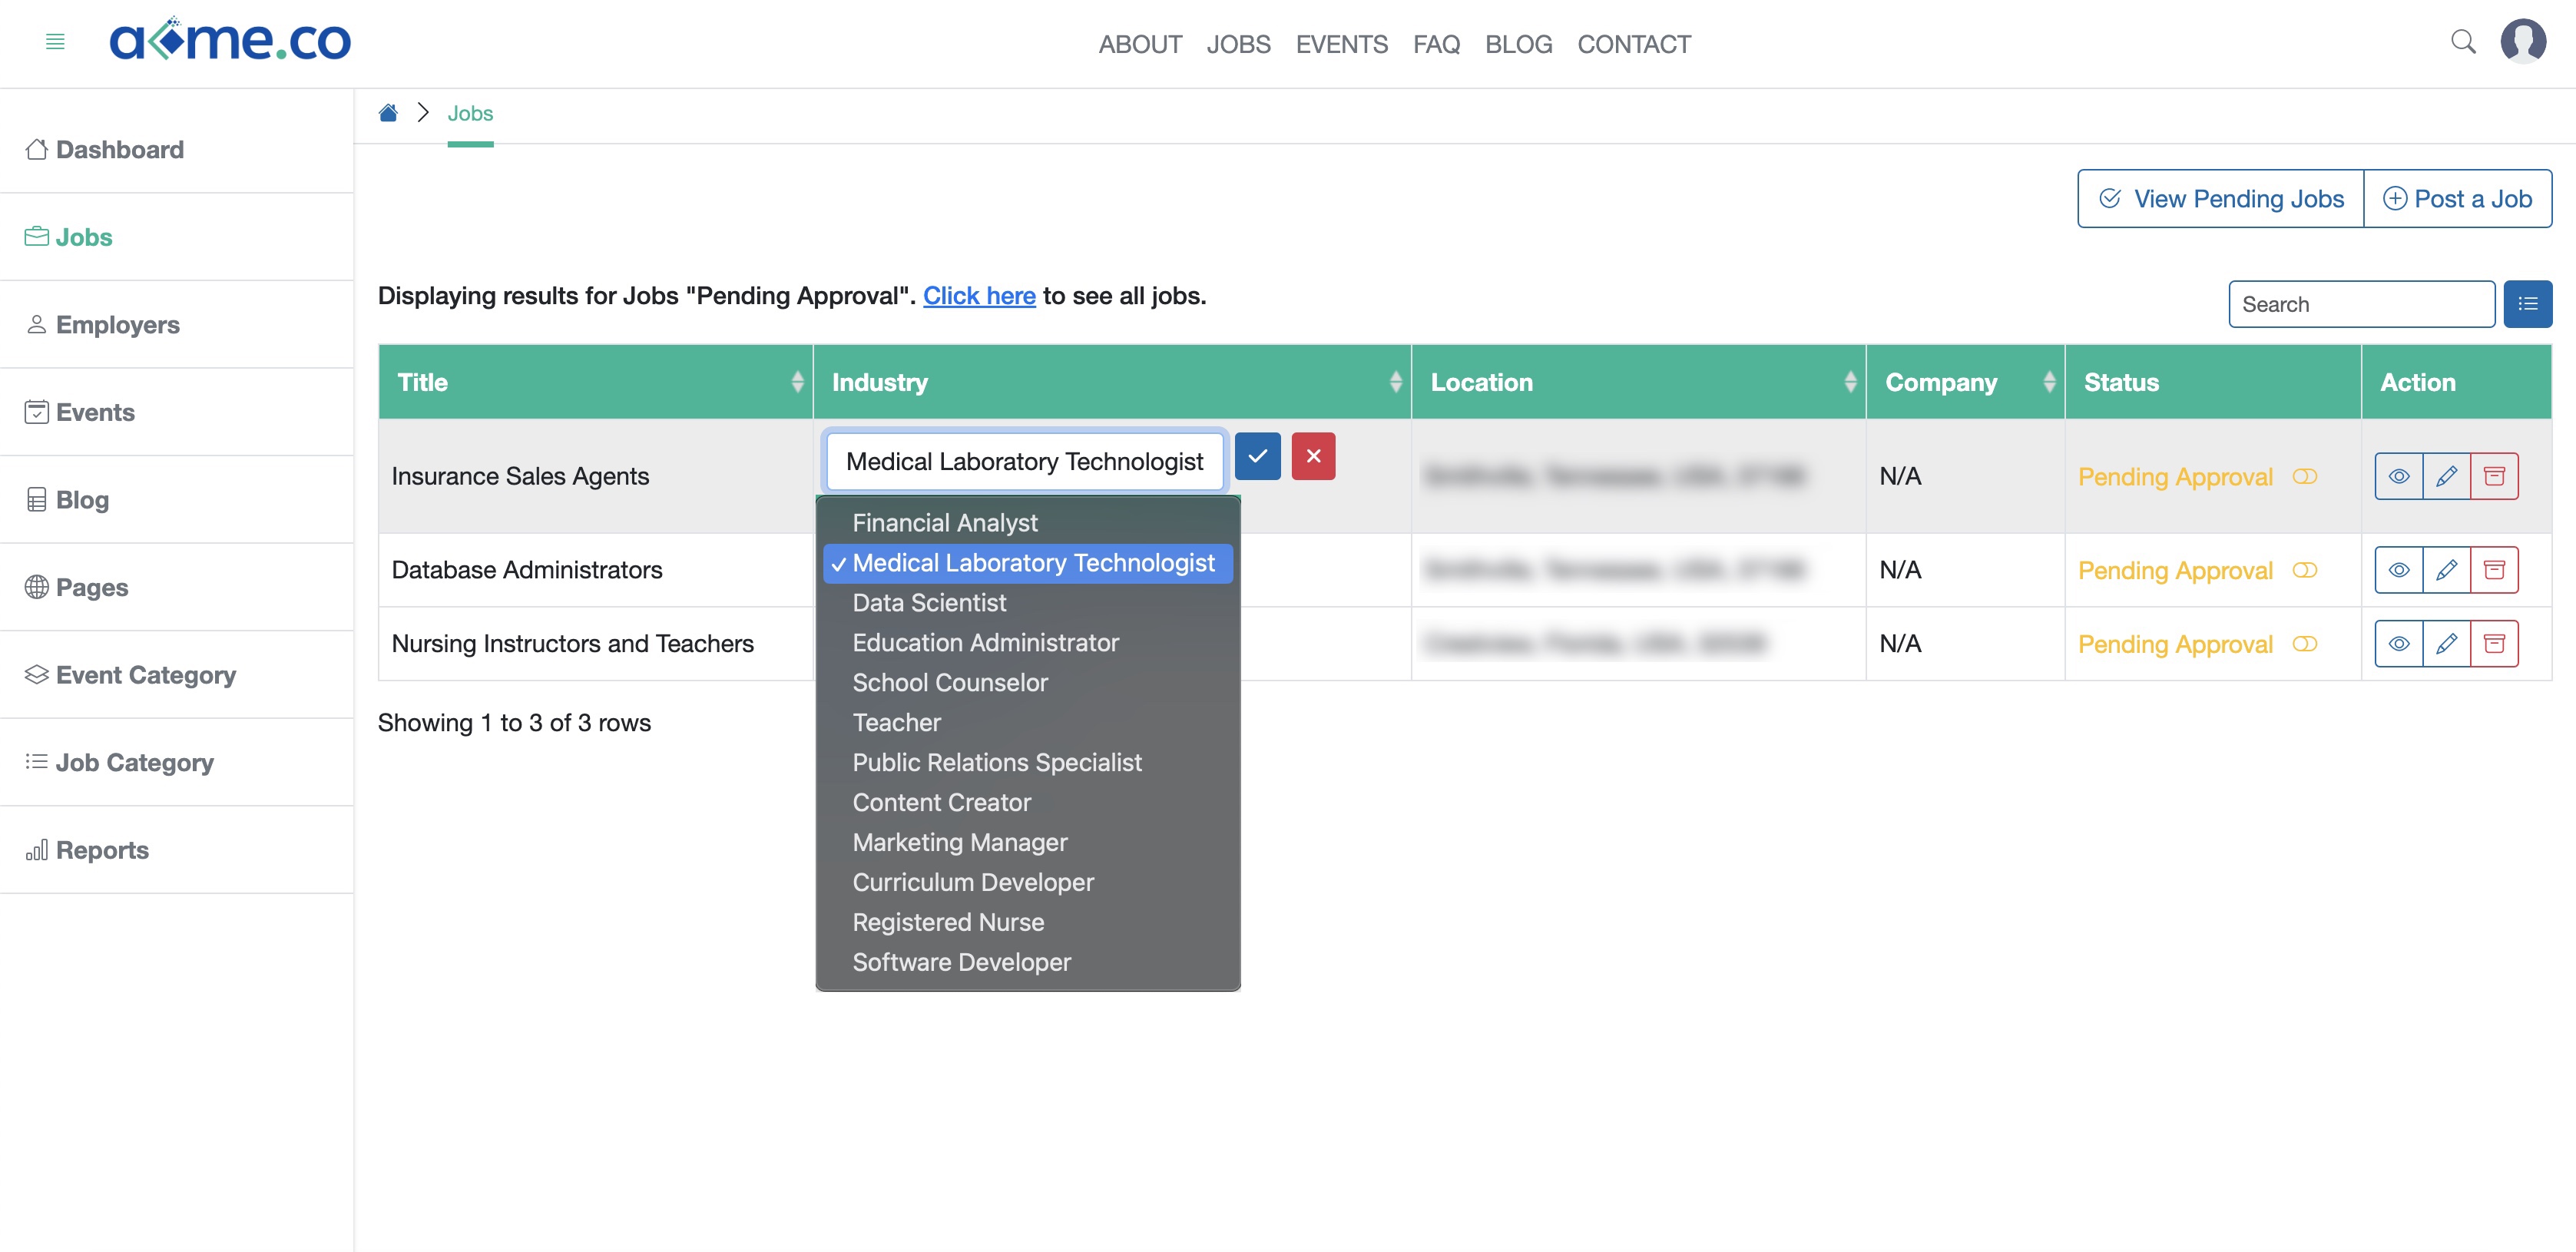
Click the Industry for a job and a dropdown menu with all available industries will appear for selection. Click the desired industry and click the Tick icon to save the changes, as shown in Figure 3 below.
Add Jobs
Click the Post a Job button to add a new job, as shown in Figure 3 above and the Add Job screen will open, as shown in Figure 4 below.
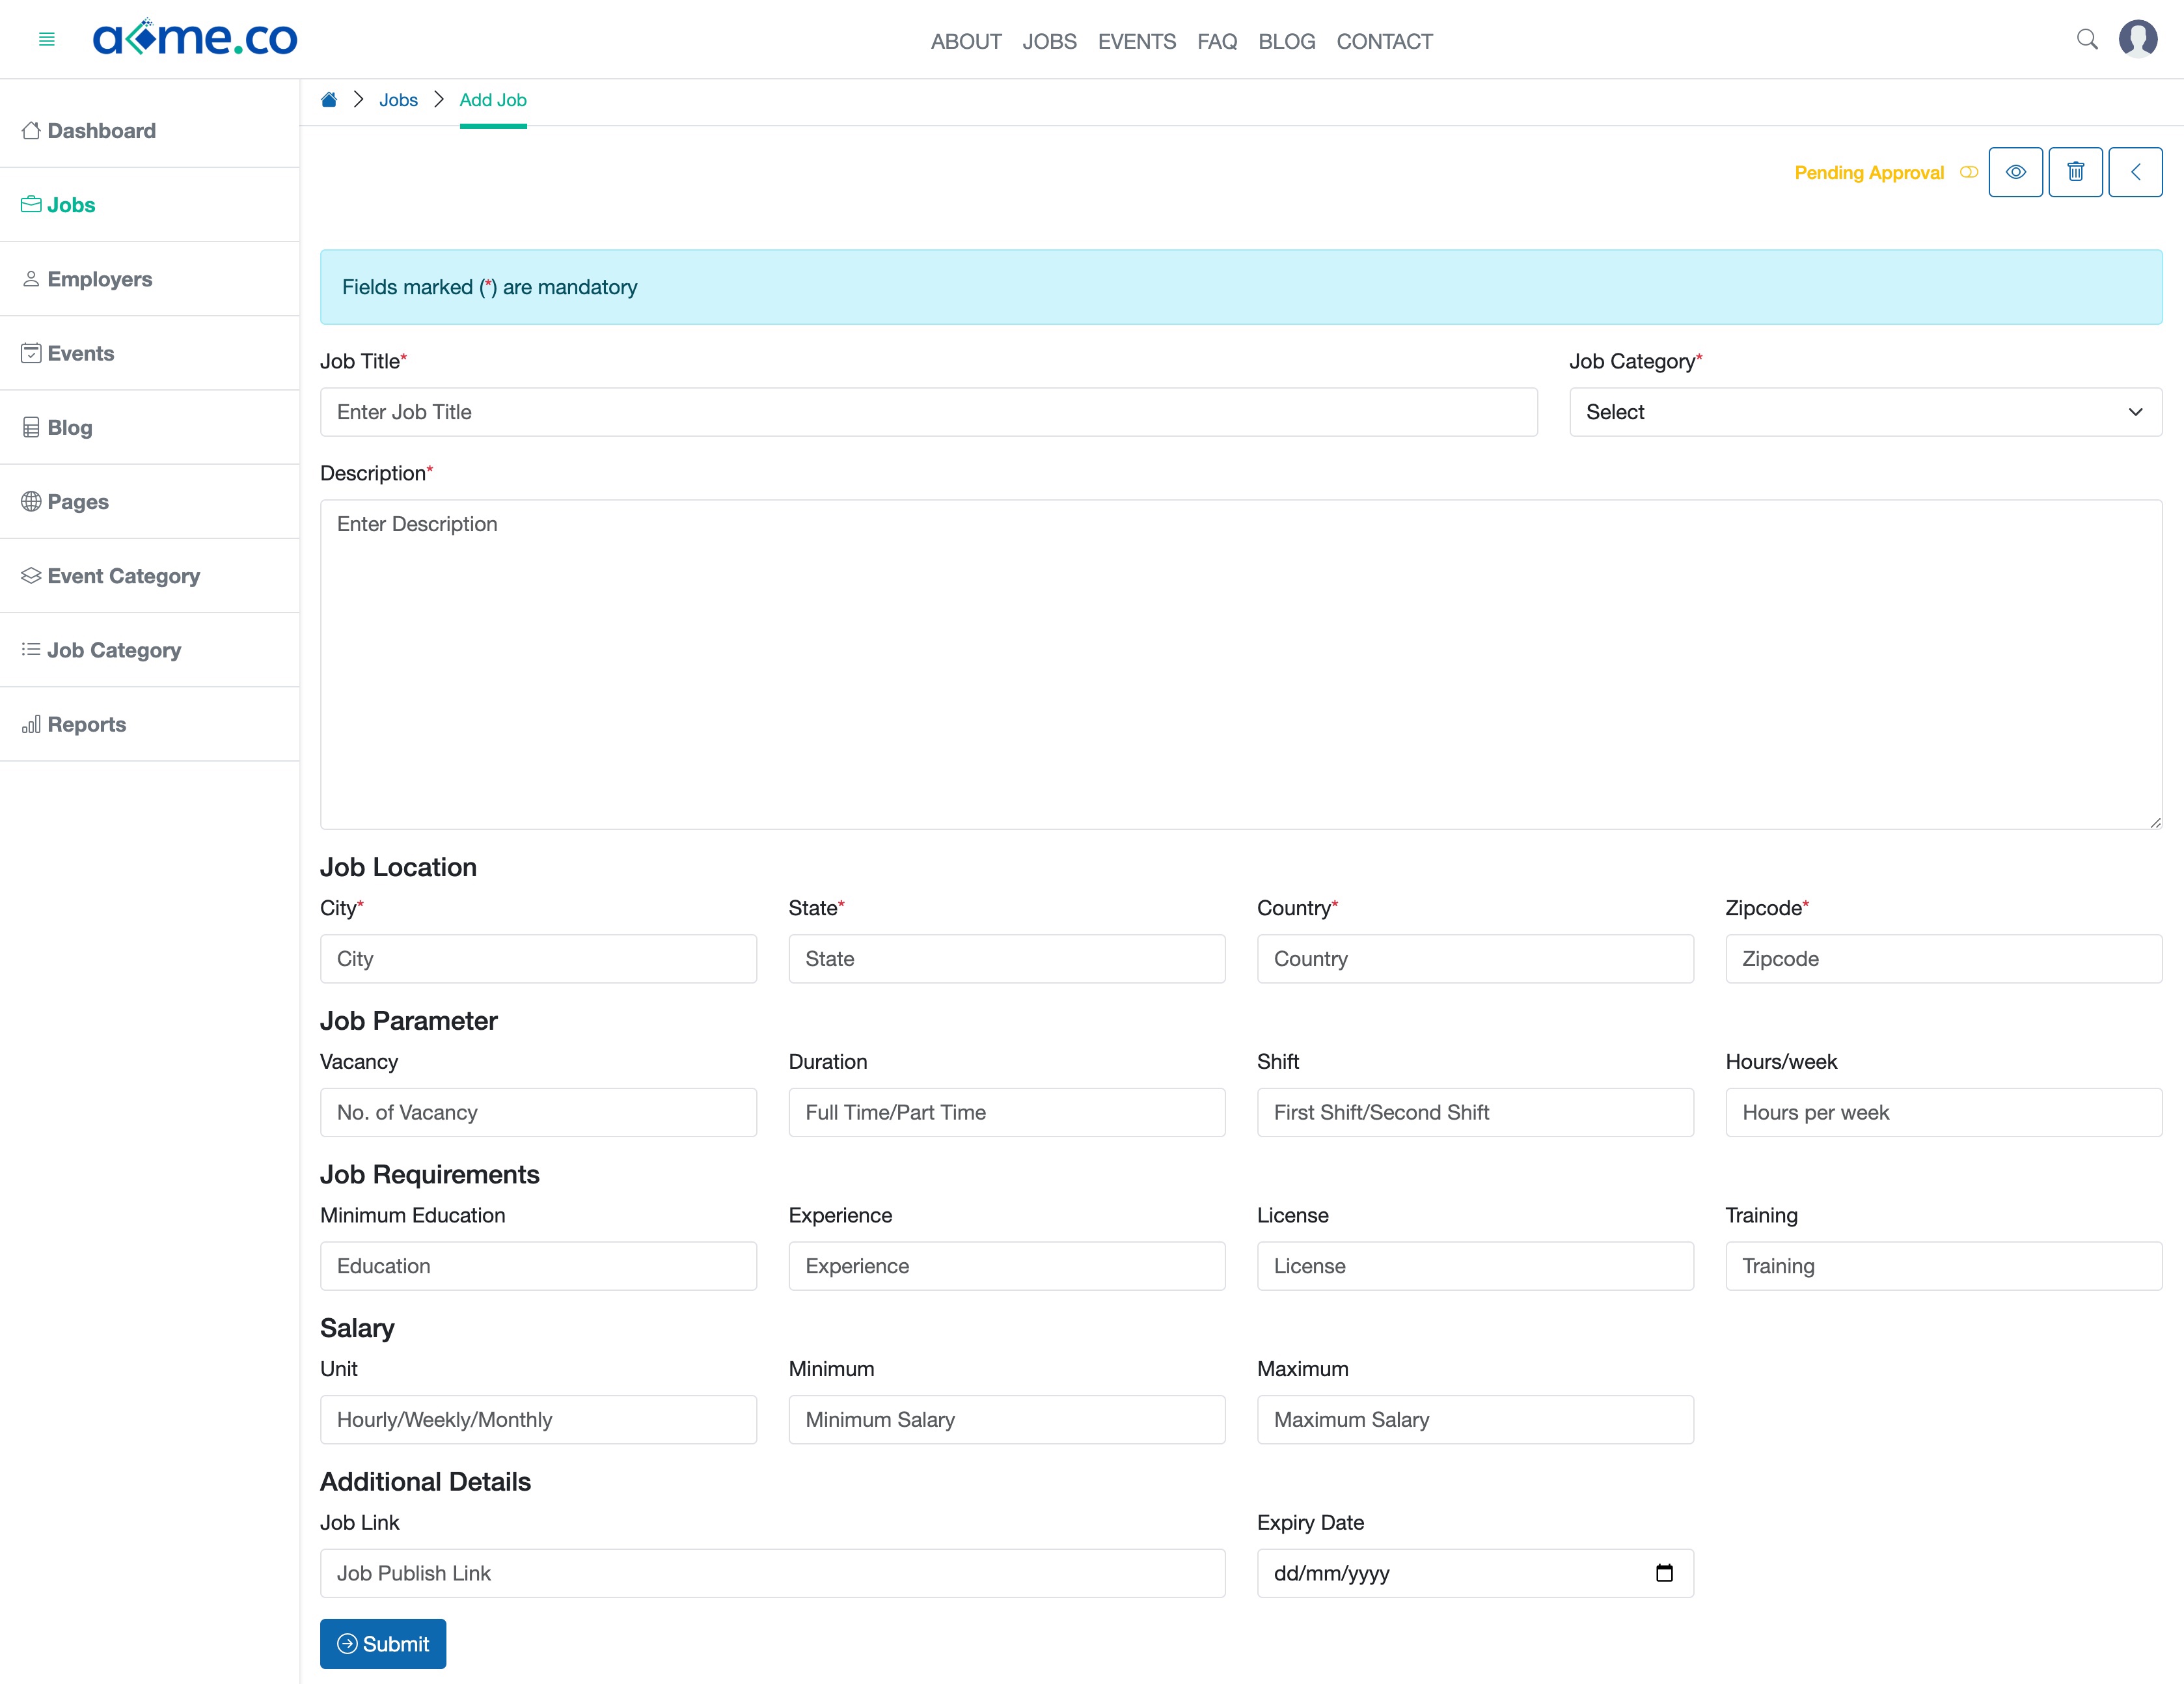
You can enter the below details and click the Submit button to save the job, as shown in Figure 4 above. The details that need to be filled in are:
- Job Title (textbox - Mandatory): Title of the Job
- Job Category (dropdown menu - Mandatory): Select one job category
- Description (text area - Mandatory): Description of the Job
- Job Location:
- City (textbox - Mandatory): Job Location City
- State (textbox - Mandatory): Job Location State
- Country (textbox - Mandatory): Job Location Country
- ZIP Code (textbox - Mandatory): Job Location ZIP Code
- Job Parameter:
- Vacancy (textbox - Optional): Number of posts available for this job
- Duration (textbox - Optional): Full-time or Part-time
- Shift (textbox - Optional): First Shift or Second Shift
- Hours (textbox - Optional): Number of working hours per week
- Job Requirements:
- Minimum Education (textbox - Optional): Minimum educational qualification for this position
- Experience (textbox - Optional): Minimum work experience for this position
- License (textbox - Optional):
- Training (textbox - Optional):
- Salary:
- Unit (Optional): Pay frequency (Monthly/Weekly/Hourly)
- Minimum (Optional): Minimum Salary
- Maximum (Optional): Maximum Salary
- Additional Details:
- Job Link (Optional): Link to apply for the job post
- Expiry Date (Optional): Last date to apply for the job post
Edit Jobs
On the job list page, click the Edit icon associated with a job post, as shown in Figure 1 above and the edit page for the job will open, as shown in Figure 5 below.
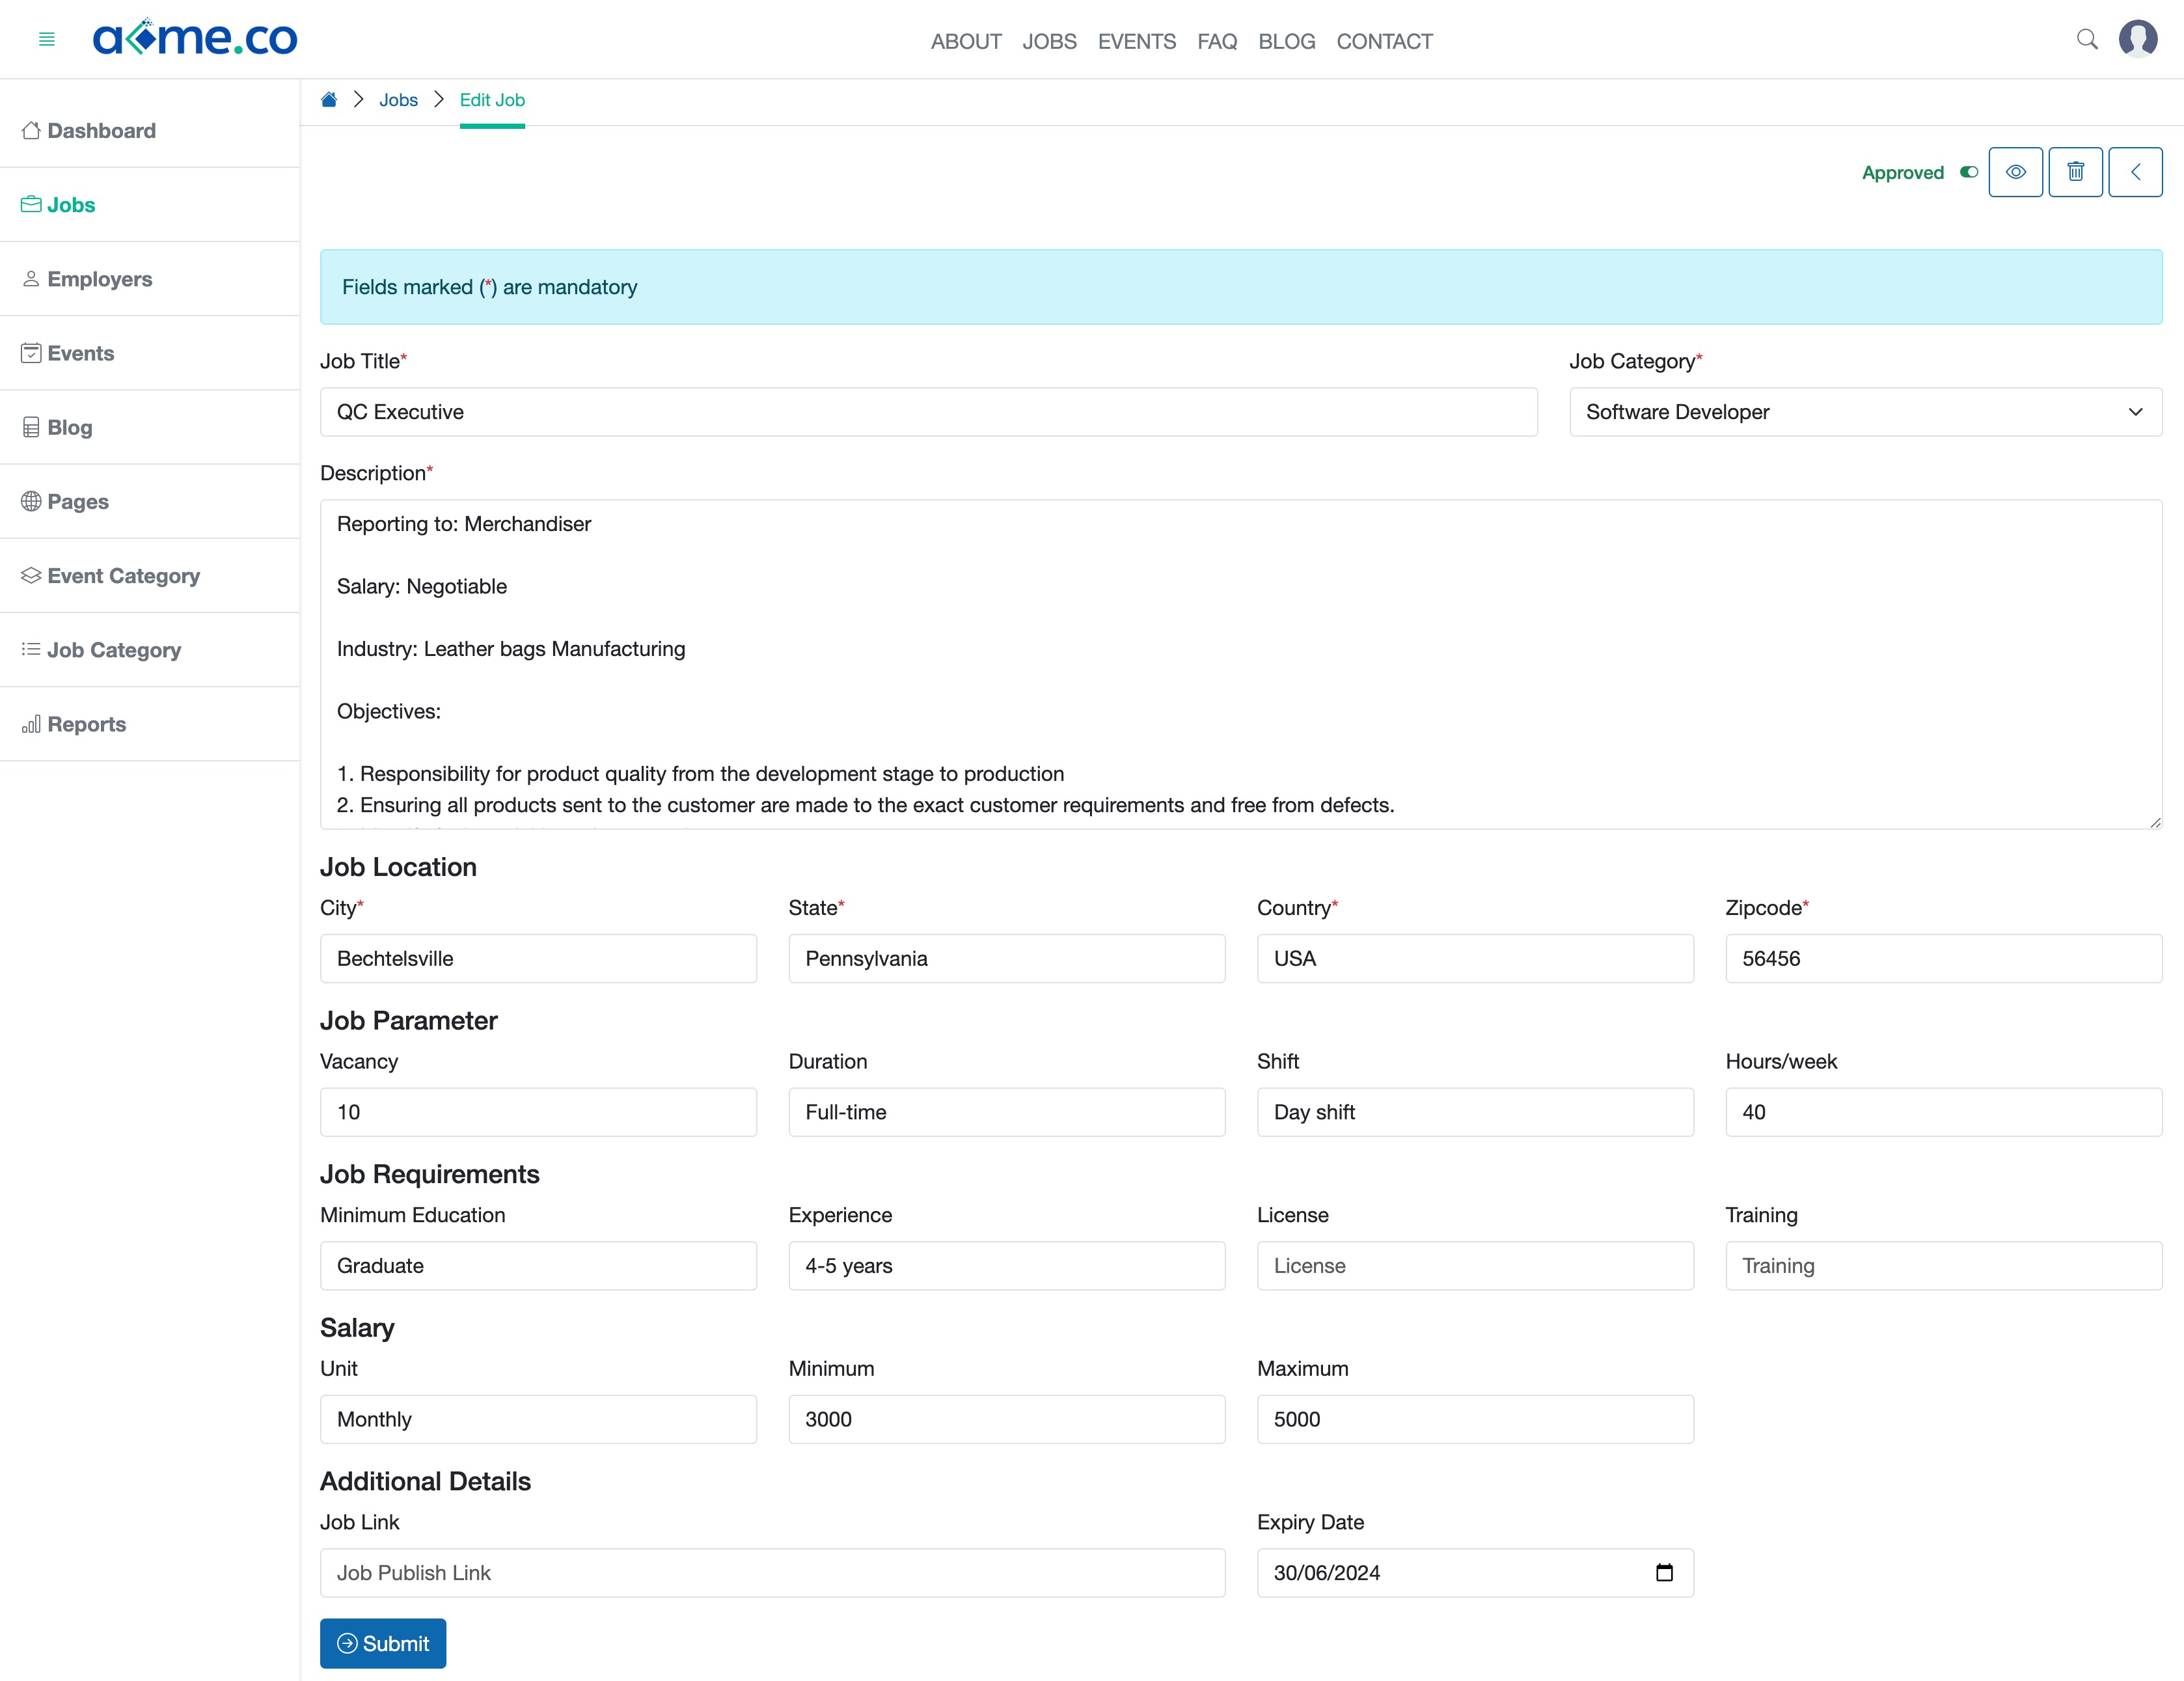
Once you finish editing the requisite details, click on the Submit button to save the edits, as shown in Figure 5 above.
You can change the status of a job from Approved to Pending Approval or vice-versa by using the toggle button available on the edit screen, as shown in Figure 5 above.
To view a job, click the View button available on the edit screen, as shown in Figure 5 above.
To archive a job, click the Archive button available on the edit screen, as shown in Figure 5 above.
Click the Back icon to return to the previous screen as shown in Figure 5 above.
View Jobs
On the job's list page, click the View icon associated with a job post, as shown in Figure 1 above and the view page of the job will open, as shown in Figure 6 below.
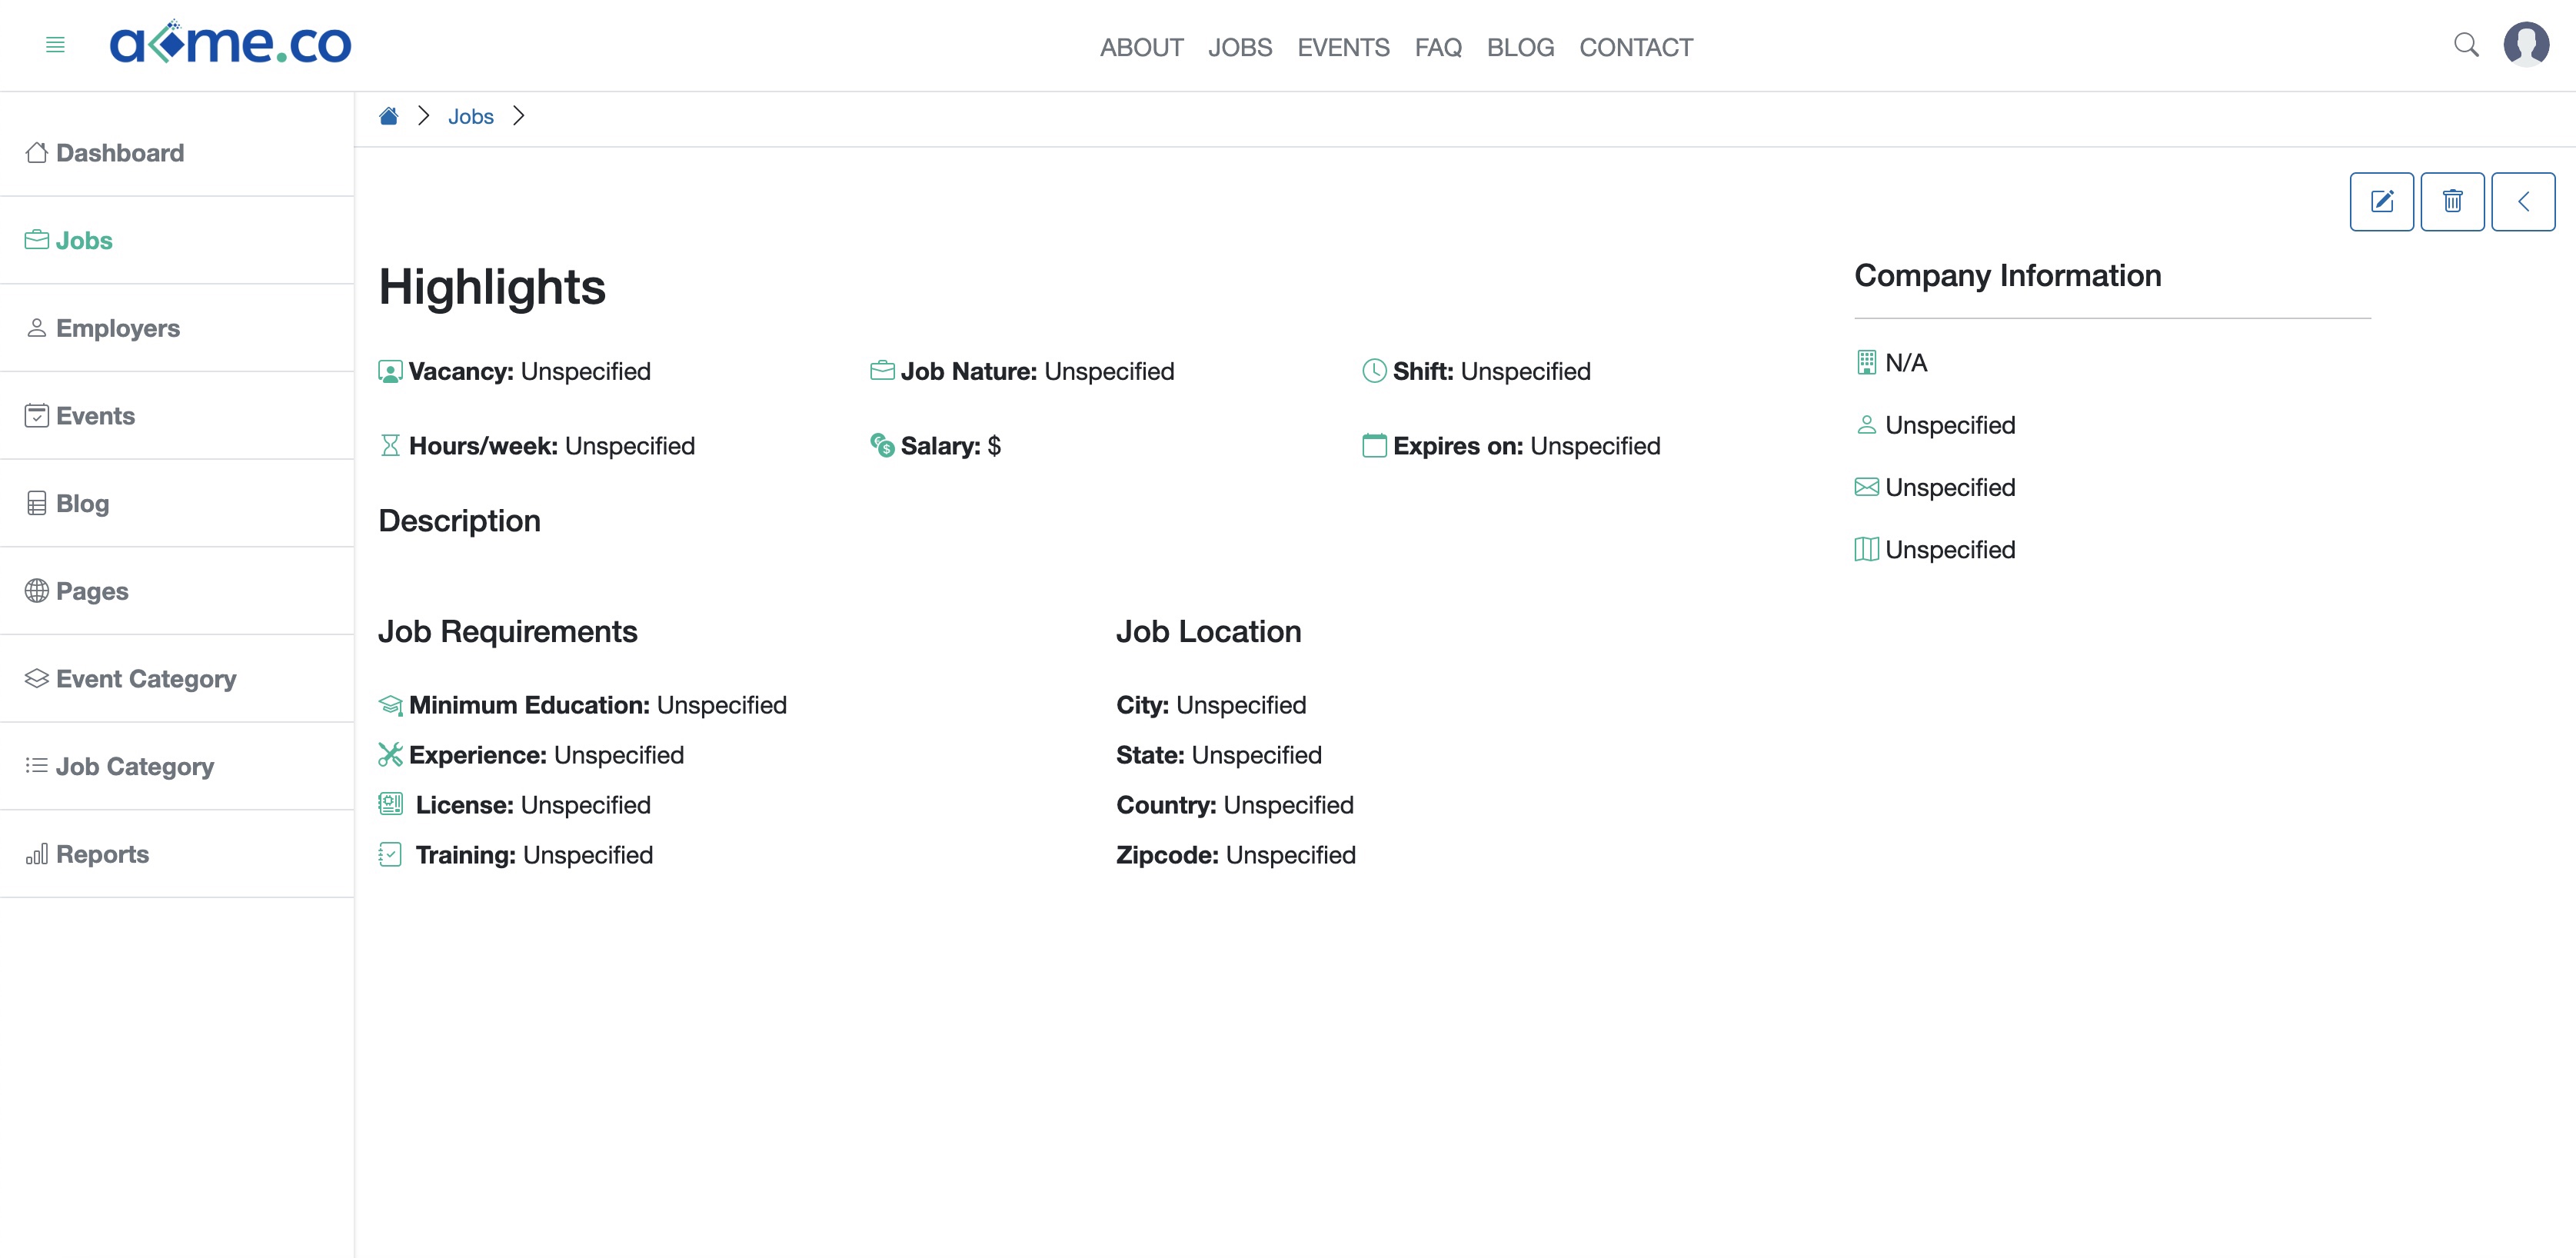
To edit the job, click the Edit button available on the view screen, as shown in Figure 6 above.
To archive the job click the Archive button available on the view screen, as shown in Figure 6 above.
Click the Back icon to return to the list page, as shown in Figure 6 above.


