


Job Category
Click the Job Category link from the nav menu, and the Job Category list page will open, as shown in Figure 1 below.
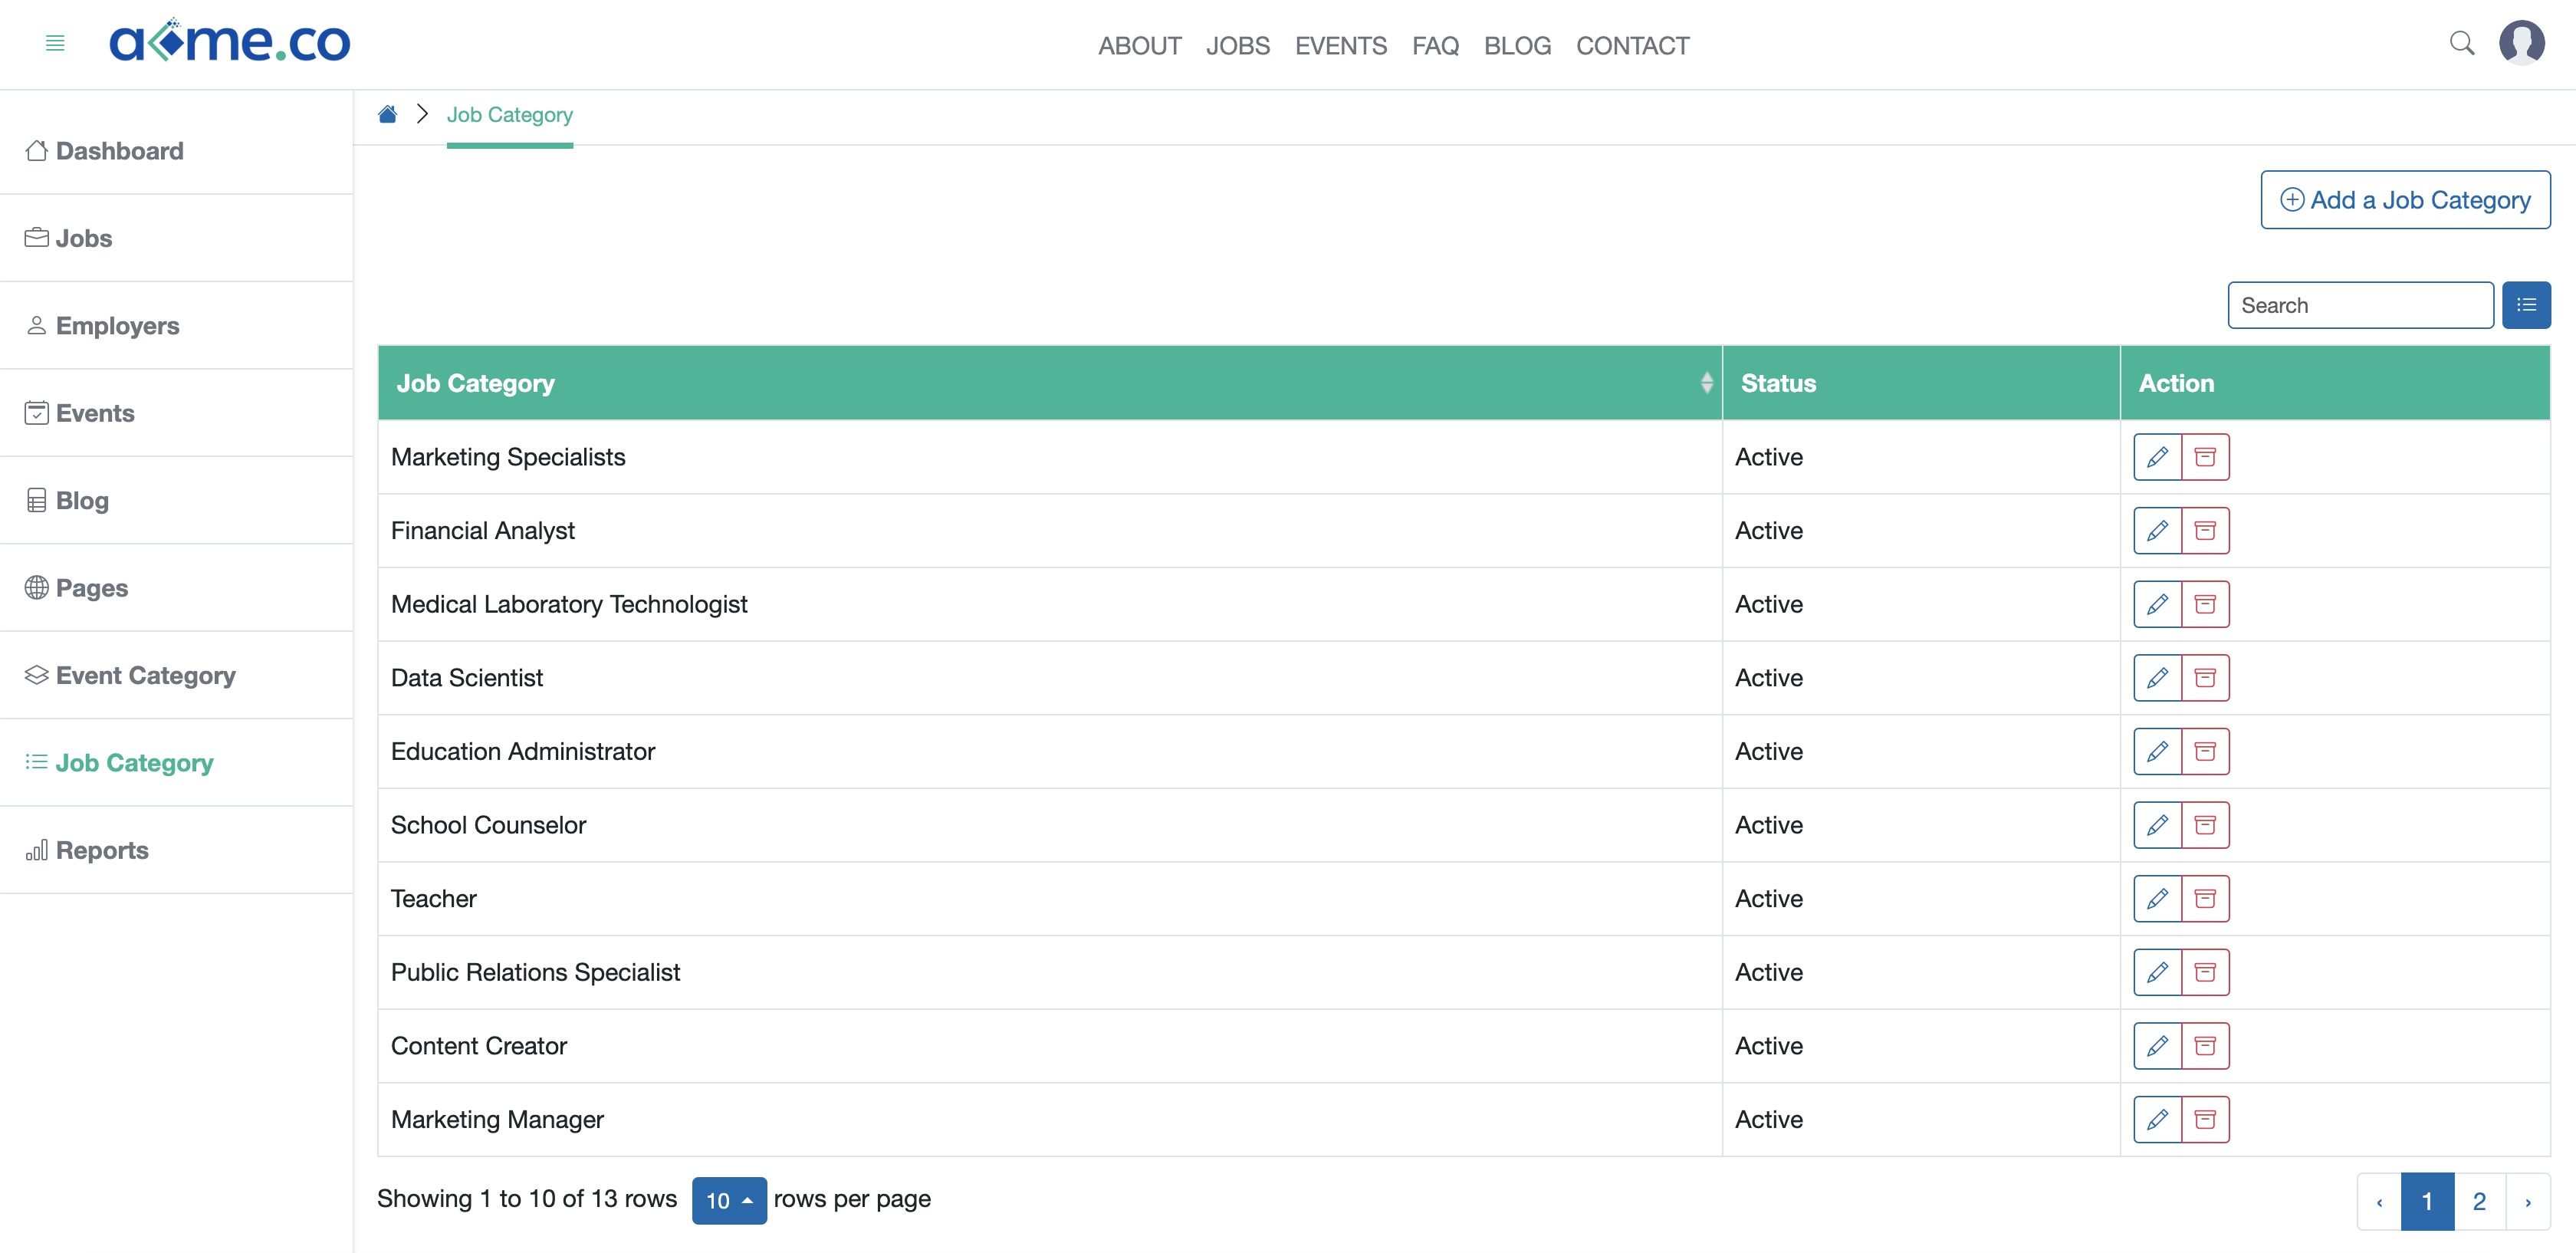
All the job categories will be available in a tabular form, as shown in Figure 1 above.
Click the Add a Job Category button available on the top right corner of the screen, and a new page will open, as shown in Figure 2 below.
Click the Edit icon available on the right side of the individual category on the Action column, as shown in Figure 1 above and the system will open the edit page, as shown in Figure 3 below.
Click the Archive icon available on the right side of the individual category on the Action column to remove the job category from the website, as shown in Figure 1 above.

Enter the Title, then click the Submit button to save the category, as shown in Figure 2 above.
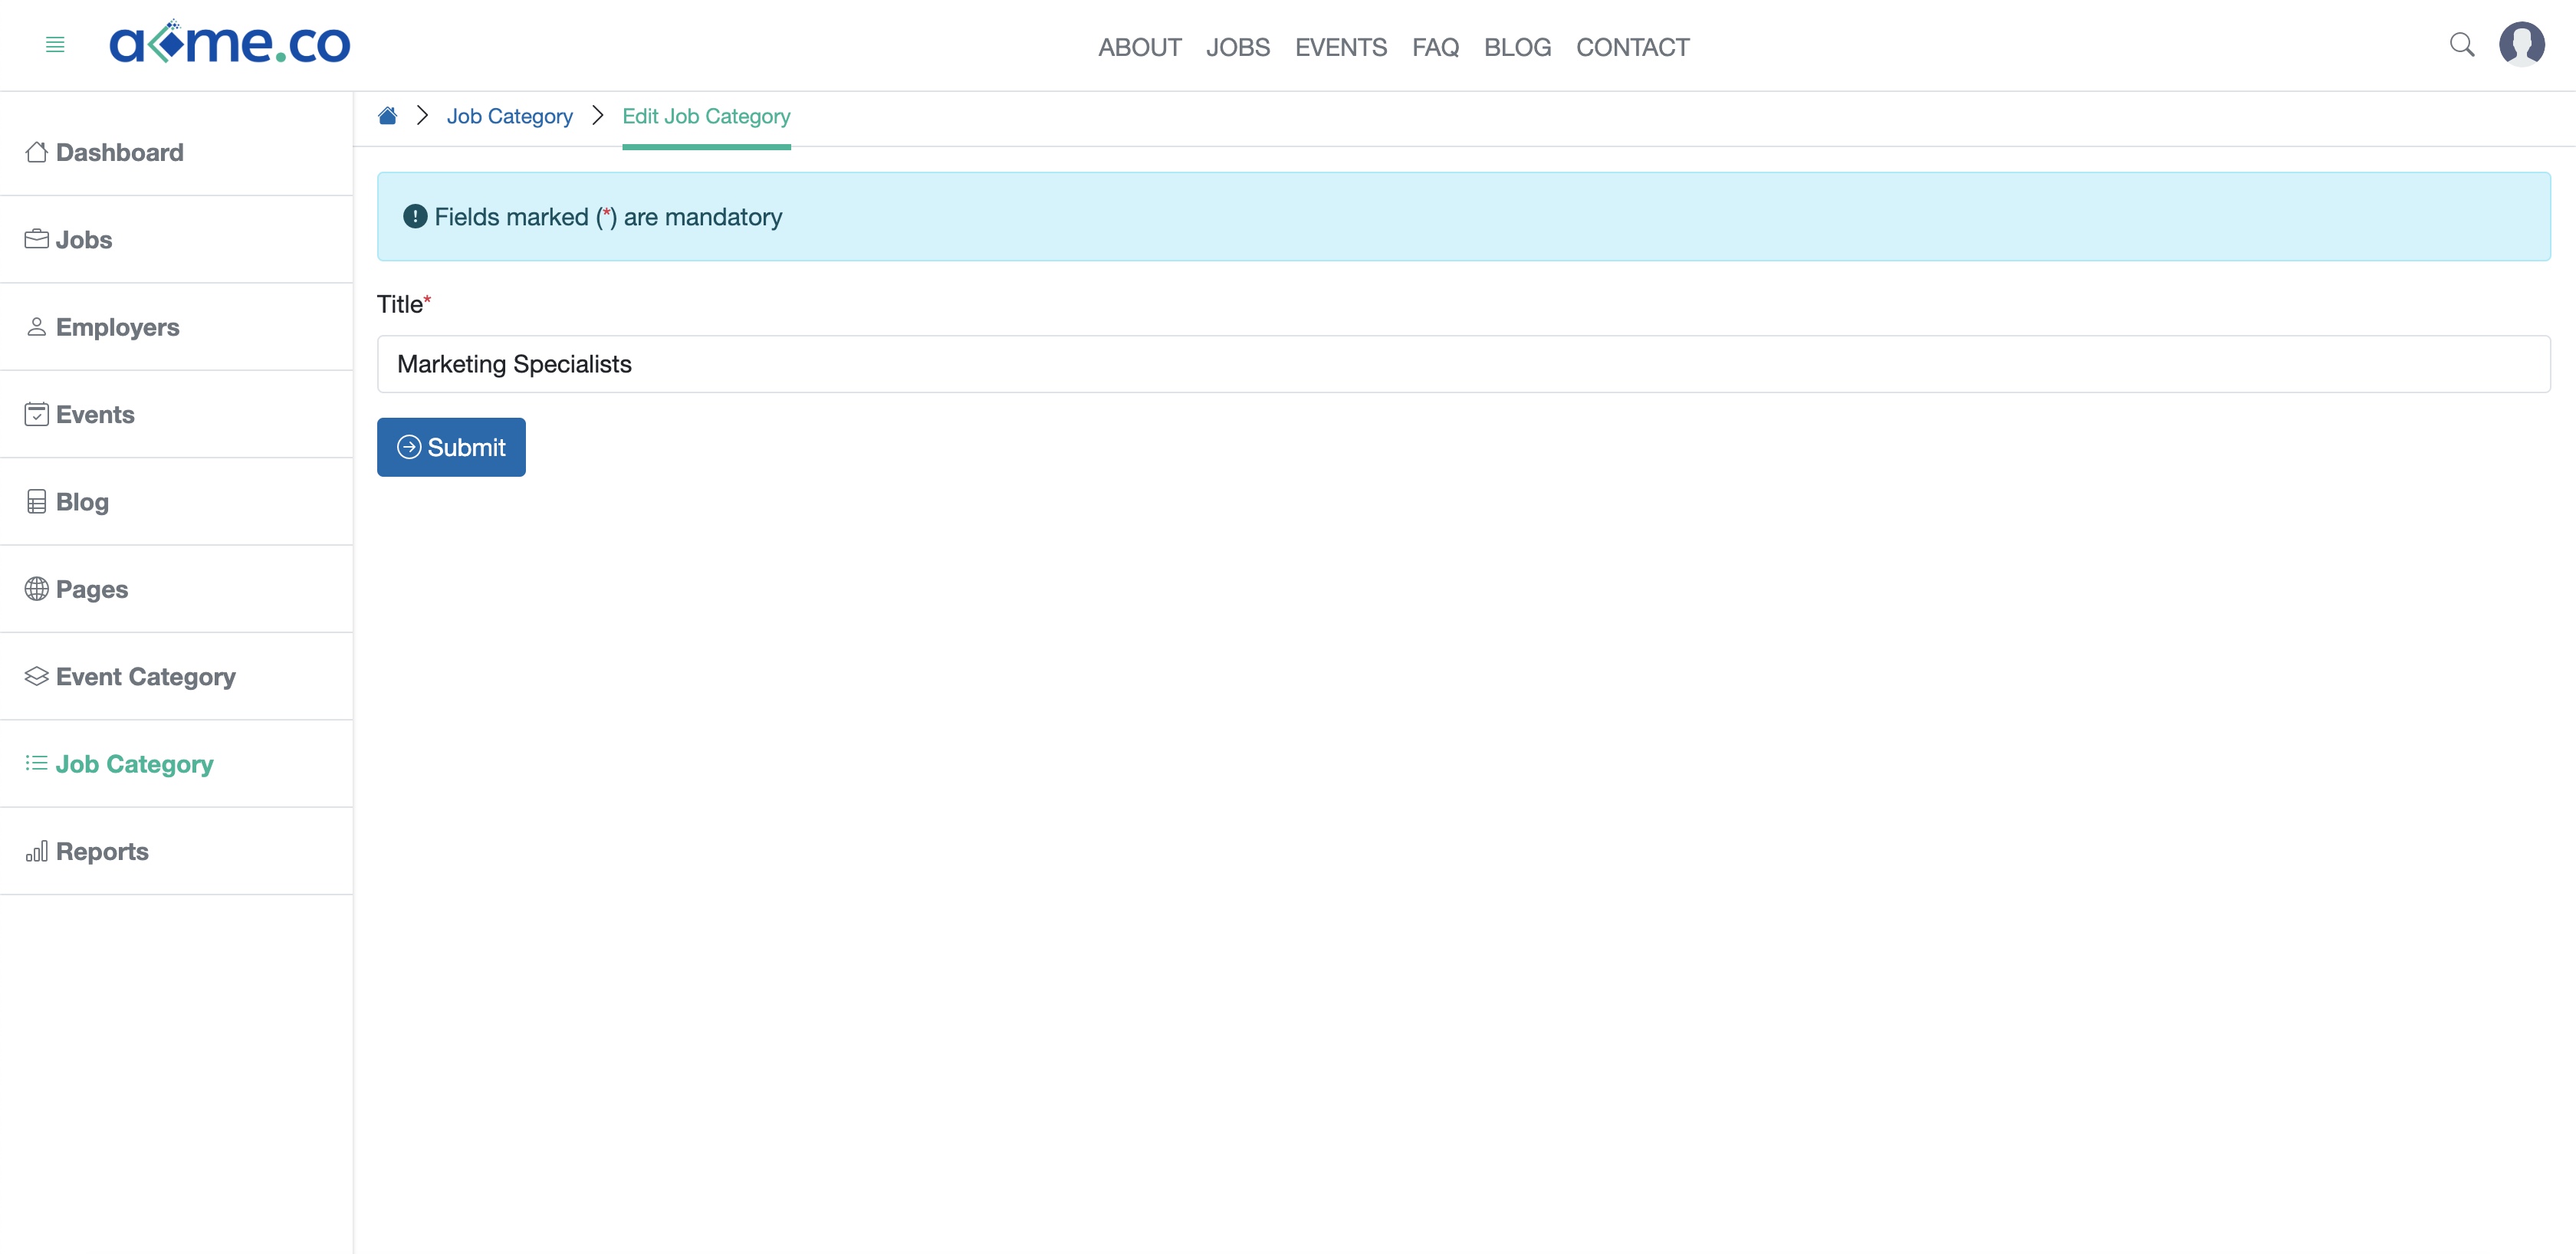
You can edit the category Title and click the Submit button, as shown in Figure 3 above to update the category.