Events
Click on the Events link from the nav menu, and the event list page will open, as shown in Figure 1 below.
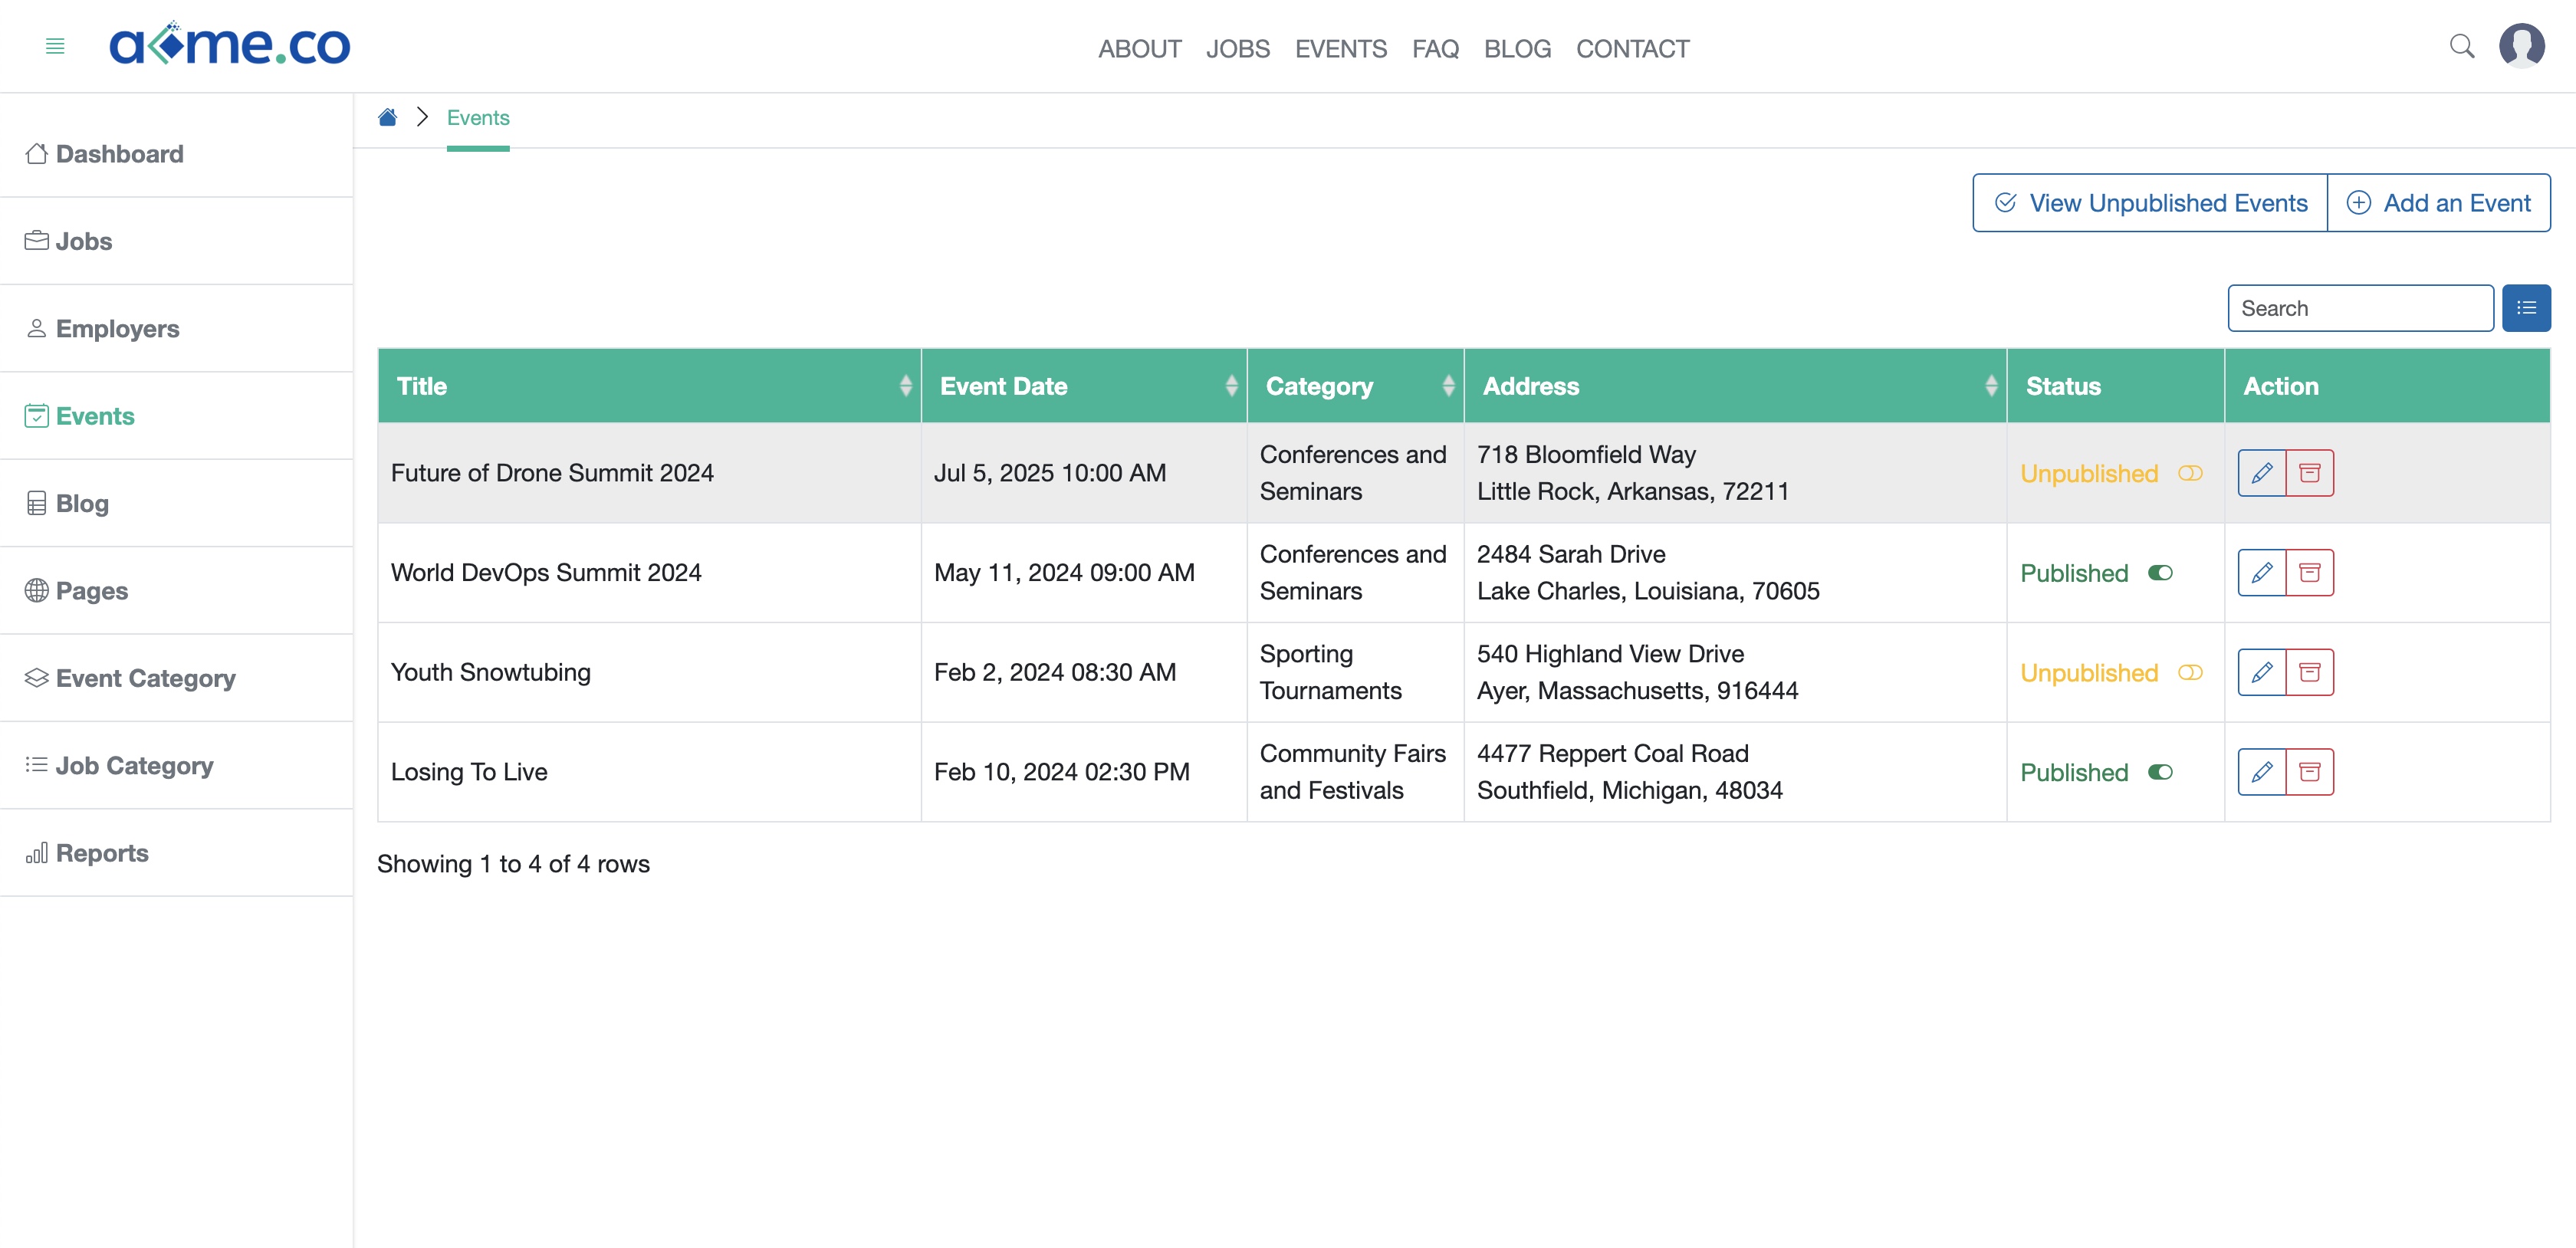
Events will be available in a tabular form on the list page, as shown in Figure 1 above.
The event can only be added by the portal admin user.
To hide the event from the website, click the Click to Unapprove link against the particular event, as shown in Figure 1 above.
Click the Add an Event button available on the top right corner of the screen, and a new page will open, as shown in Figure 2 below.
Click the Edit icon on the right side of that specific event in the Action column, as shown in Figure 1 above and a new window will open with the event details for edit, as shown in Figure 3 below.
Click the Archive icon on the right side of that specific event in the Action column, as shown in Figure 1 above to hide the event from the website.
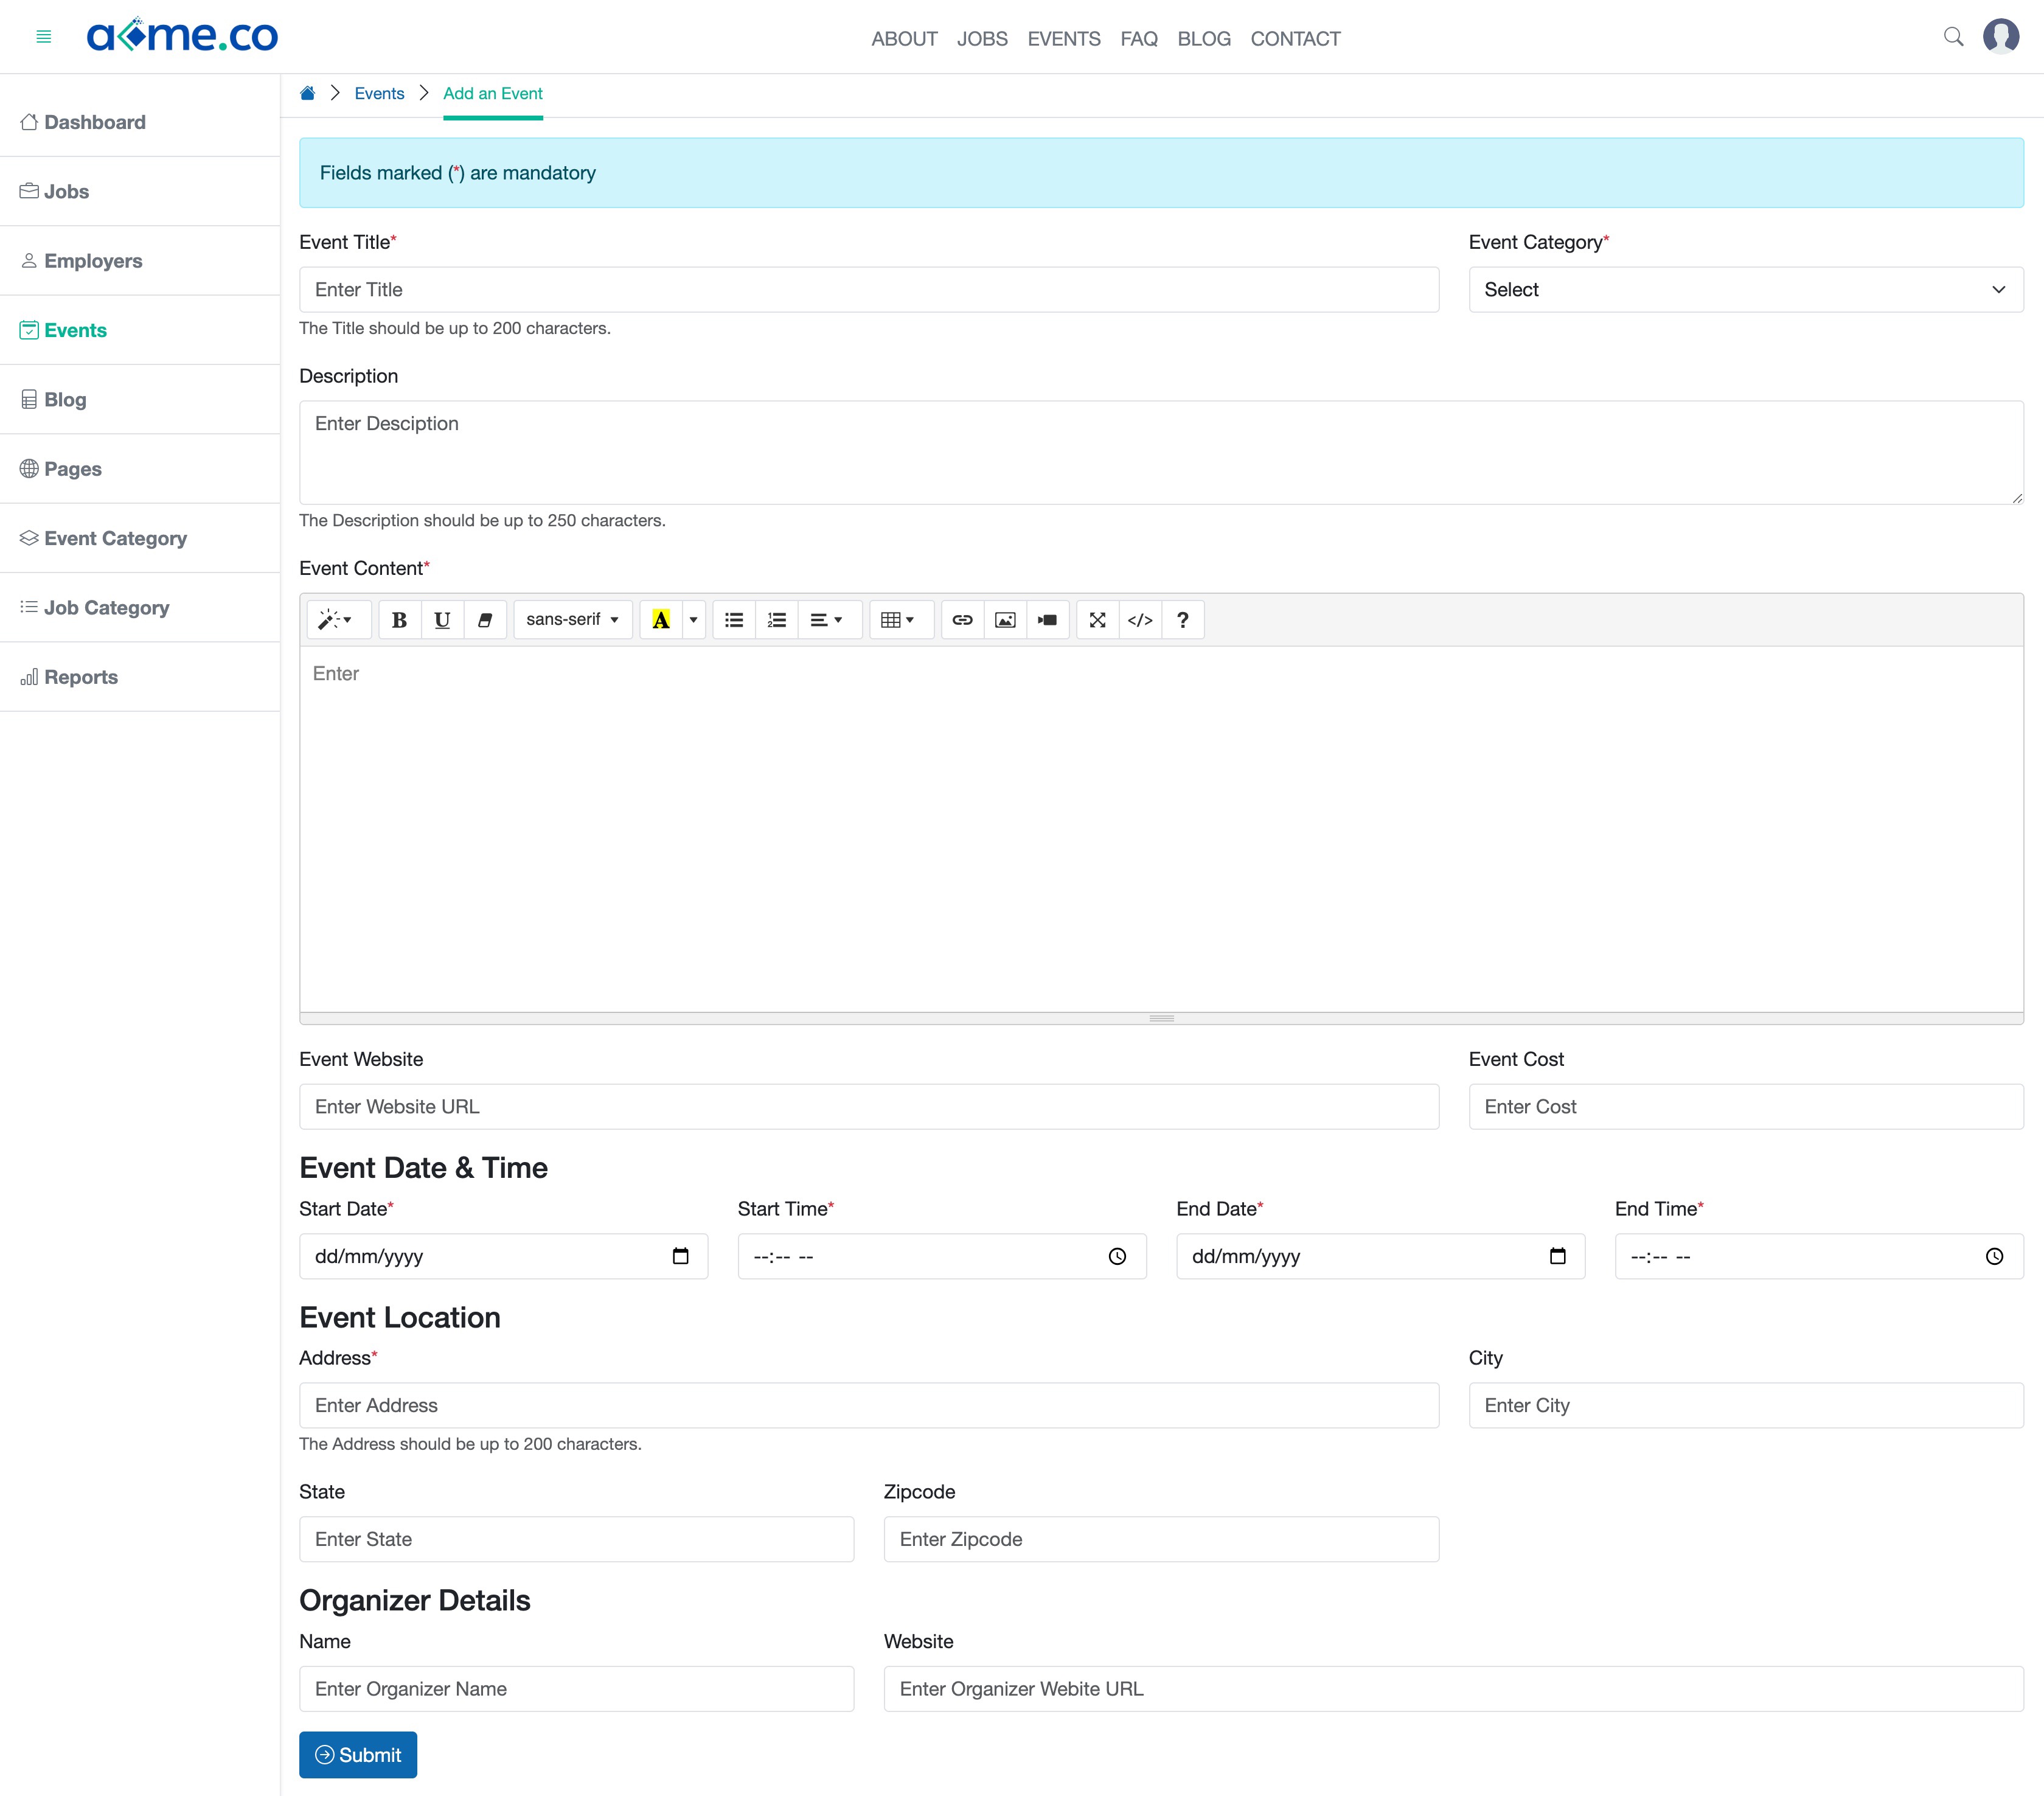
Fill in the details and click the Submit button to create a new event. The details that need to be filled in are:
- Event Title (text box - Mandatory): Title of the Event
- Event Category (dropdown box - Mandatory): Select the Event category from the list
- Event Description (text editor - Mandatory): Content of the page in the text editor. You can use the visual or code mode to write the content in the text editor
- Event Website (Optional): Enter the event registration link
- Event Cost (Optional): Enter the cost of the ticket to attend the event
- Event Date & Time
- Start Date (Mandatory): Select the start date of the event
- Start Time (Mandatory): Select the start time of the event
- End Date (Mandatory): Select the end date of the event
- End Time (Mandatory): Select the start time of the event
- Event Location
- Address (Mandatory): Enter the event location
- City (Optional): Enter the location city
- State (Optional): Enter the location state
- Zip code (Optional): Enter the location Zip code
- Organizer Details
- Name (Optional): Enter the event organizer name
- Website (Optional): Enter the event organizer's website
Click the Submit button to publish the event, as shown in Figure 2 above.
Click the Back icon on the right side of the screen to return to the list page, as shown in Figure 2 above.
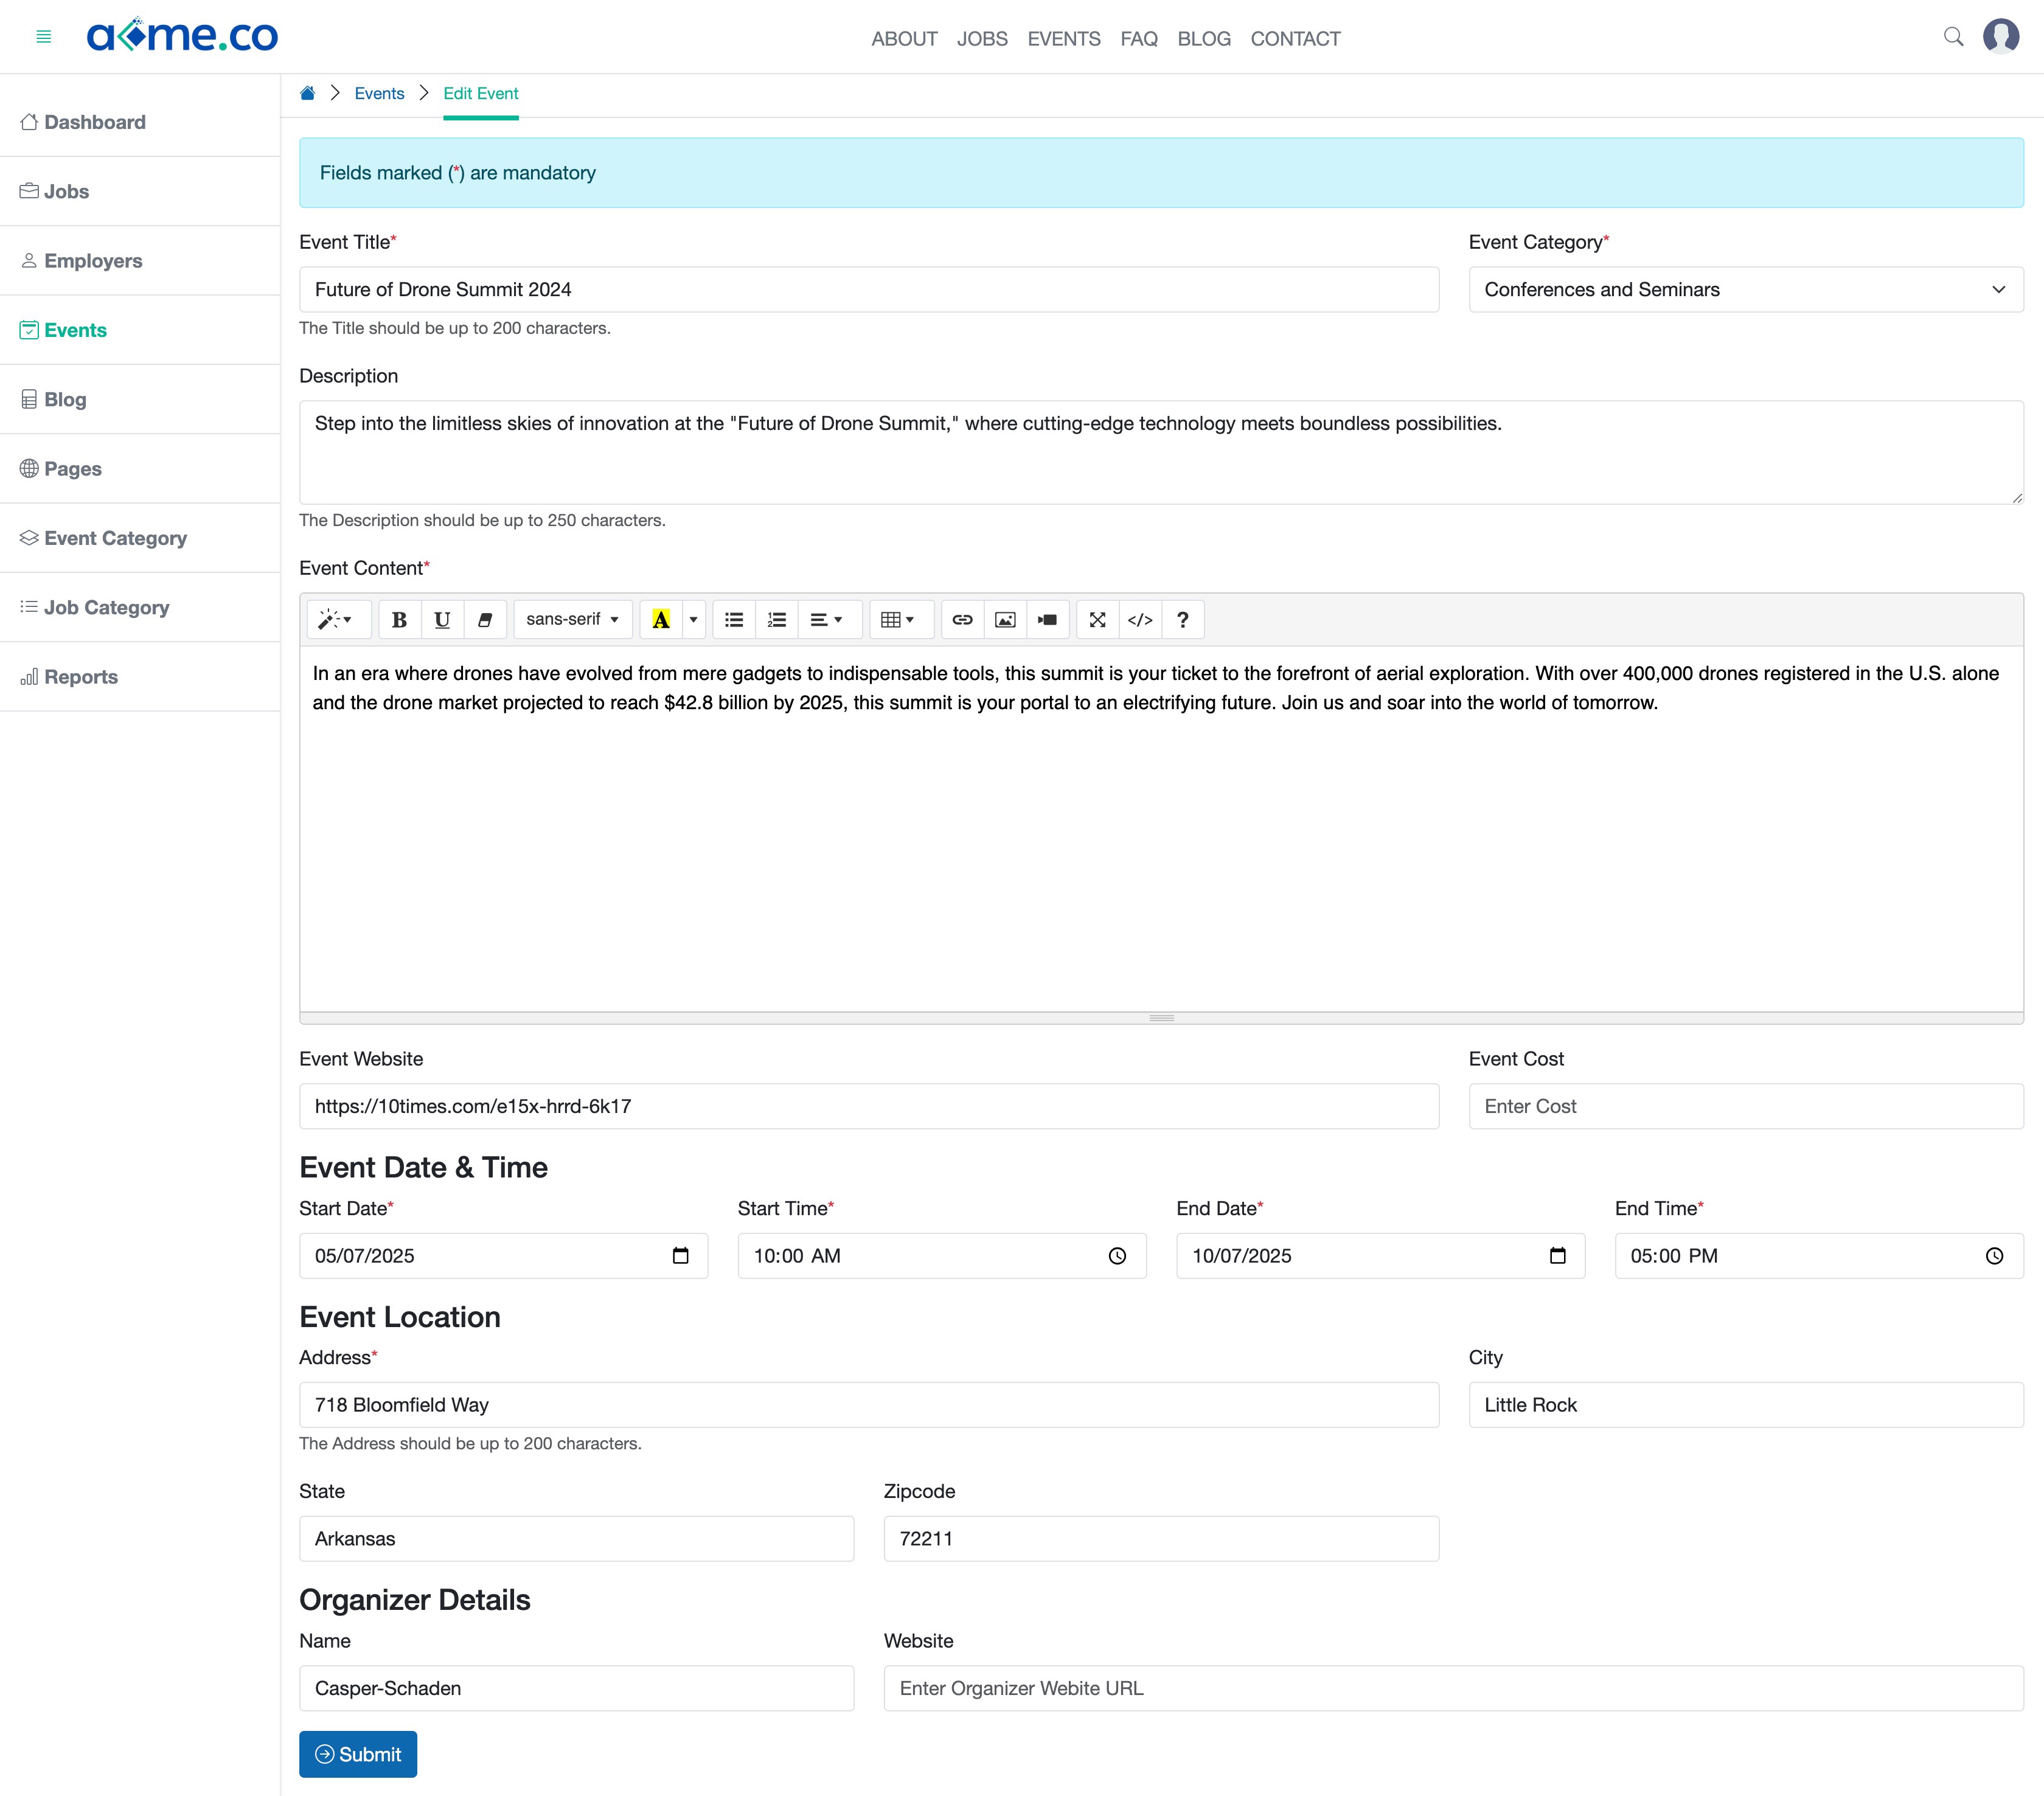
On the event edit page you can edit all the event details and once you are done click the Submit button to update the event page, as shown in Figure 3 above.


