


Using Batoi Hub as a Content Creator
Account Creation
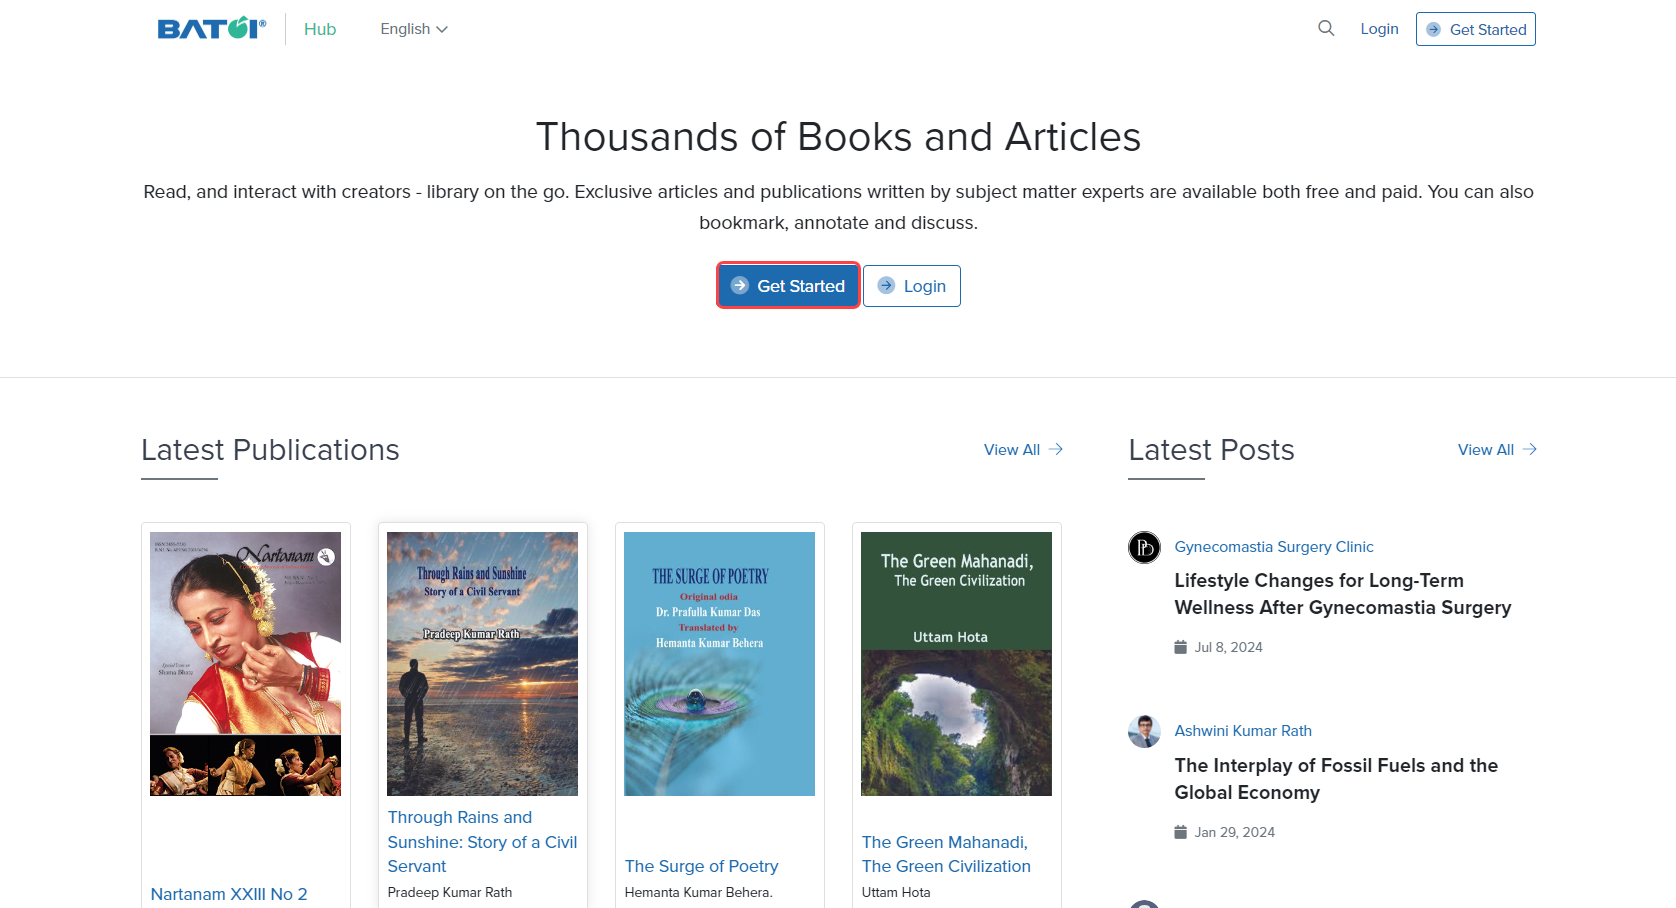
Go to the Batoi Hub homepage.
Click the Get Started link, as illustrated in Figure 1.
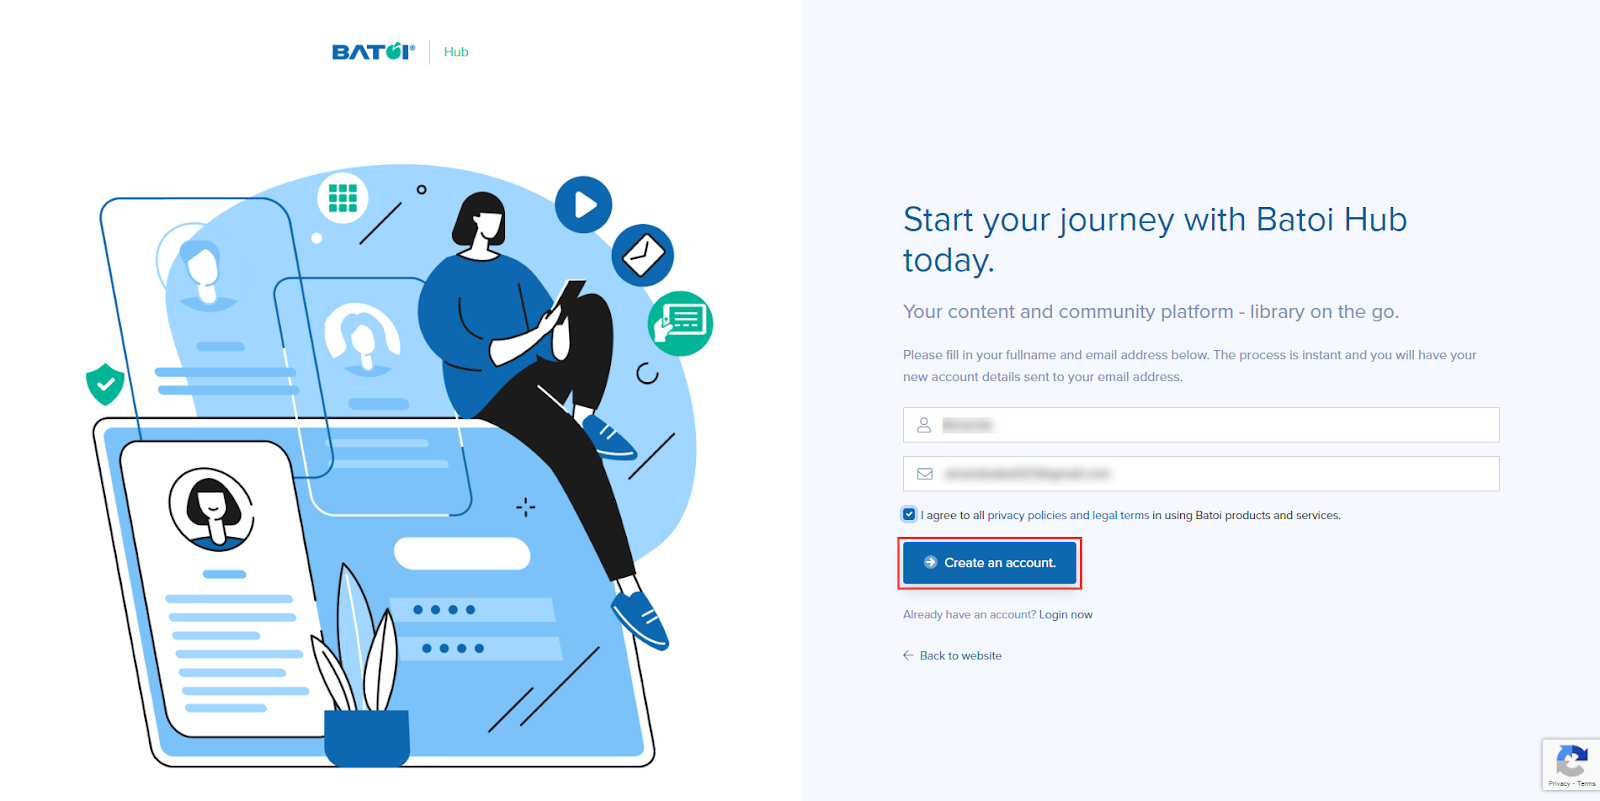
Enter your Full Name and Email Address. Click the checkbox and click the Create an Account button, as illustrated in Figure 2.
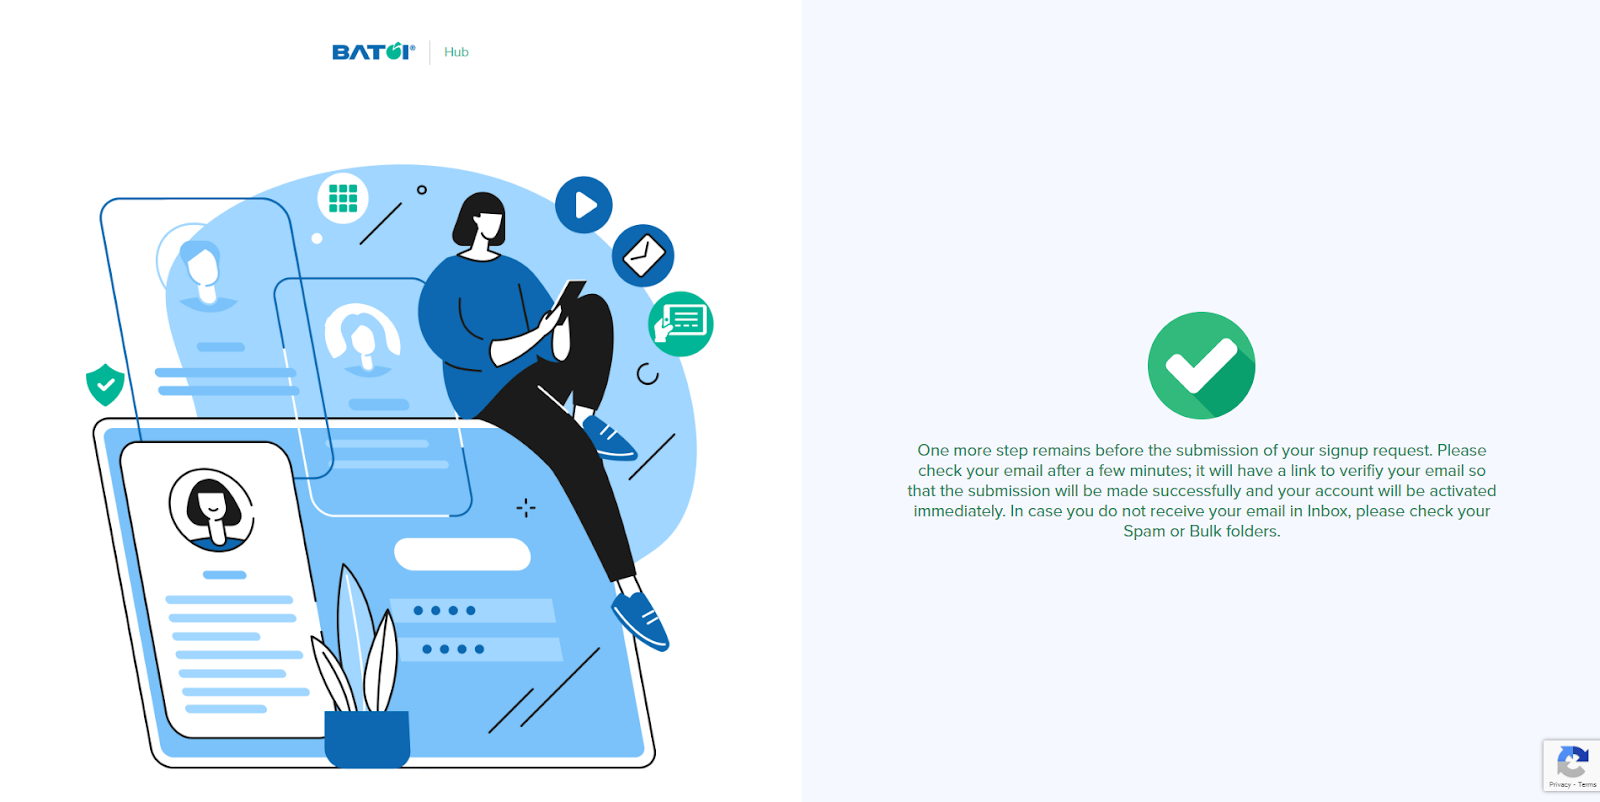
After clicking the Create an Account button, you will see a screen, illustrated in Figure 3, to verify your email.
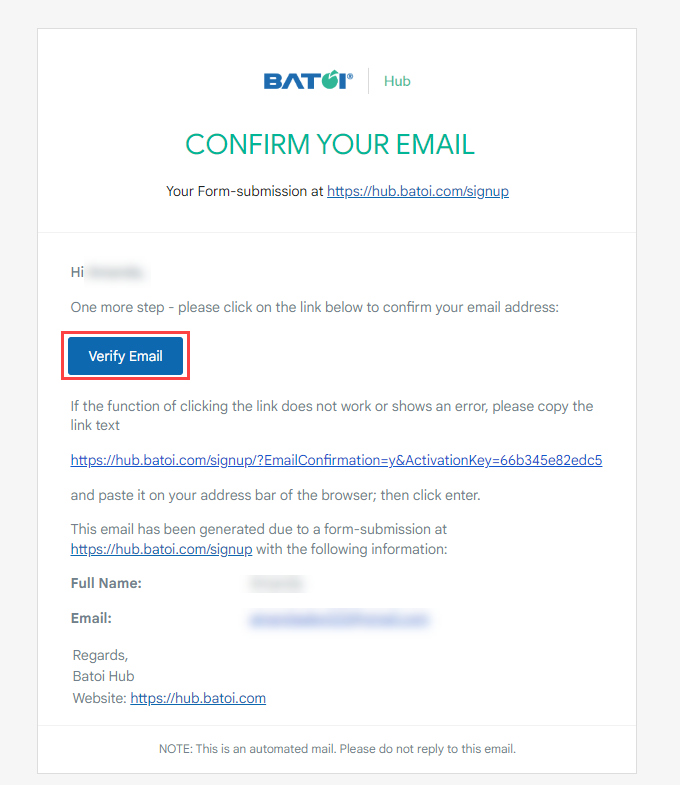
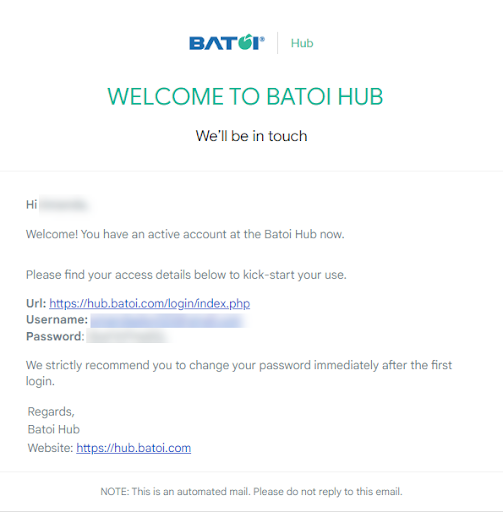
Open the email and click the Verify Email button, as illustrated in Figure 4.
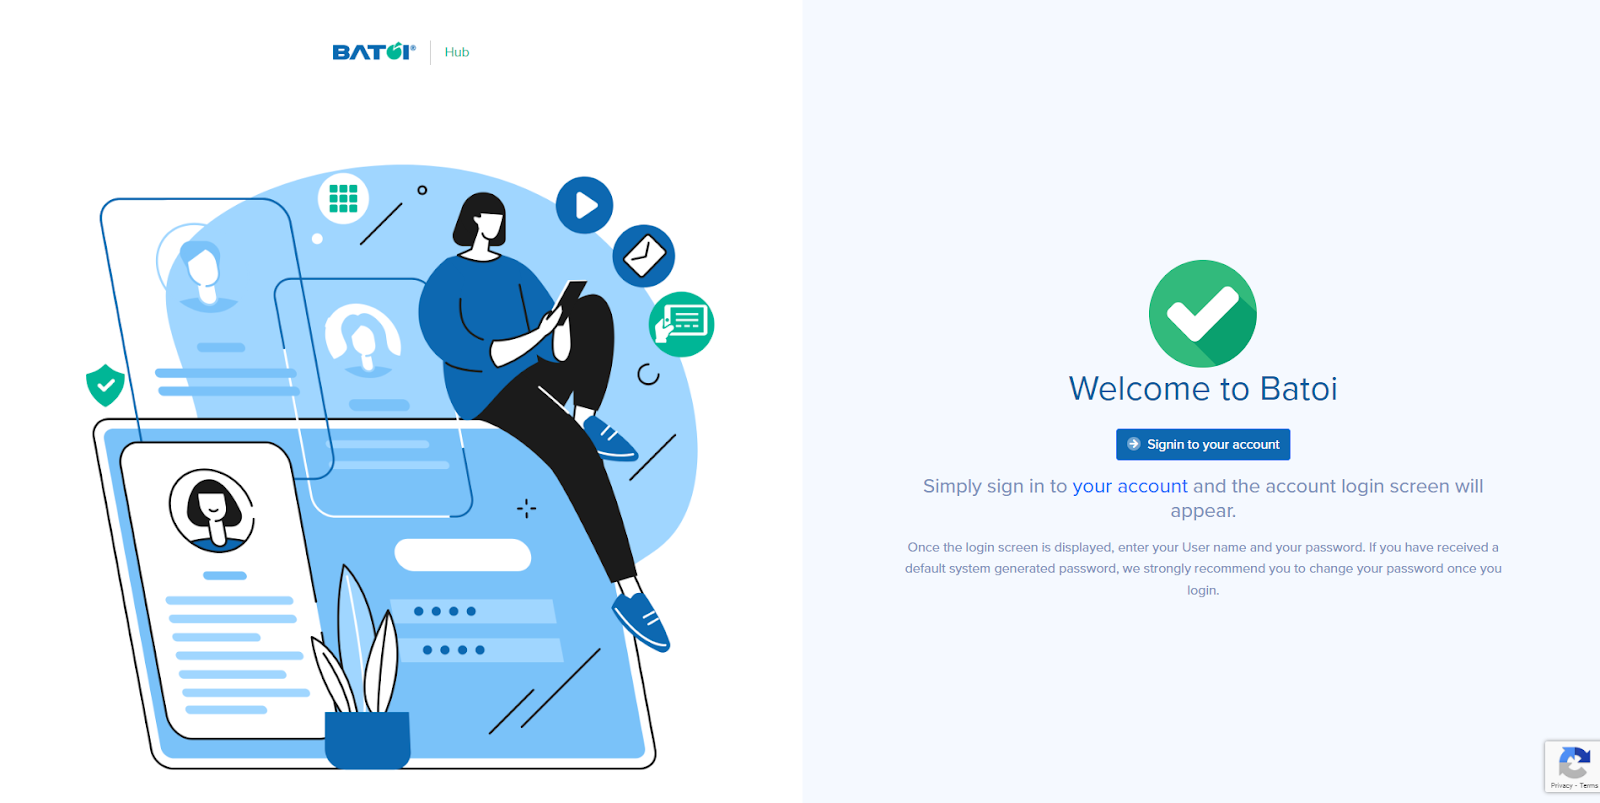
You will be directed to the welcome page when verifying your email address, as illustrated in Figure 5.
Now, click the Sign In to your account button and enter the credentials you received in your email. You will be directed to the dashboard, as illustrated in Figures 6(a) and 6(b), respectively.

Profile Management
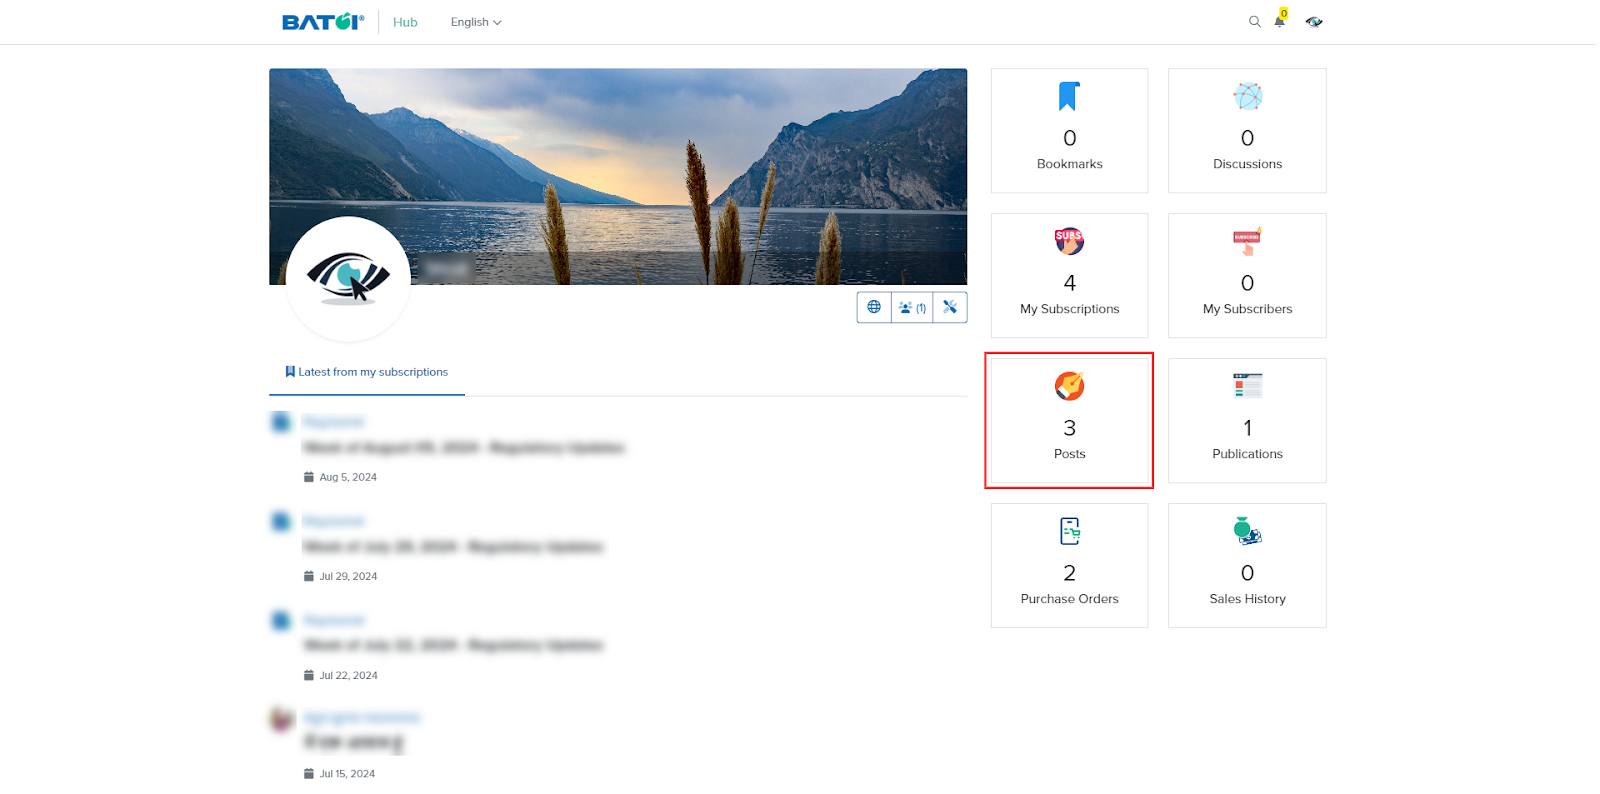
You have the following cards on the dashboard page, as illustrated in Figure 7.
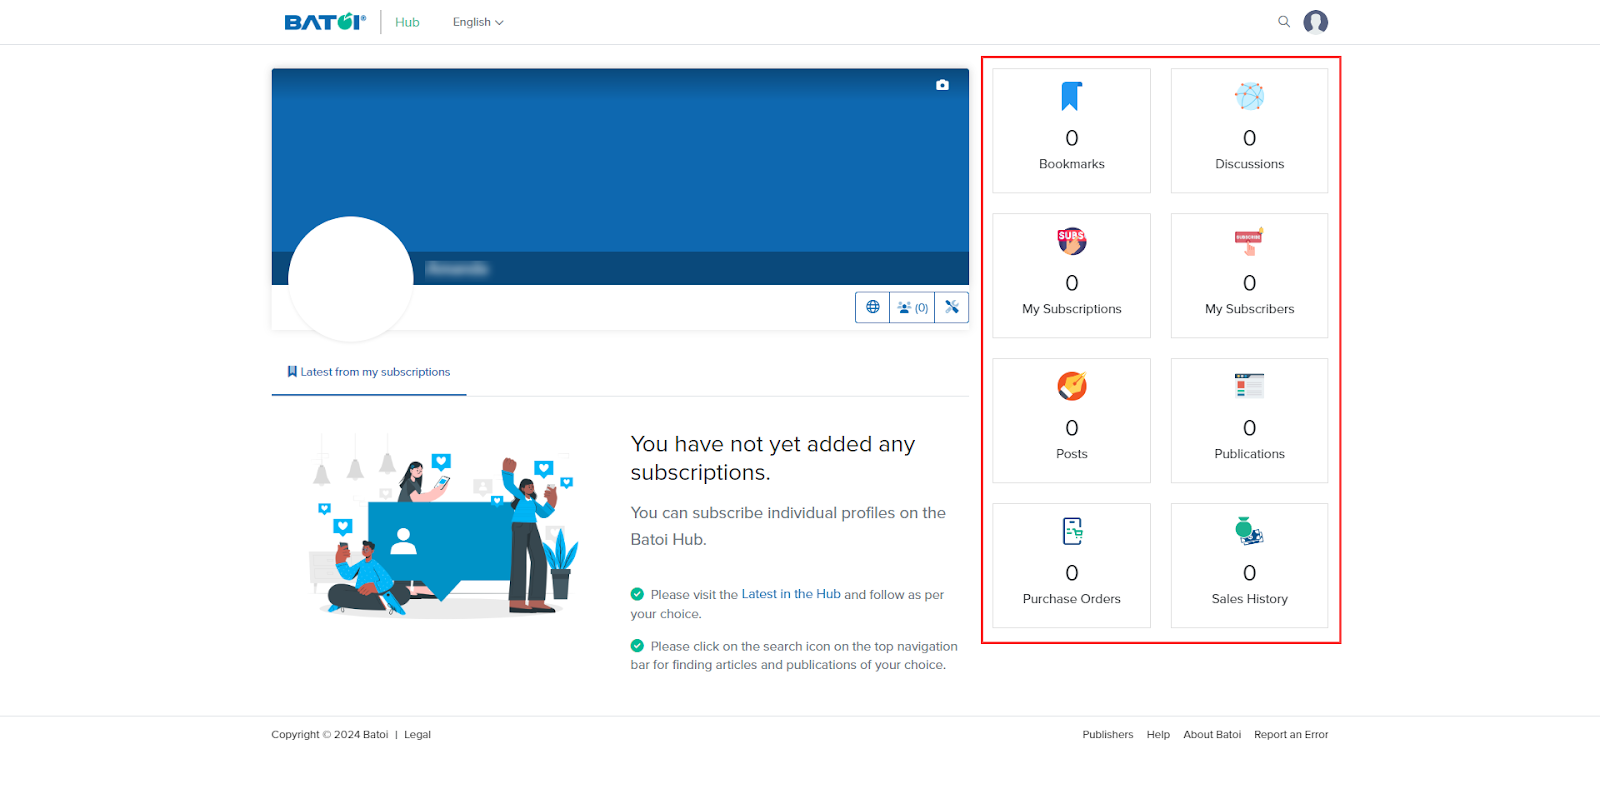
A brief Information about them is as follows :
- Bookmarks: Here, you can view all your bookmarks.
- Discussions: In the discussions section, you can view all the discussions you have participated in.
- My Subscriptions: It allows you to view the count of the number of subscriptions.
- My Subscribers: It gives the count of your subscribers.
- Posts: It provides information about the number of posts you have created.
- Publication: It depicts the number of publications you have created.
- Purchase Orders: It provides the details of all the purchases made by those who have subscribed to our profile or books.
- Sales History: It provides information about the number of sales you have done.
The highlighted button in Figure 8(a) is My Profile, where you can click and view all your posts, as illustrated in Figure 8(b).

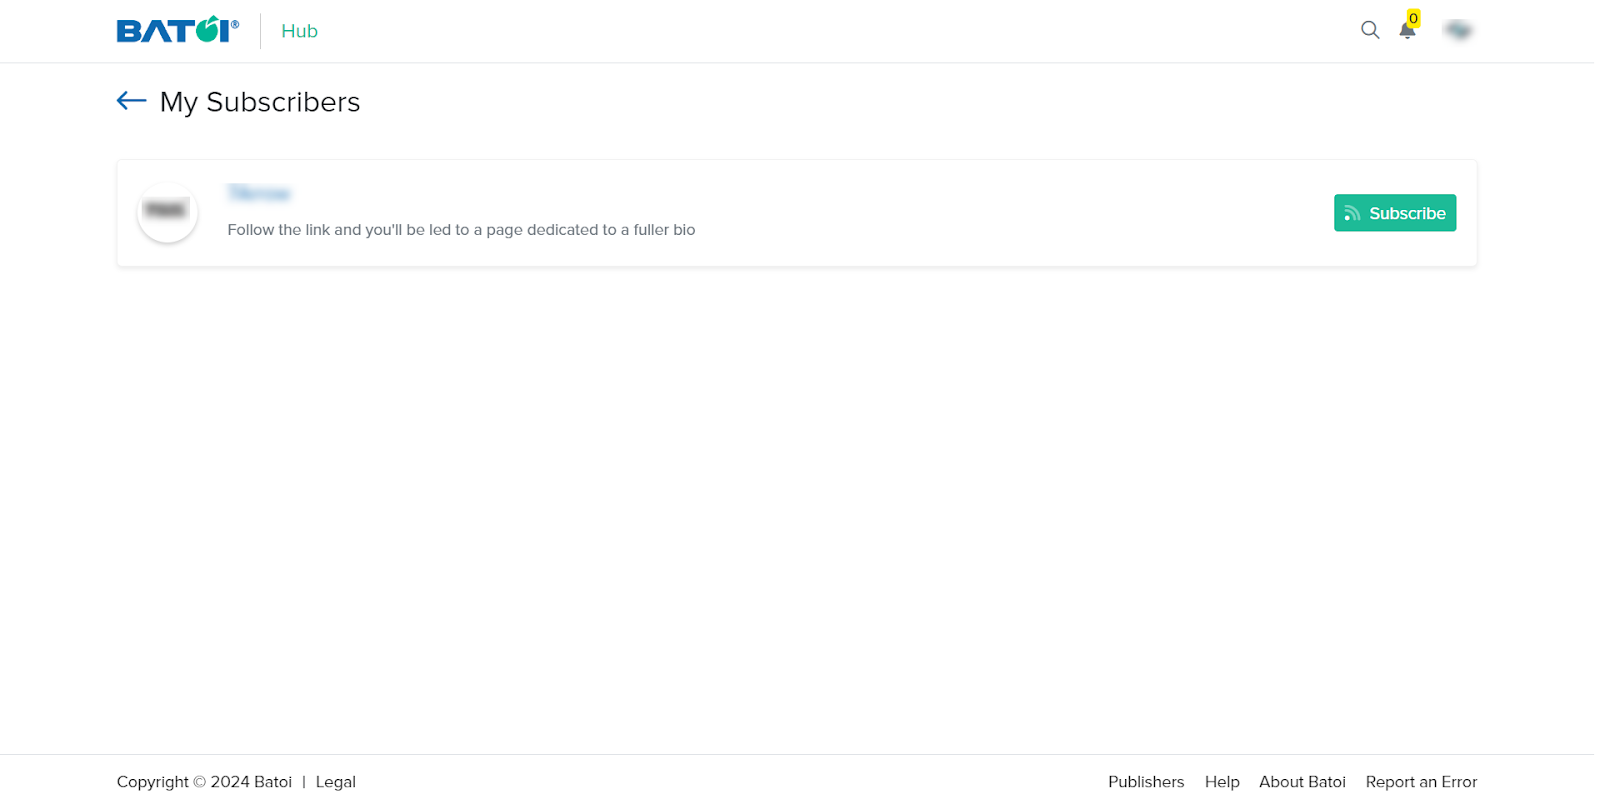
The next is the My Subscribers button, which allows you to view all your subscribers, as illustrated in Figure 9.
Clicking on the Edit Personal Details button takes you directly to the Manage Personal Info page, where you can edit your personal details, as illustrated in Figure 10.

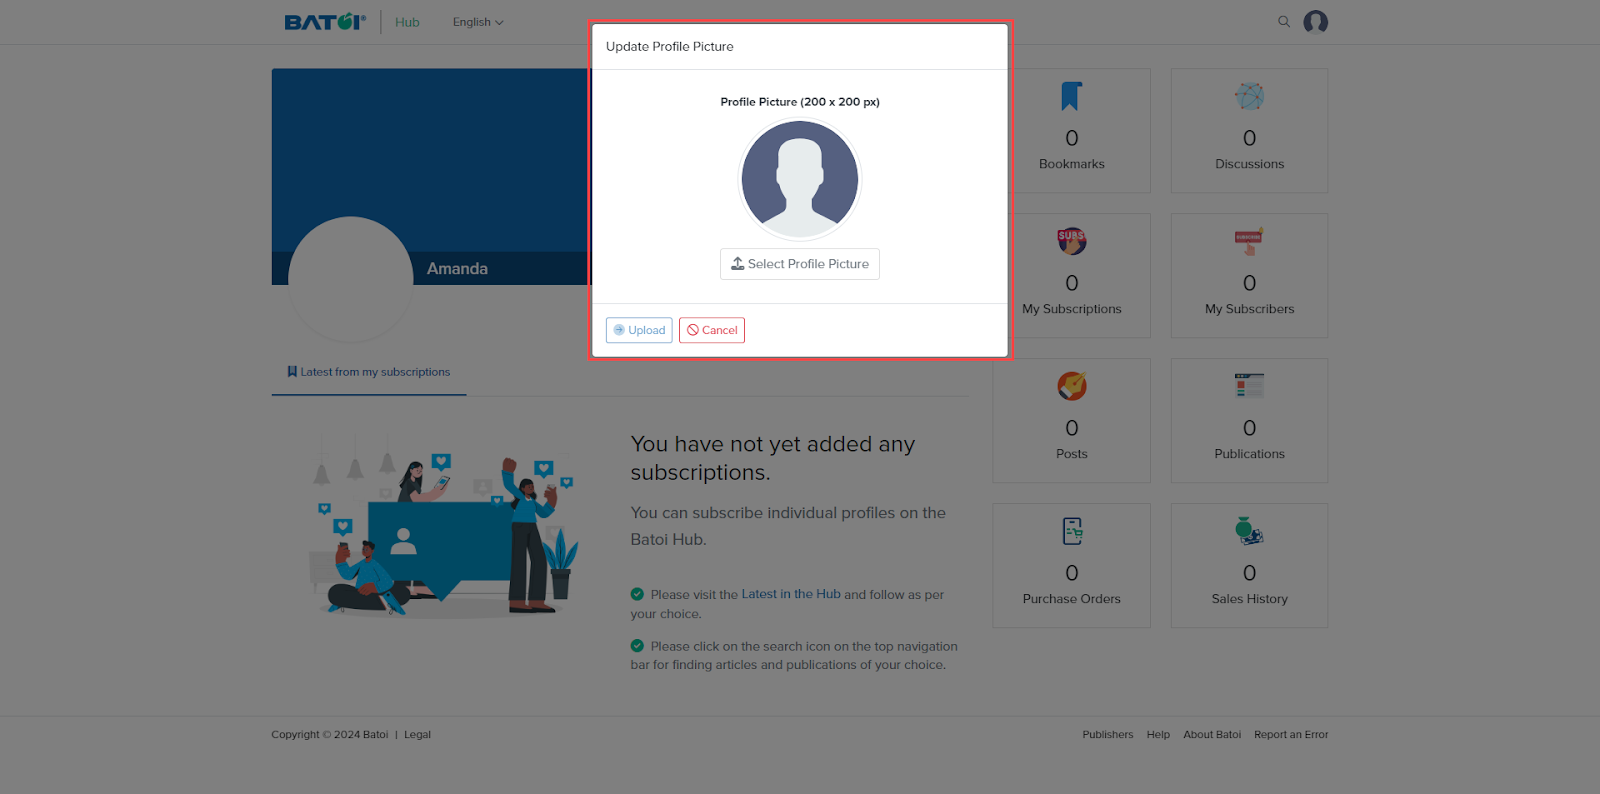
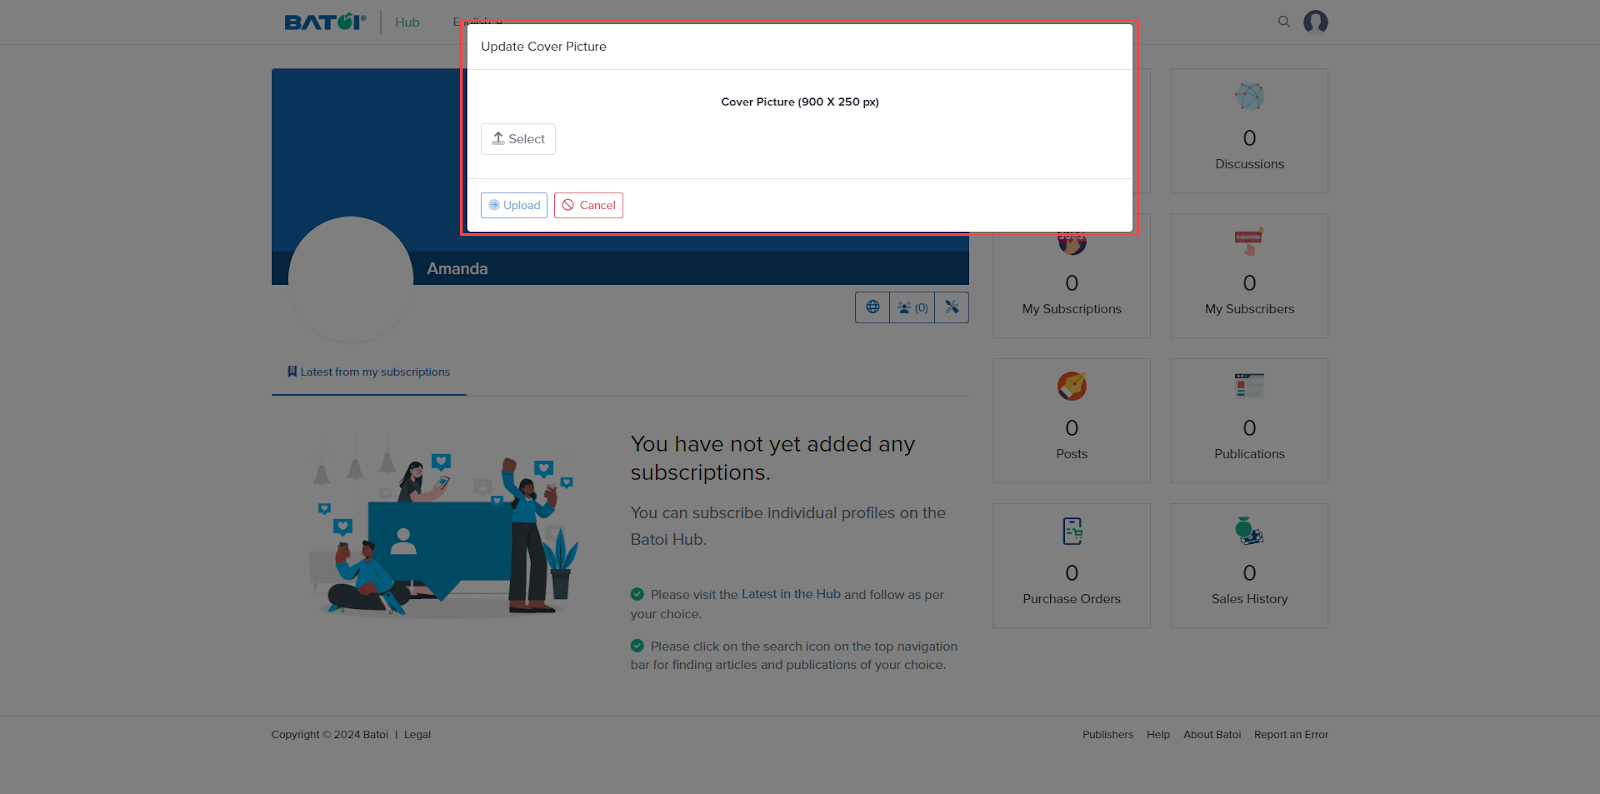
Now click the highlighted area, as shown in Figure 11.

Upload the required details as illustrated in Figure 12(a) and Figure 12(b).
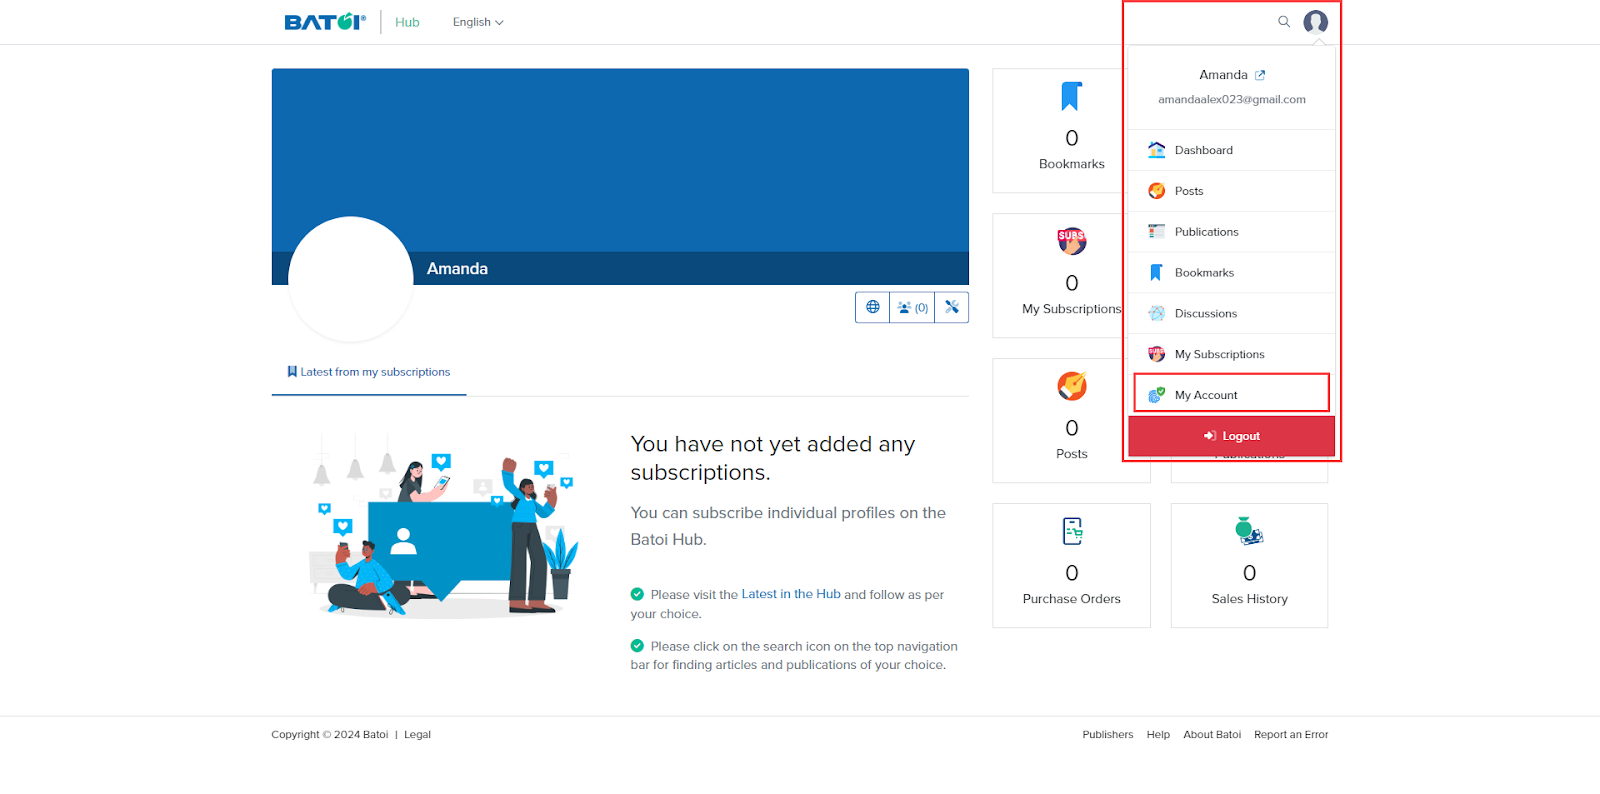
Click your profile icon and click the My Account link, as illustrated in Figure 13.
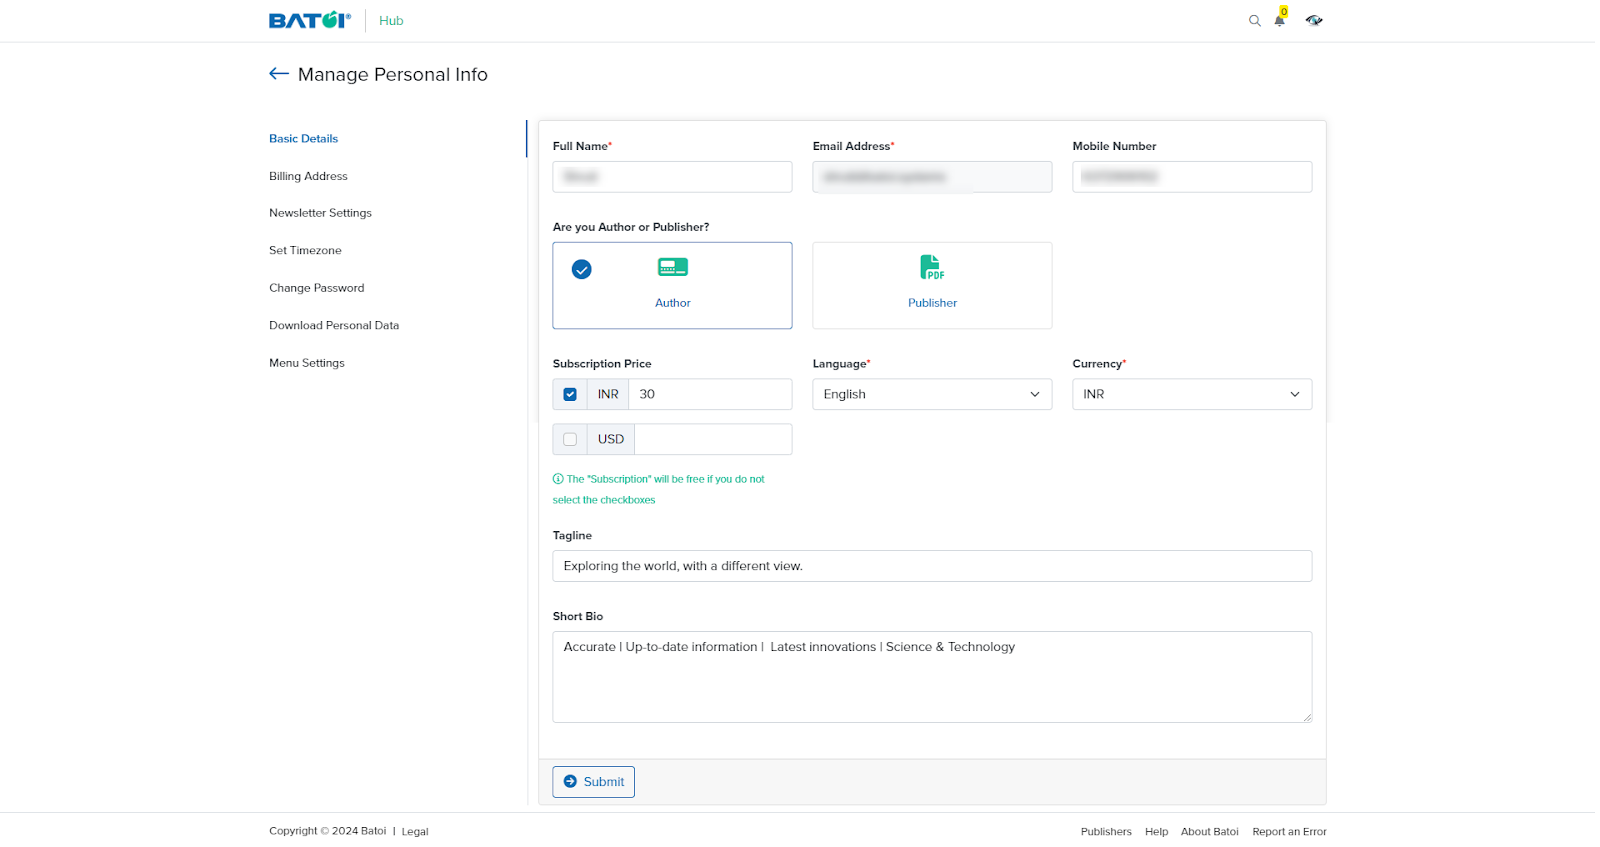
You will be directed to the Manage Personal Info page, where you can fill in all your details as an author, as illustrated in Figure 14.
A brief description of all the items has been provided below:
- Full Name: Enter your full name.
- Email Address: It will be auto-filled with the name you have registered.
- Mobile Number: Enter your mobile number.
- Are you Author or Publisher: Here, you need to select whether you are an author or a publisher.
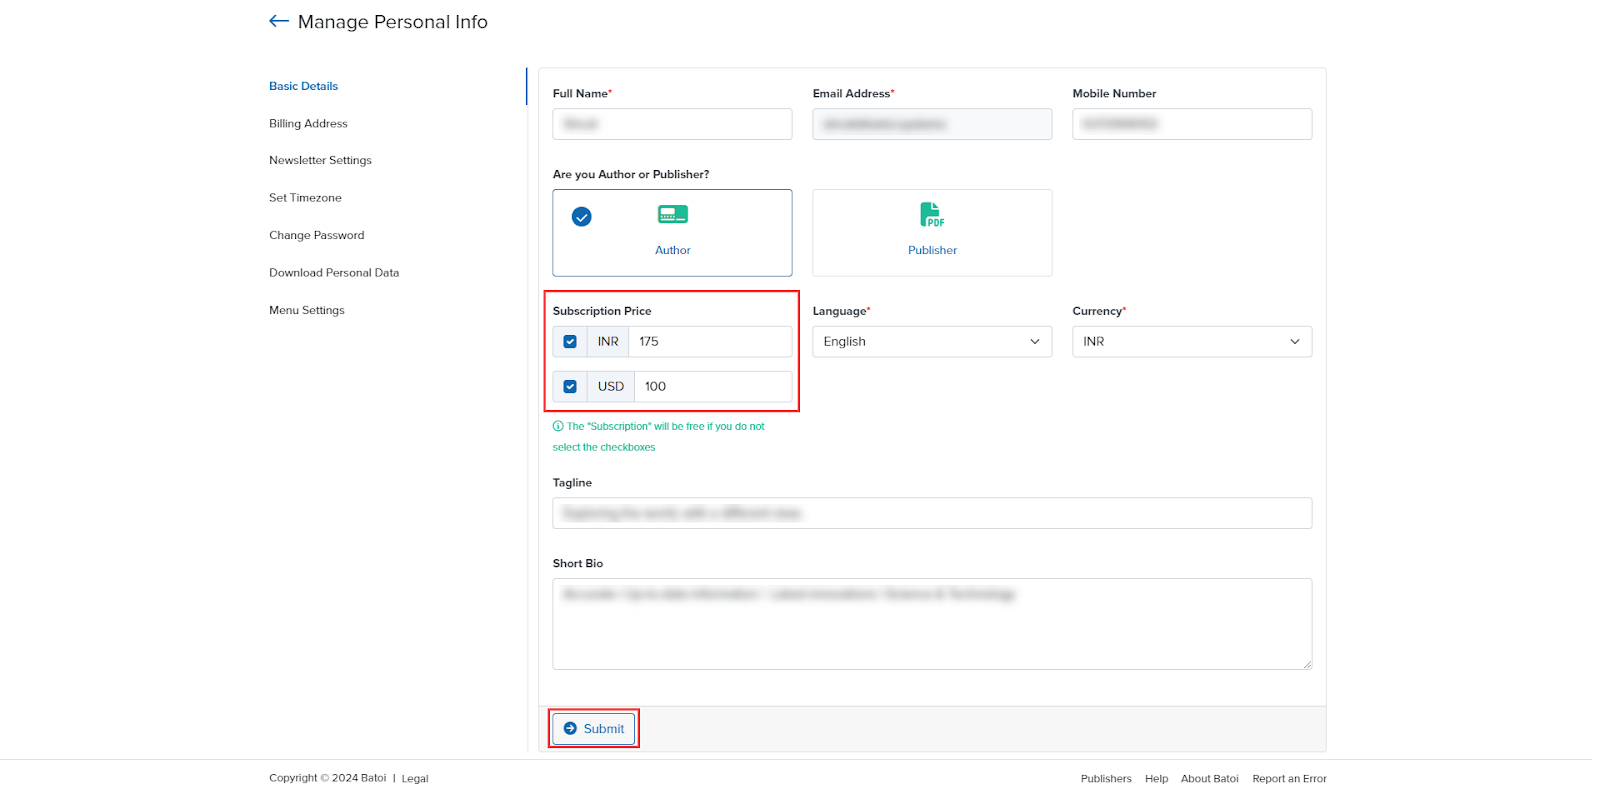
- Subscription Price: The price you want to keep for your content for reading. If checkboxes are not checked, content will be free. The yearly subscription rate must be at least ₹50 or $5.
- Language: In Batoi Hub, you have three language options: English, Odia, and Hindi. You can choose any of them according to your preference.
- Currency: We have two currency options: Rupees and USD.
- Tagline: A brief text that will help readers discover about you and your content.
- Short Bio: A brief text that contains a short biography of yourself and sums up your work.
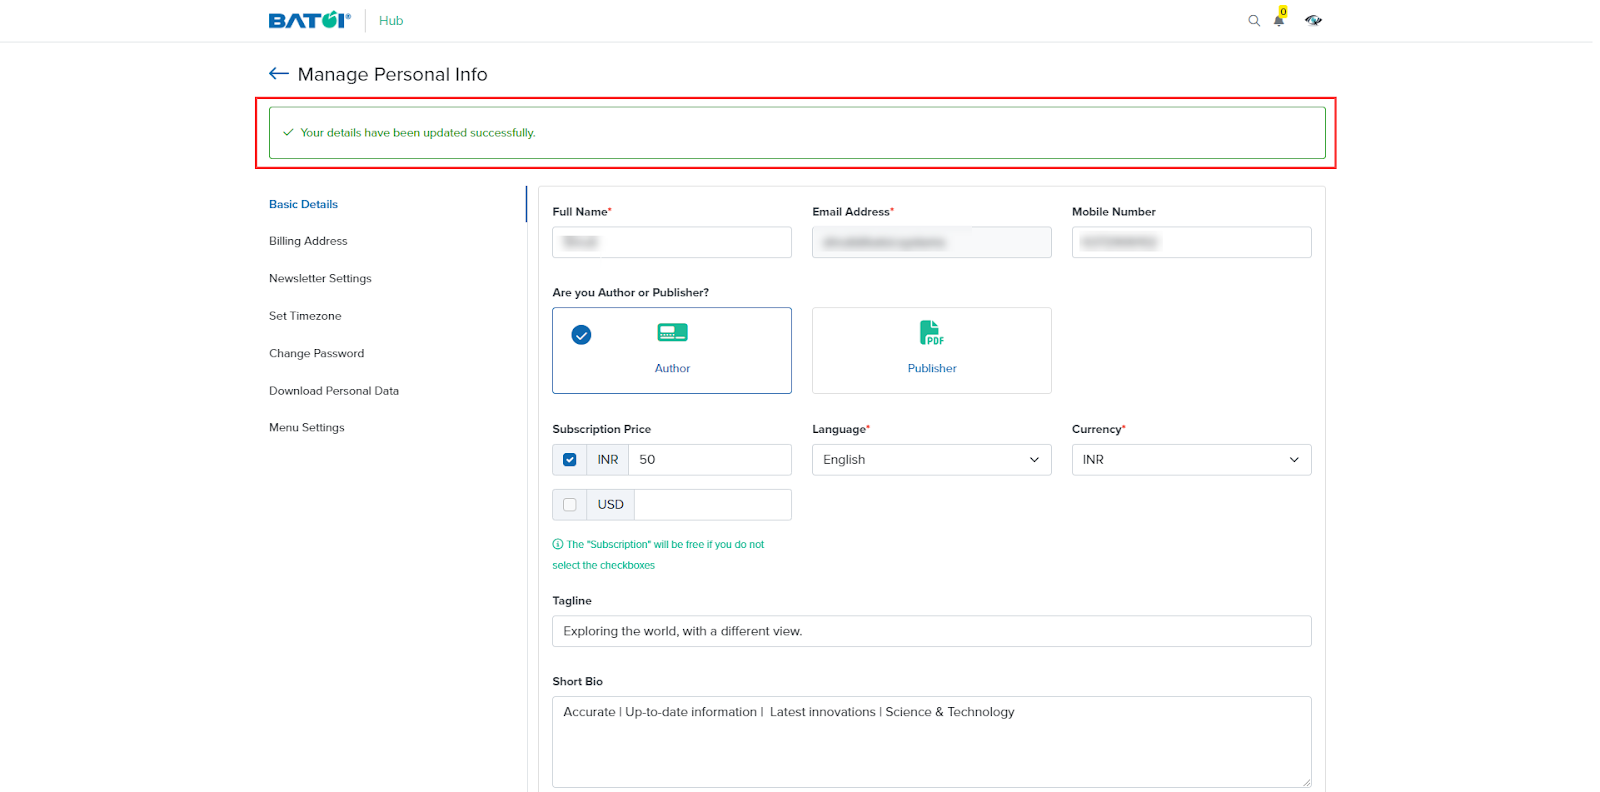
After submitting, you will receive a message that your details have been updated successfully, as illustrated in Figure 15.
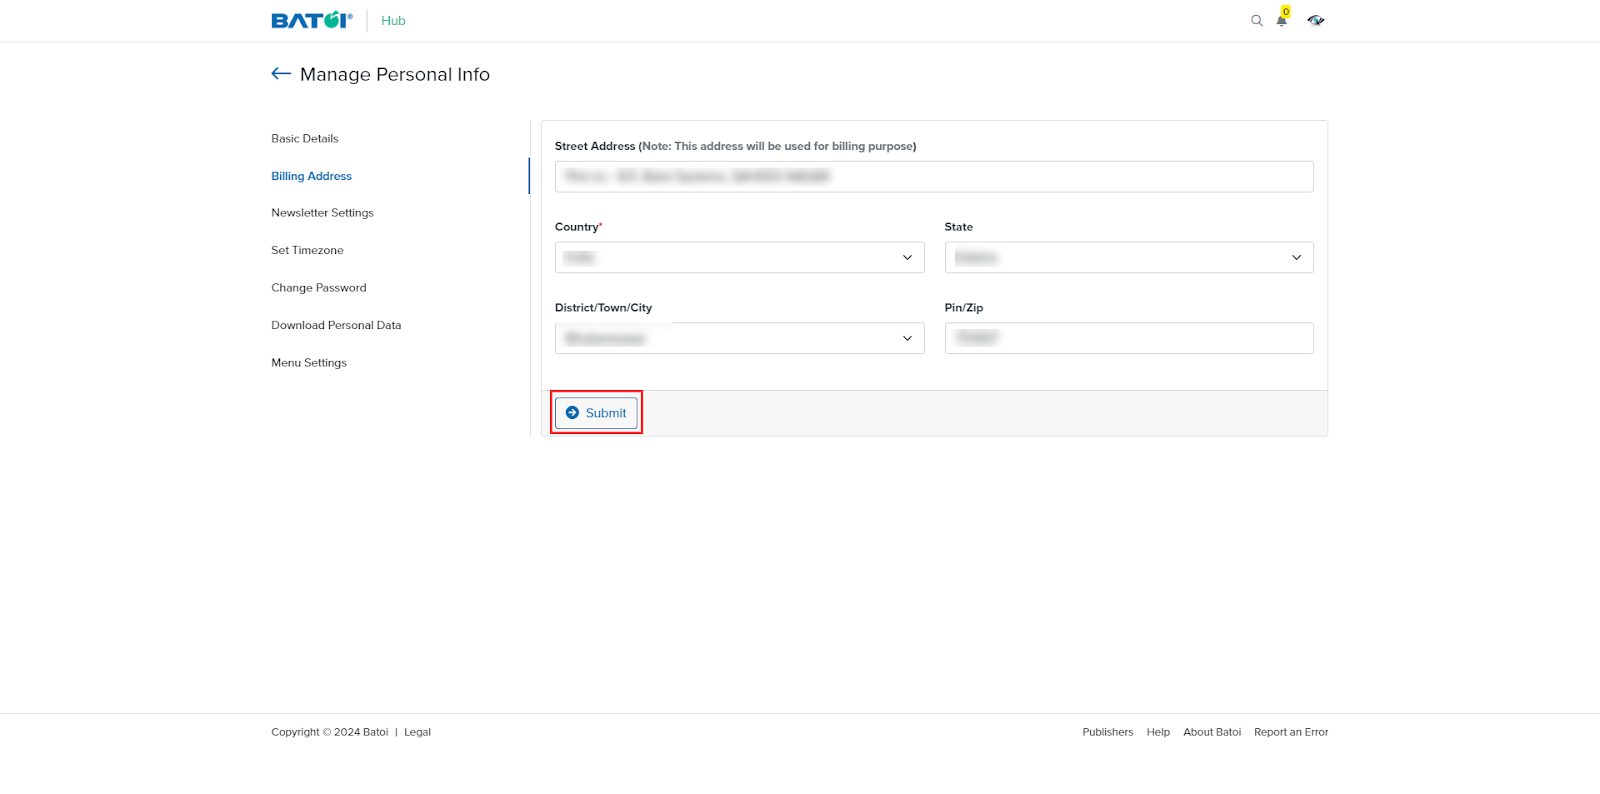
Click the Billing Address menu and fill in the details. Your invoice will have this billing address. After filling in the details, click the Submit button, as illustrated in Figure 16.
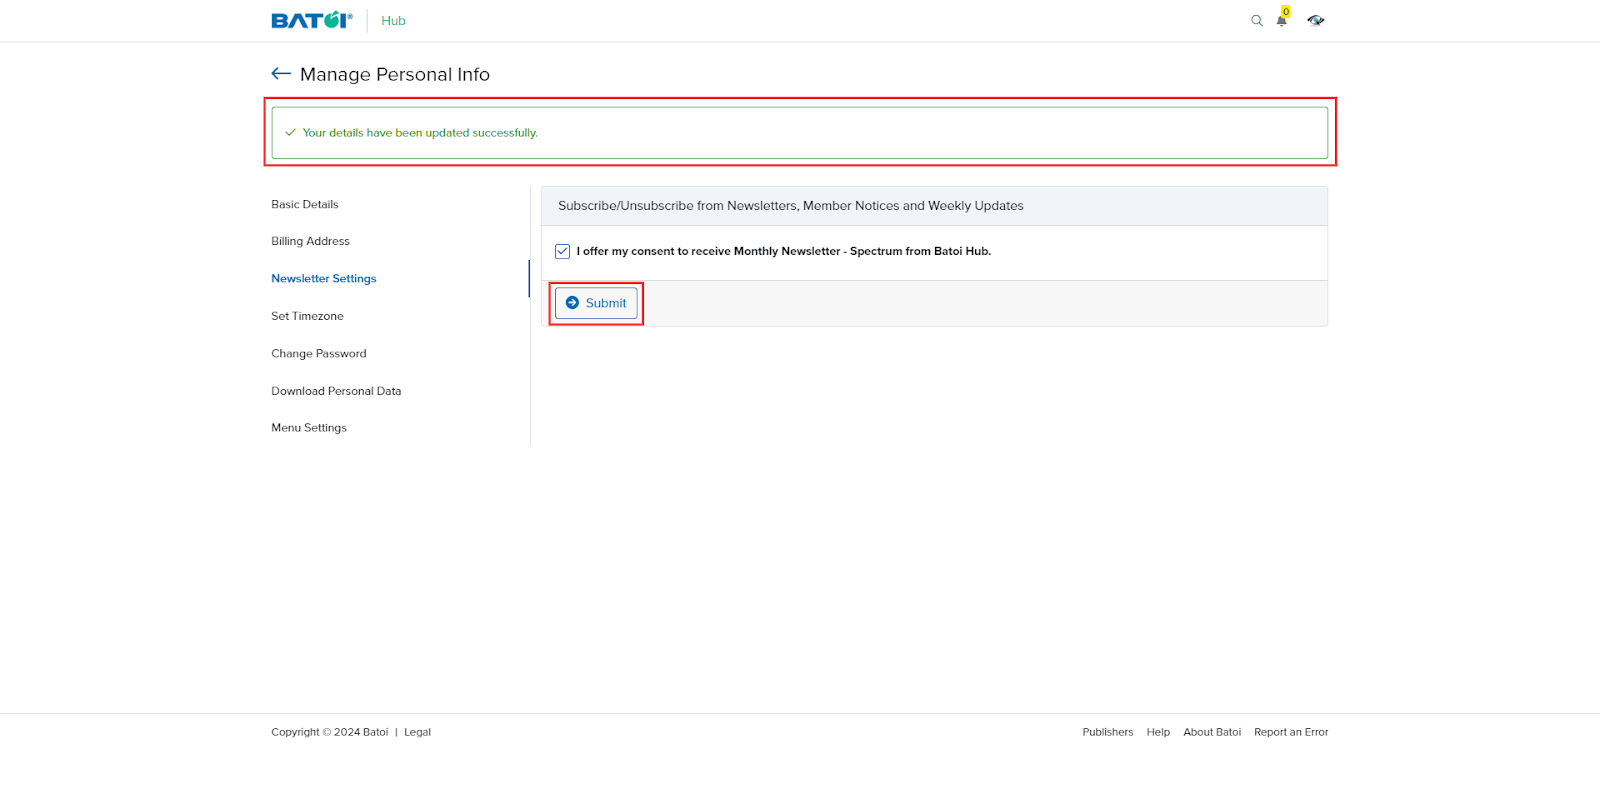
In the Newsletter Settings, you can choose whether to receive emails or communications from Batoi Hub. Once you are done with it, click the Submit button. Data will be updated as shown in Figure 17.
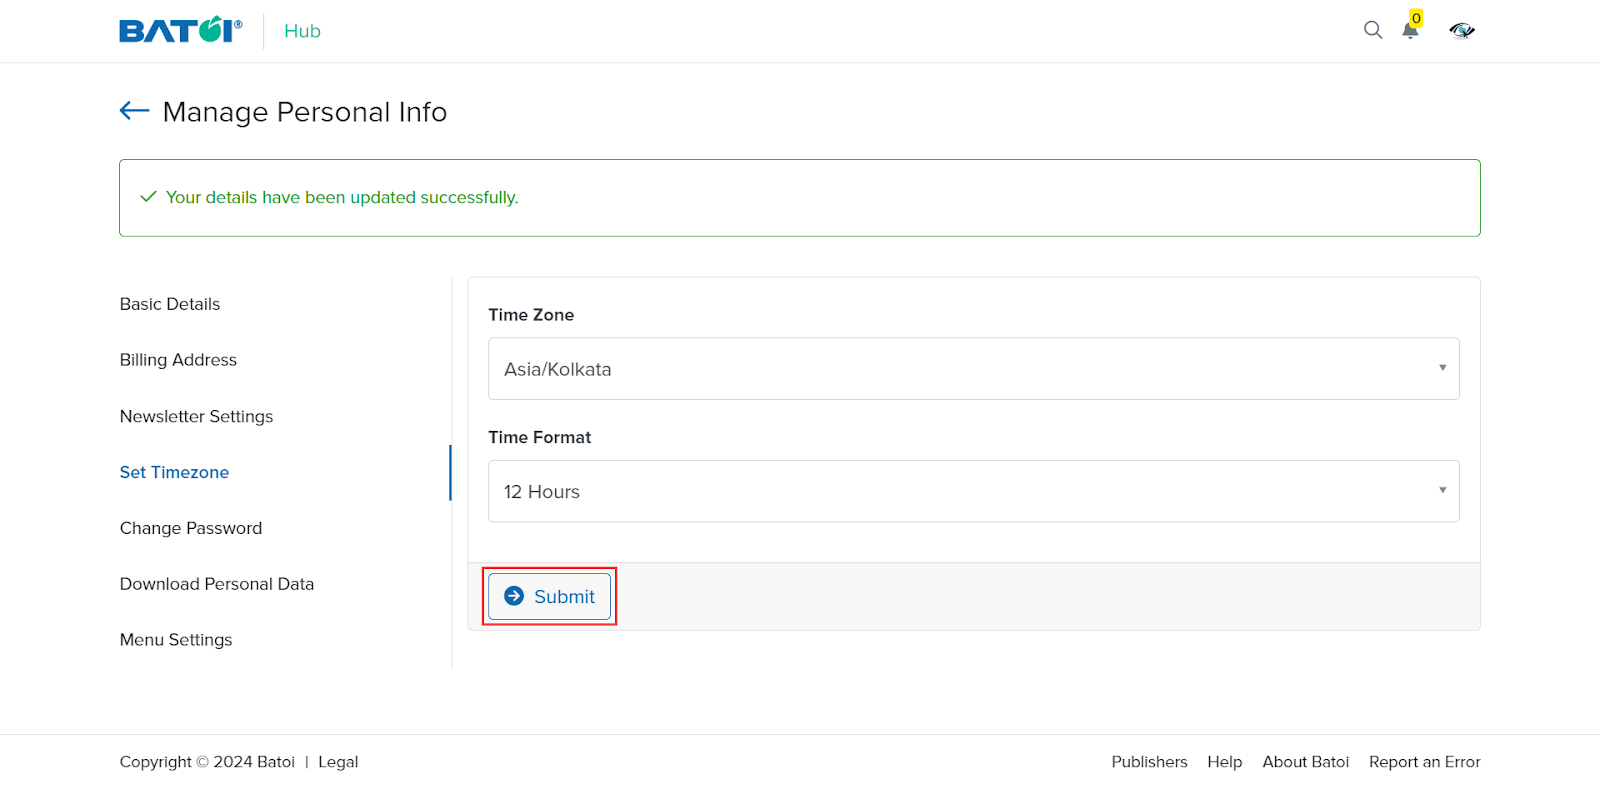
You can update your time zone and time format in the Set Timezone section. As illustrated in Figure 18, click the Submit button to save the changes.
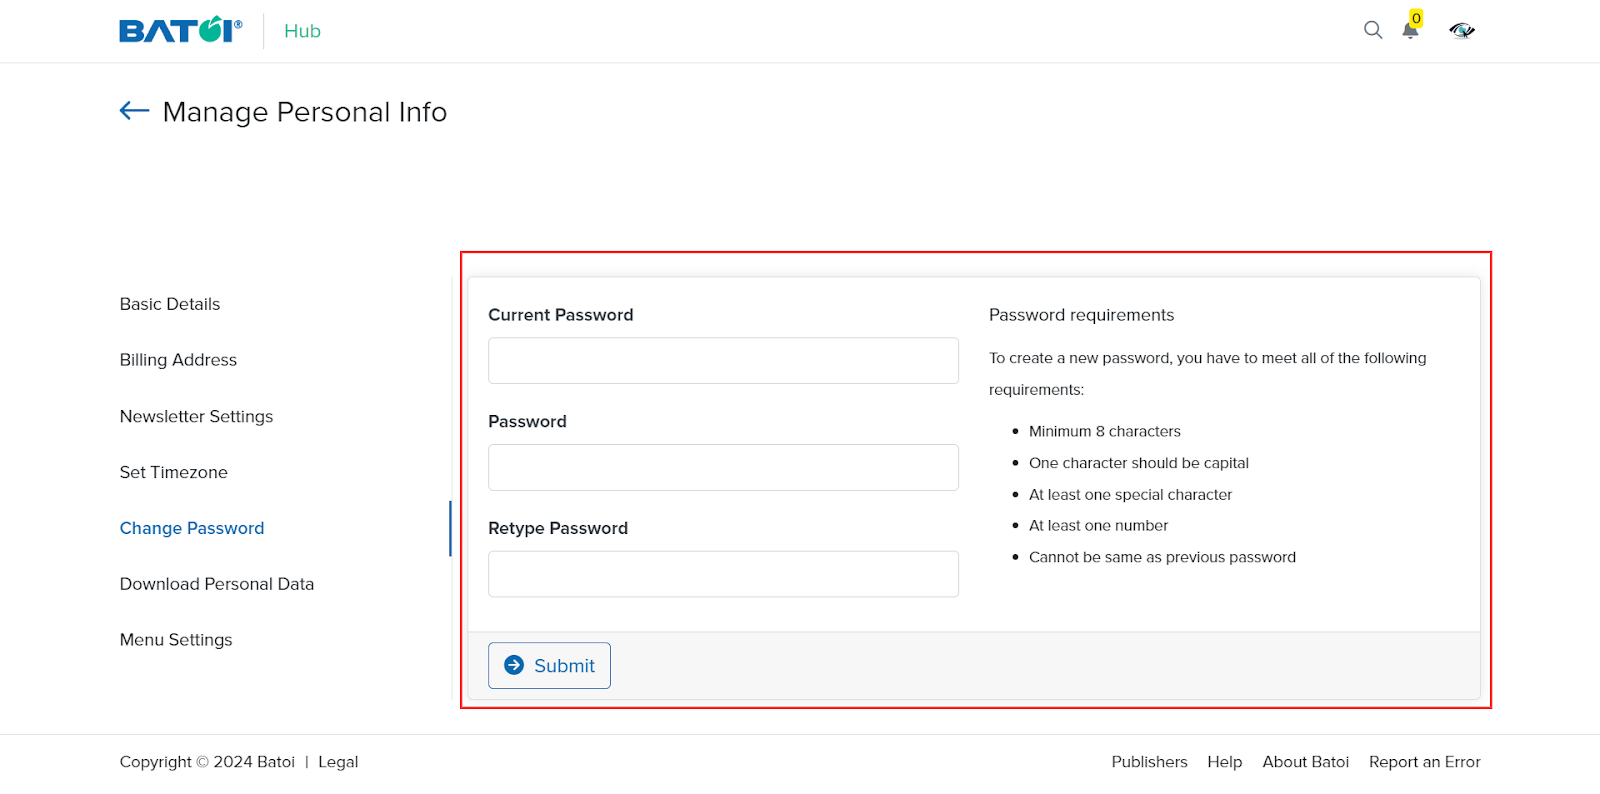
You can change your password anytime by filling in the required fields and meeting the requirements for generating a password, as illustrated in Figure 19.
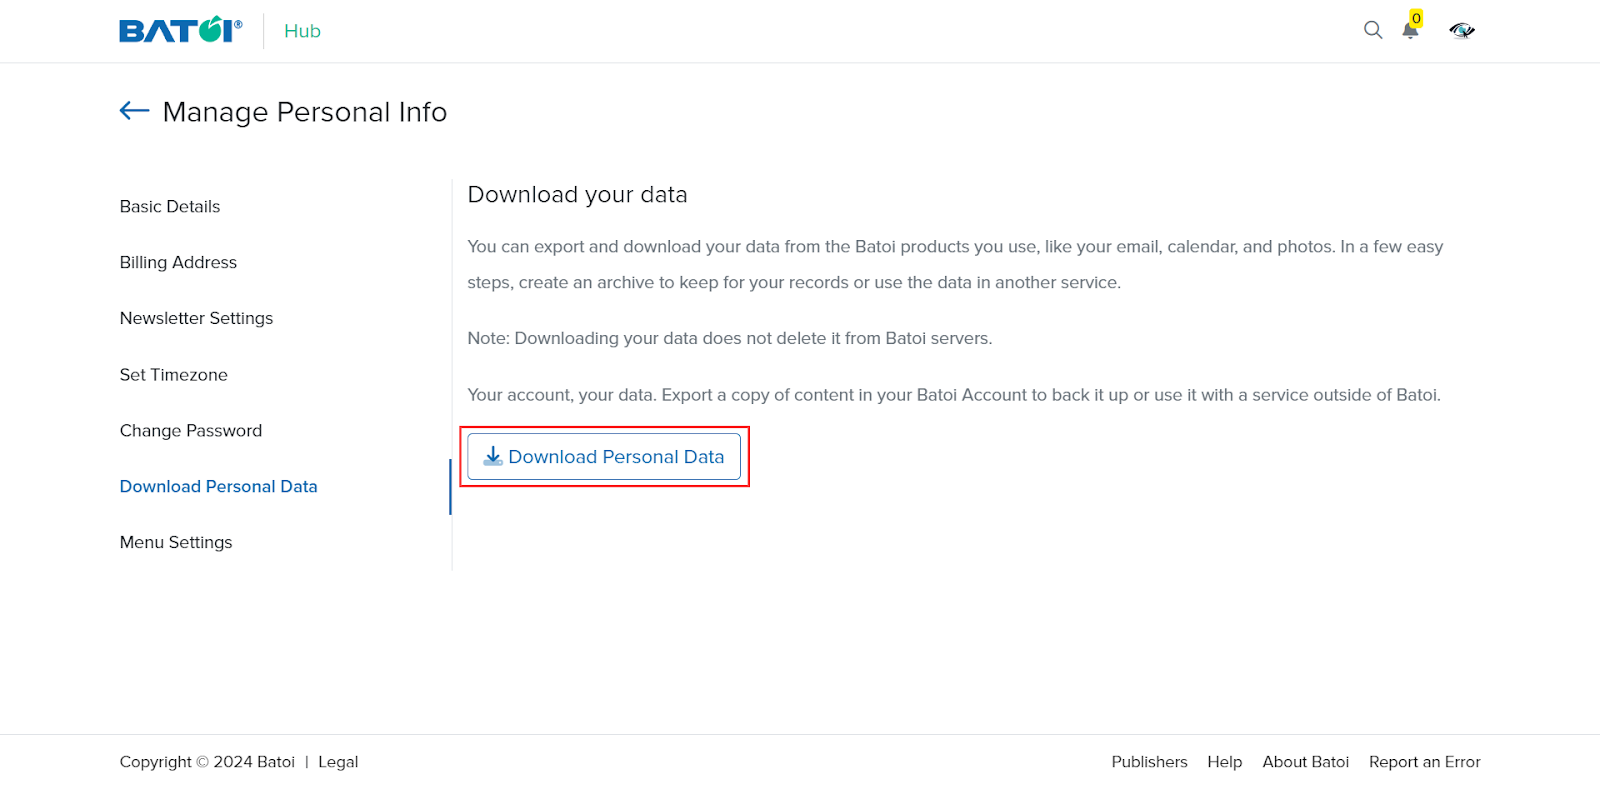
You can download your personal data by clicking the Download Personal Data button, as illustrated in Figure 20.
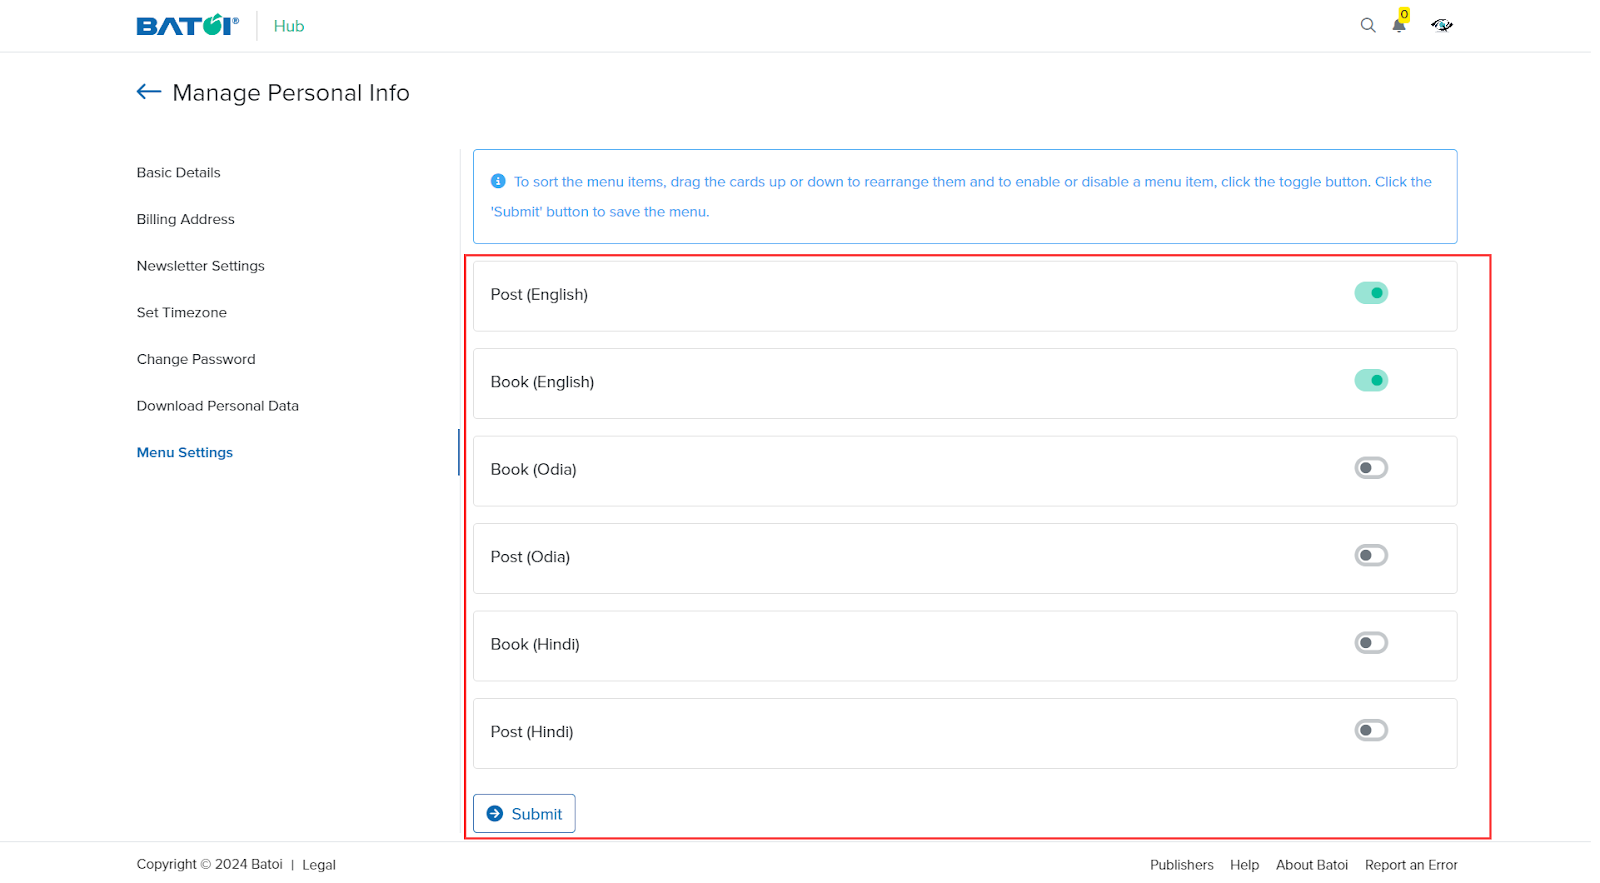
In the Menu Settings, you can sort the menu items and drag the cards up or down to rearrange them according to your choice. A Toggle button is present to choose the language in which you will post your content. If you keep the toggle button on for the content you do not post, it will show blank. Now, click the Submit button to save the menu, as illustrated in Figure 21. All the changes done will be reflected on your dashboard.
Create Article/Book
Login to your account
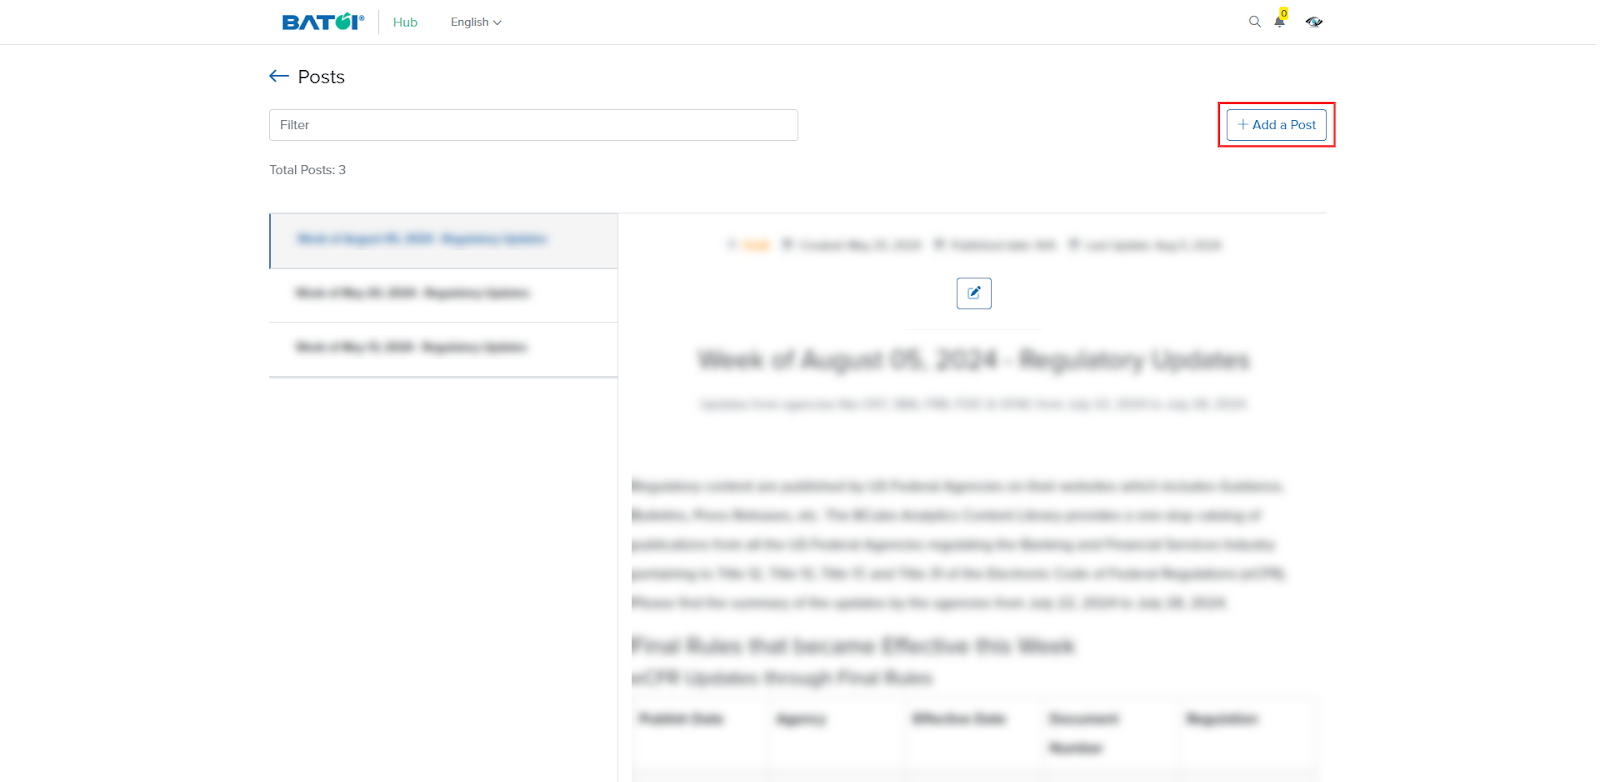
Click the Posts card, as illustrated in Figure 22.
Click the Add a Post button, as illustrated in Figure 23.
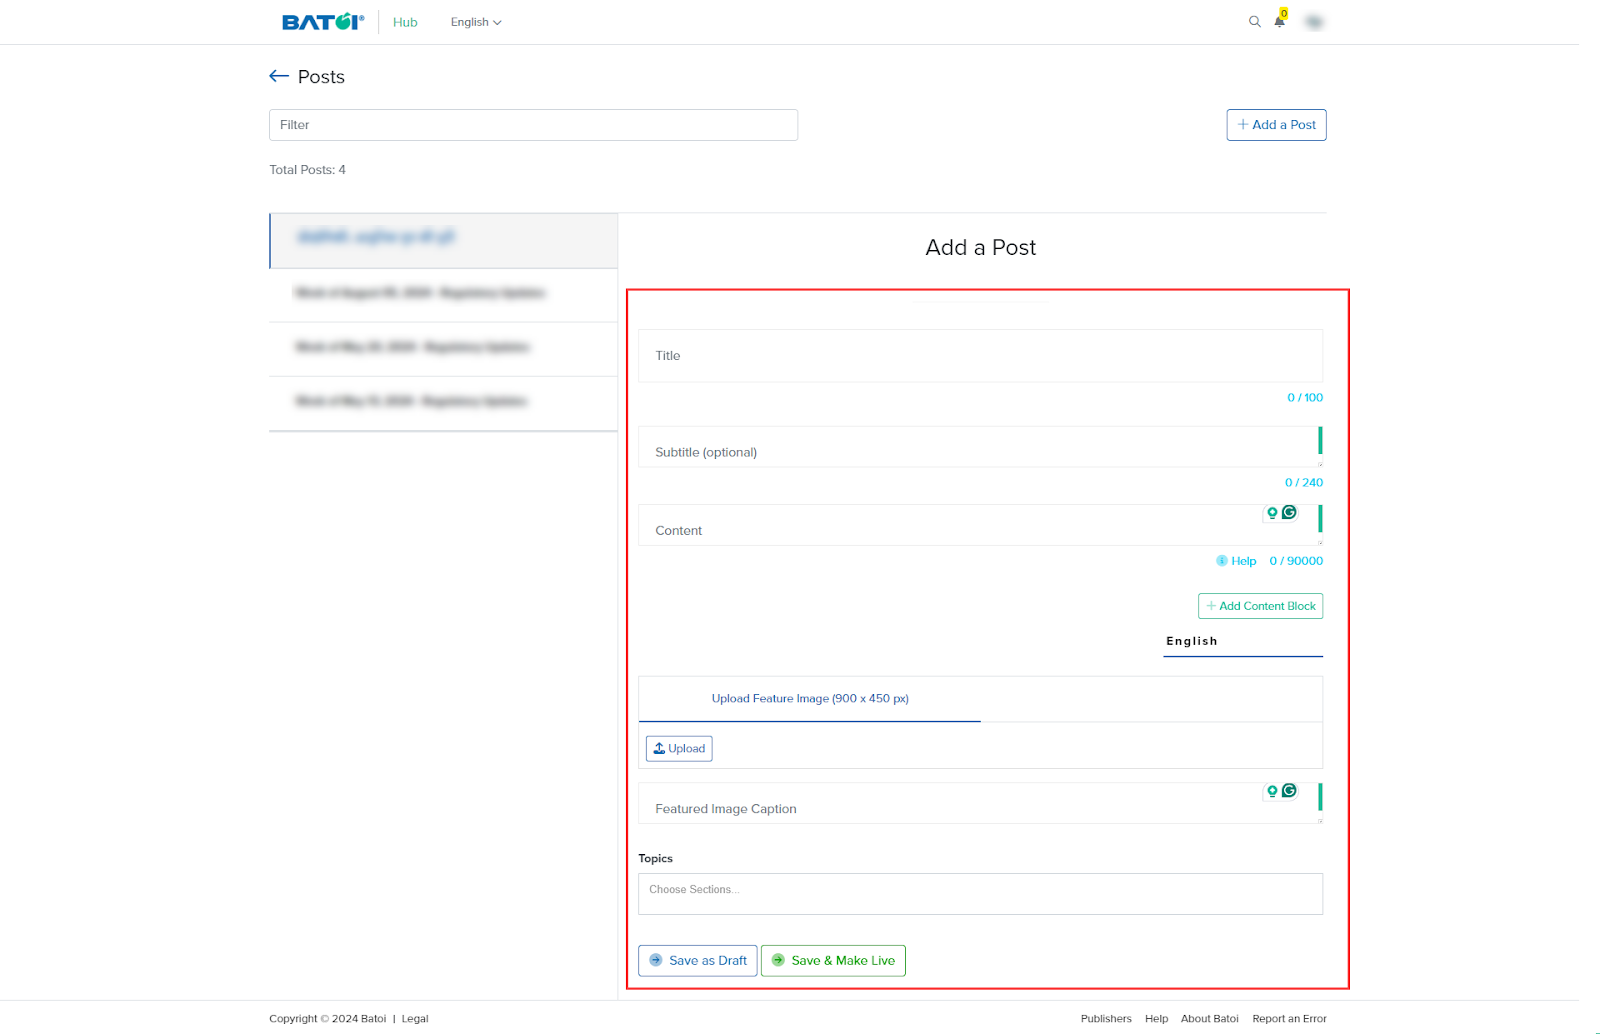
You will get the page, as illustrated in Figure 24.
A brief Information about each of the fields available on the page is as follows:
- Title: It is the title of your post.
- Subtitle: Here, you can provide additional context or details about the main title, offering more insight into the content. Writing a subtitle is optional and up to you.
- Content: It is the post content, including all the details and insights it covers. You can add more content boxes as needed.
- Feature Image: This is the primary visual element used to represent and attract attention to the post. The image format and size are mentioned.
- Topics: A topic is a short word that gives readers an idea of the post's topic.
- Save as Draft button: Click this button to save your post as a draft if you want to make any further changes later.
- Save & Make Live: You can directly save and make your post live.
When the content is made live, you can view the slug, as illustrated in Figure 25. After clicking the Save & Make Live button, you need to change the slug, if your post is in Odia or Hindi.
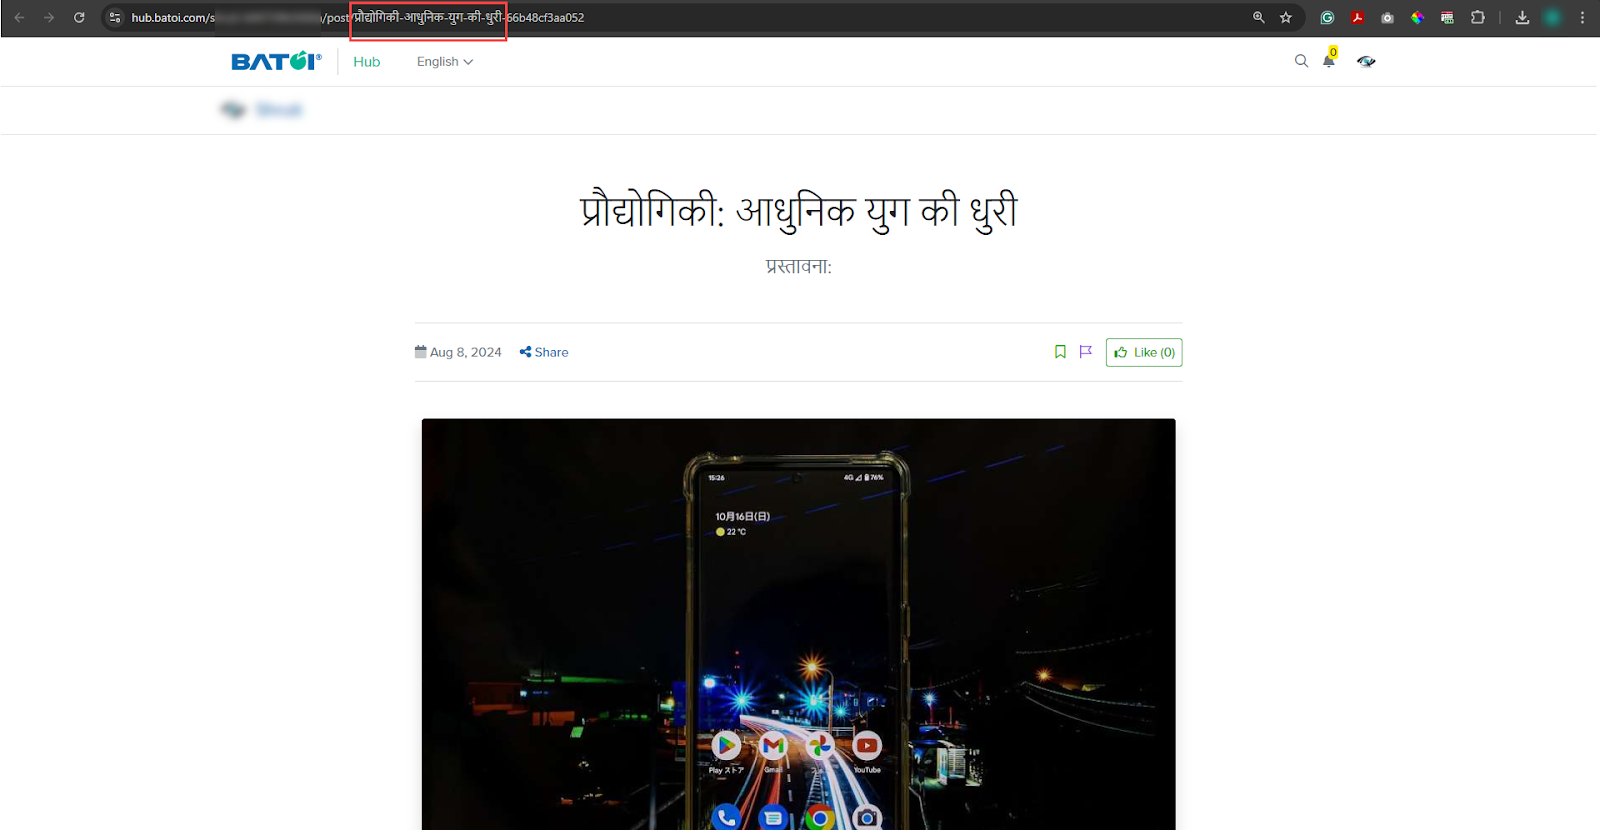
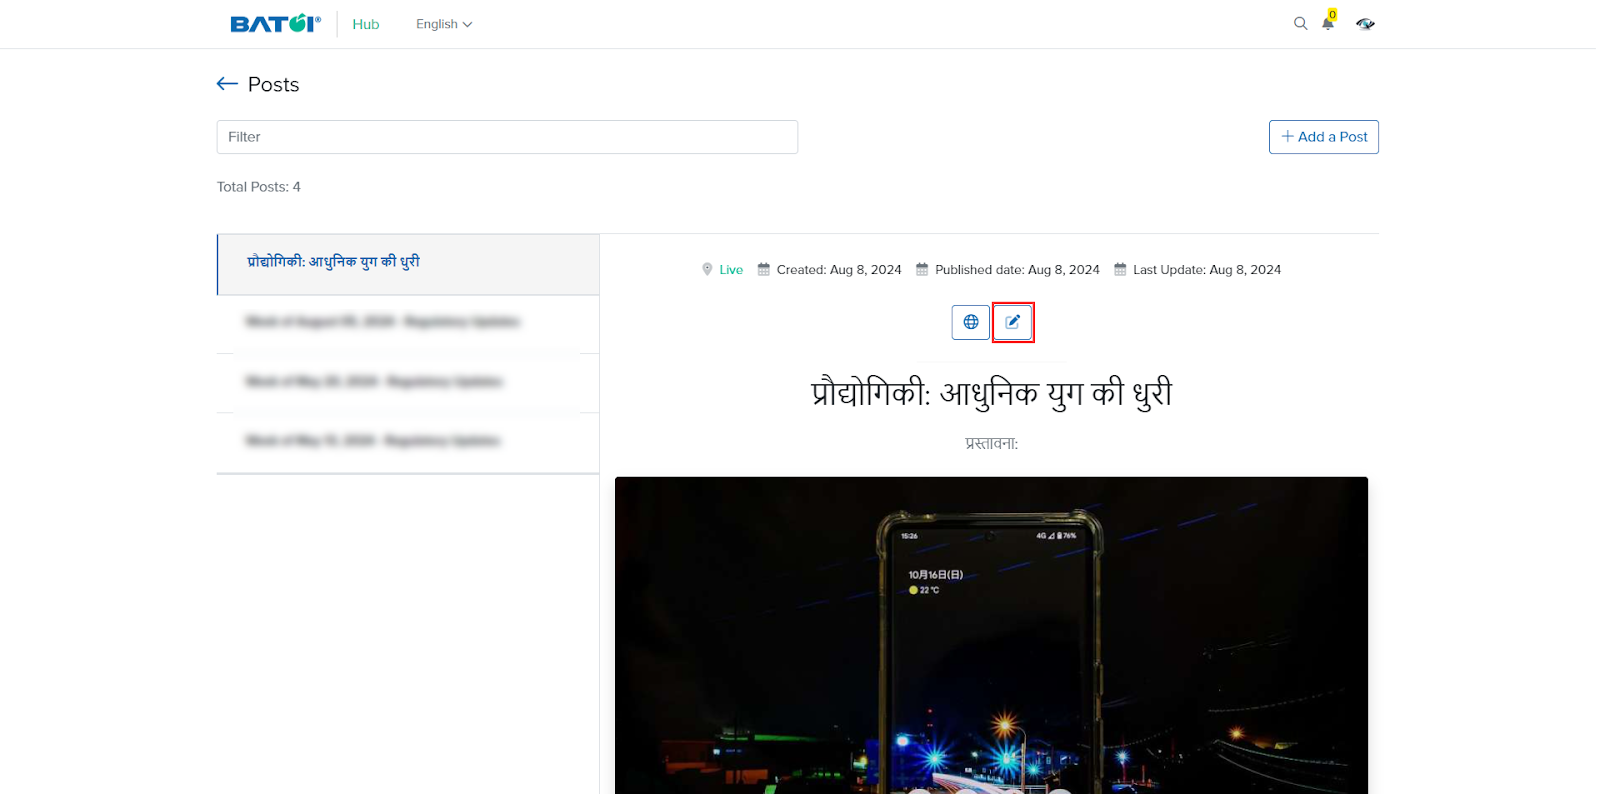
To change the slug, click the Edit button to edit the post, as illustrated in Figure 26.
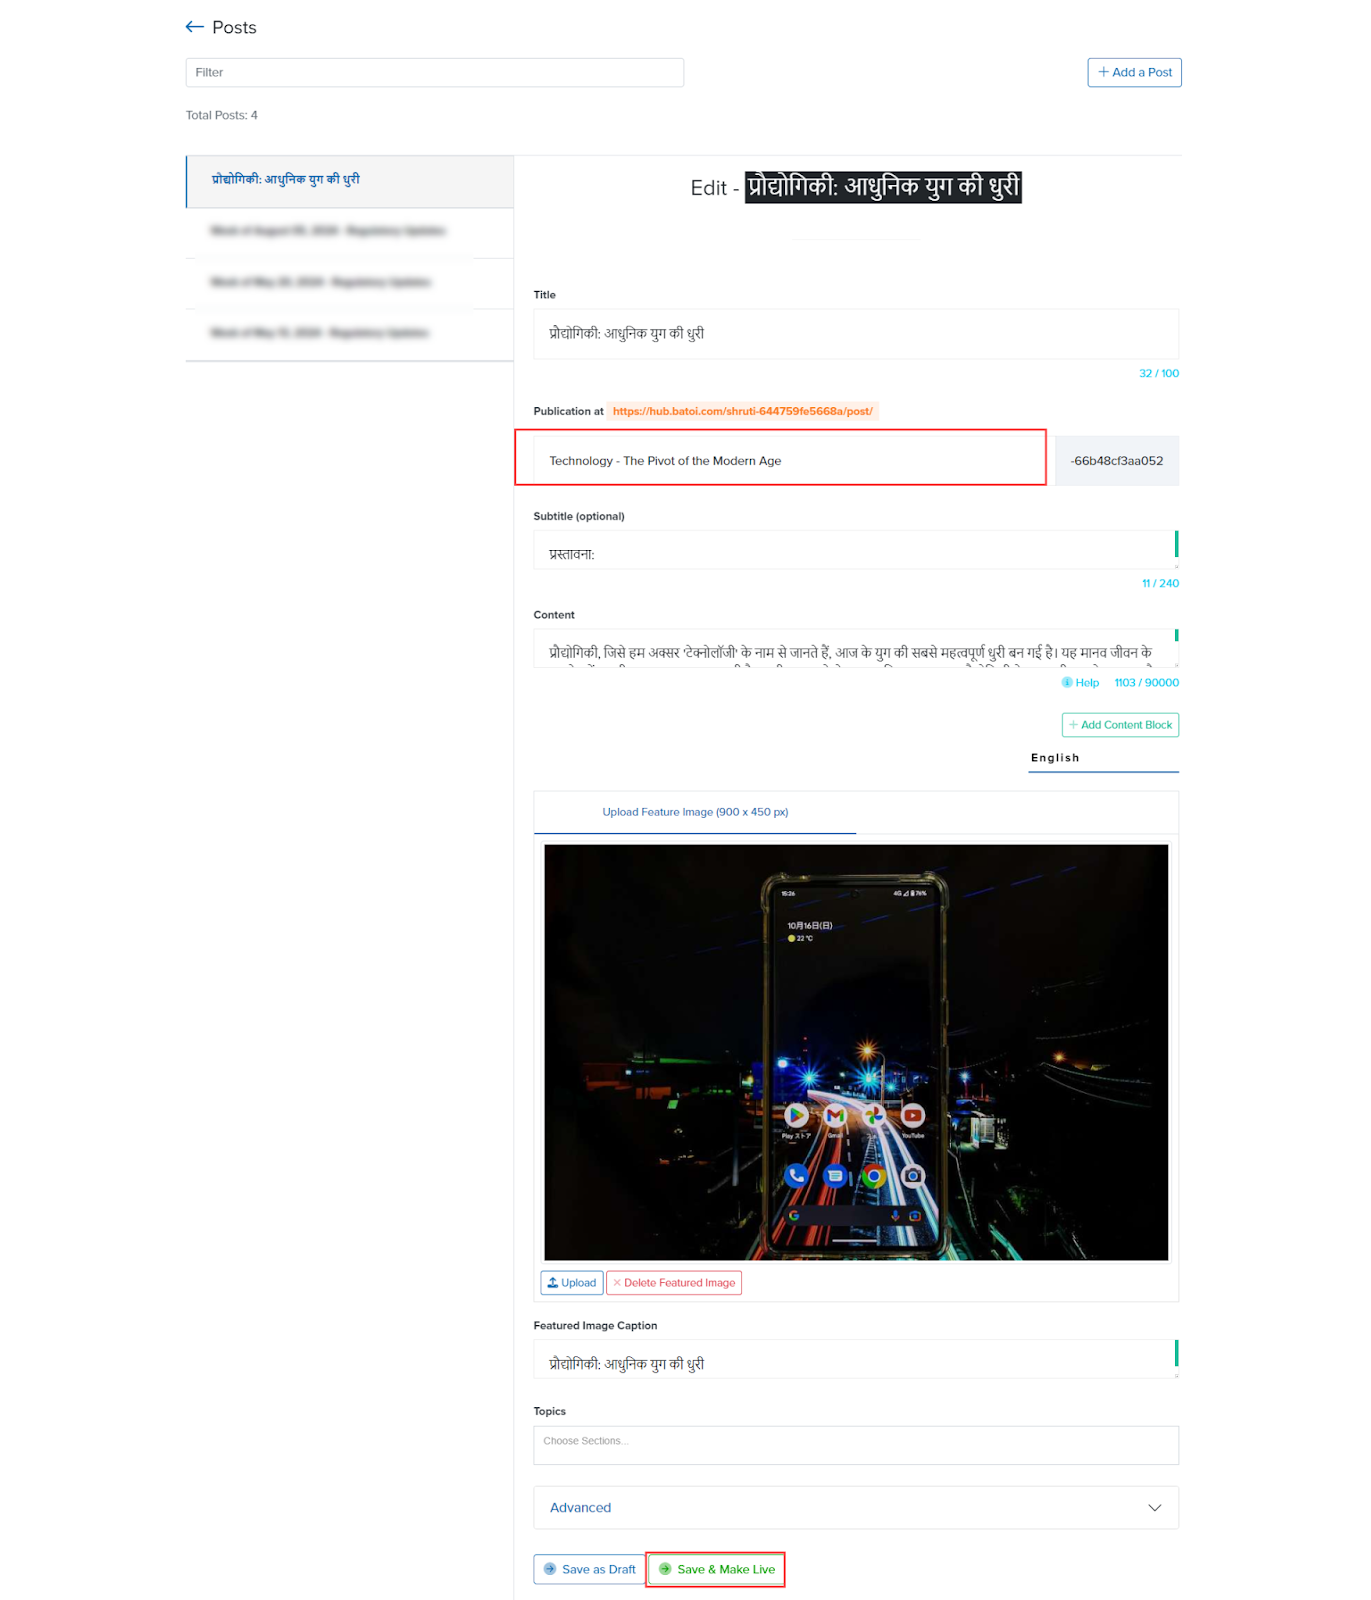
Edit the slug and click the Save & Make Live button, as illustrated in Figure 27.
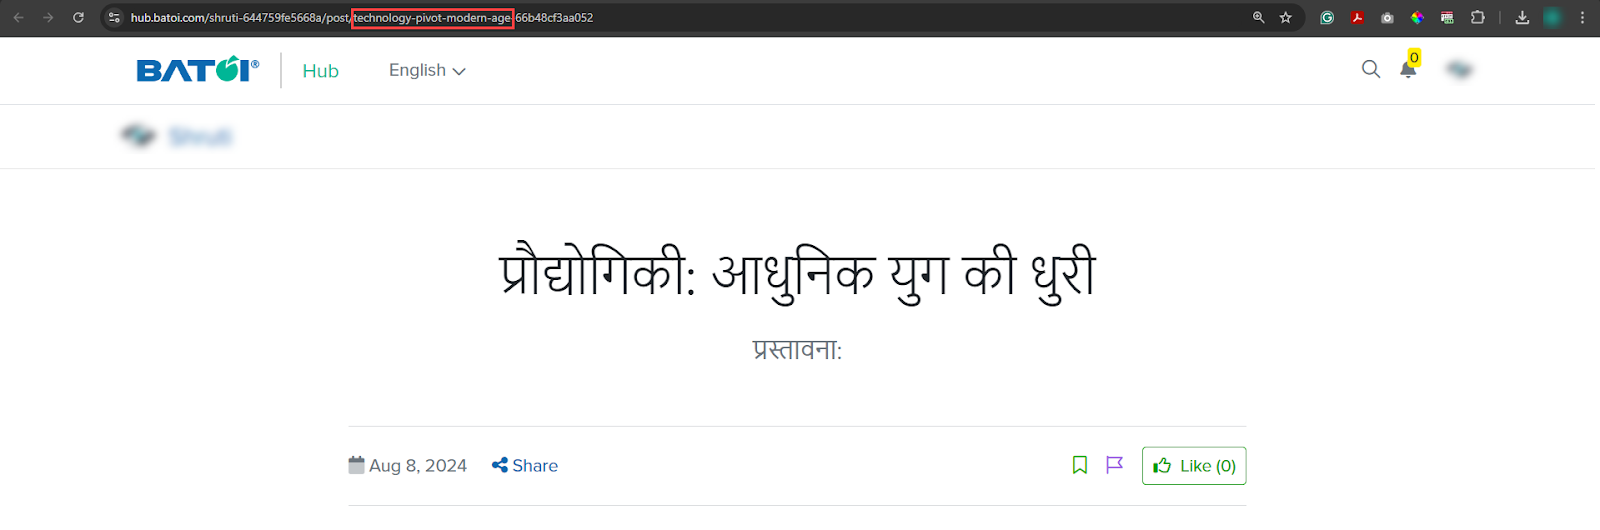
The changed slug URL can be viewed, as illustrated in Figure 28.
Respond to feedback from subscribers
Log in to your account.
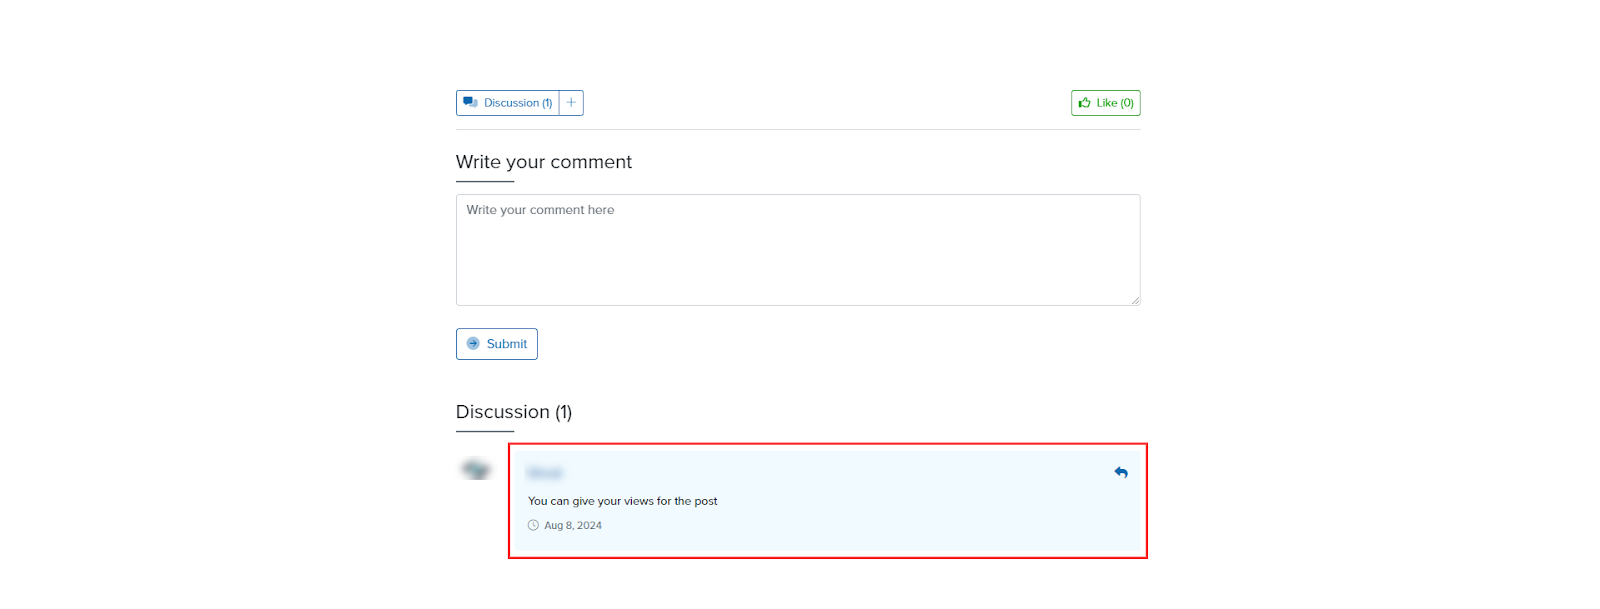
Go to the post you want to comment on. Click the Discussion button and write your comment. After writing the comment, click the Submit button, as illustrated in Figure 29.
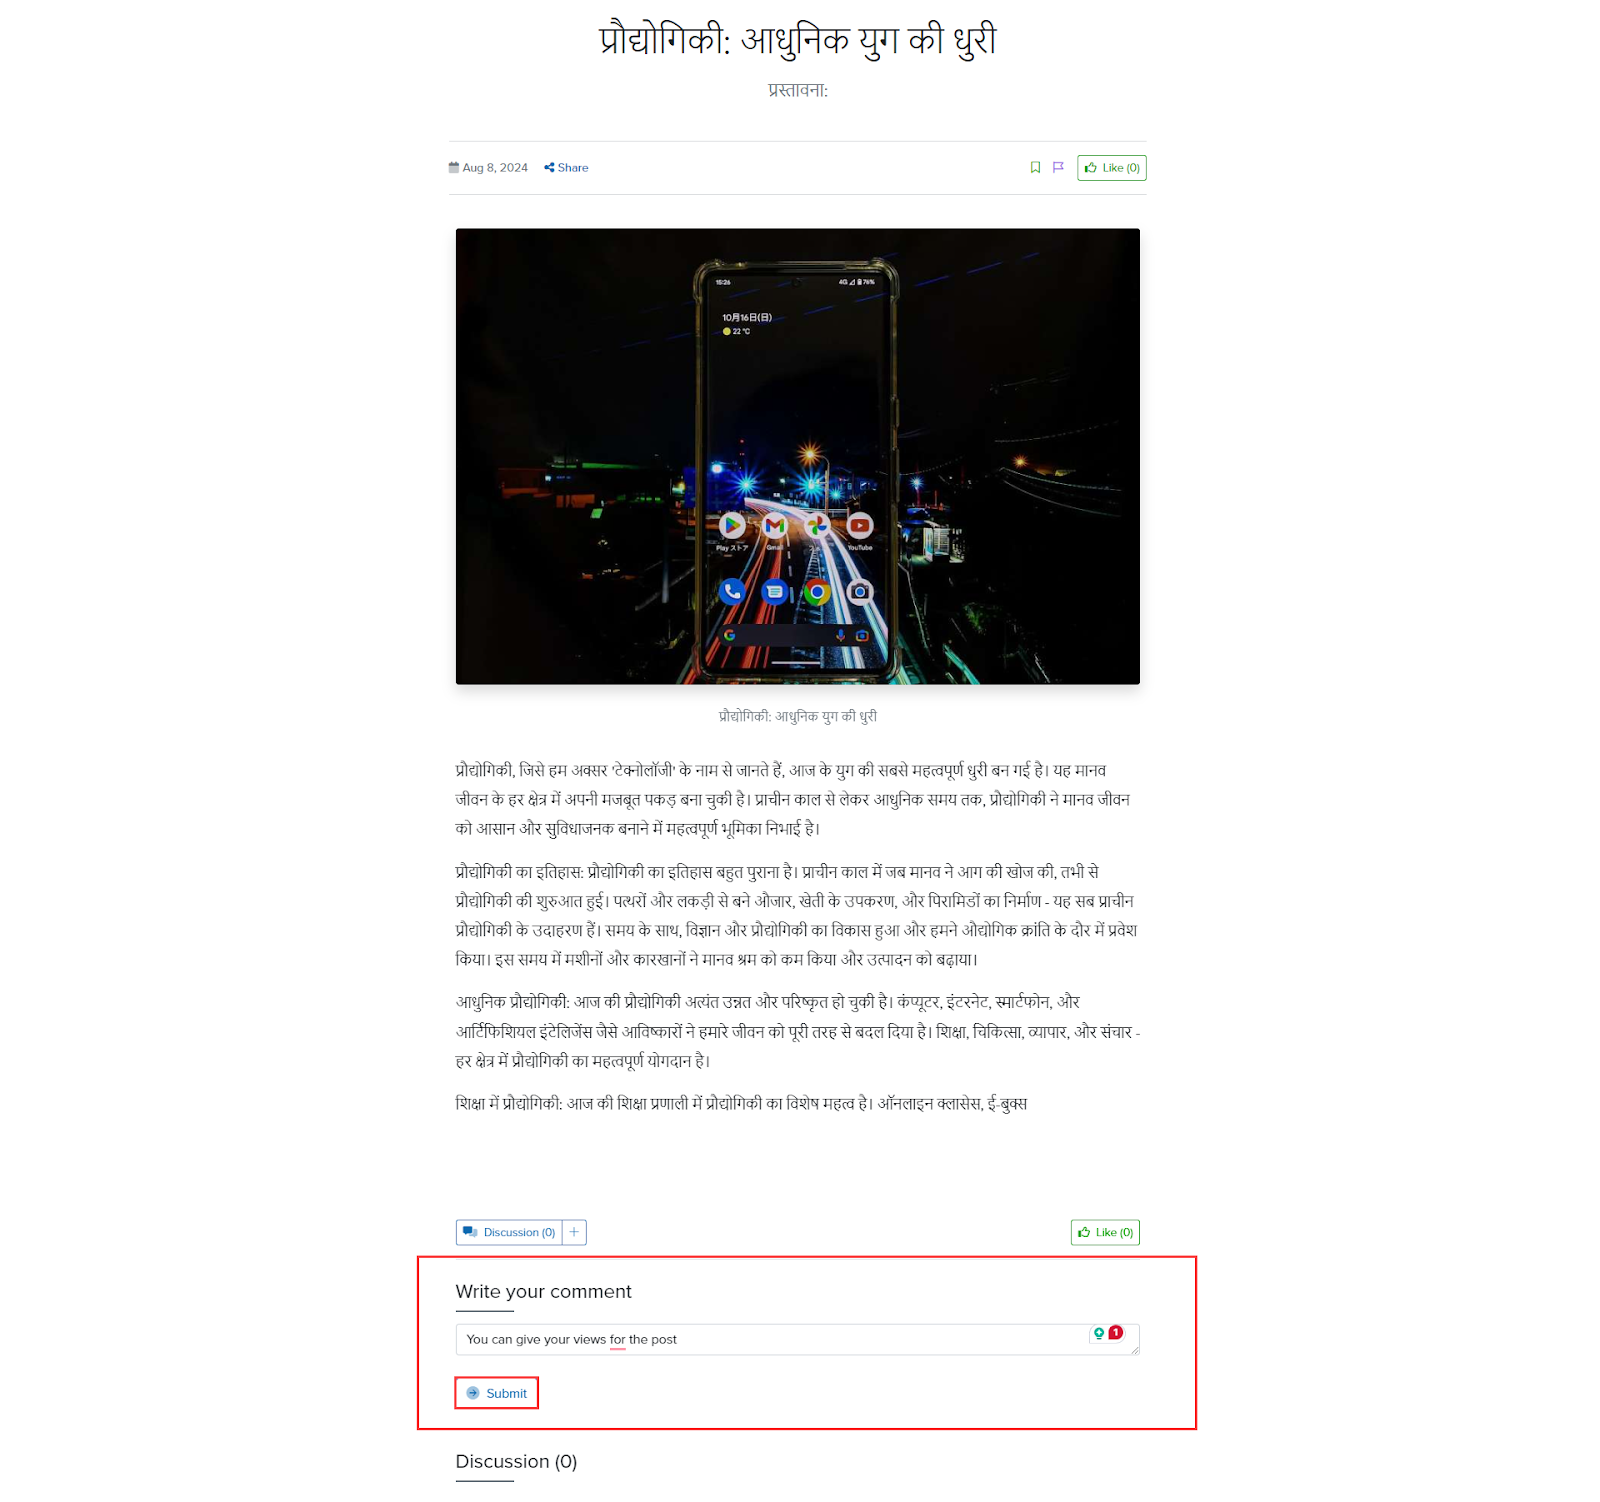
Now, you can view your comment, as illustrated in Figure 30.
Pricing Change / Subscription
Log in to your account.
to the settings, as illustrated in Figure 31.
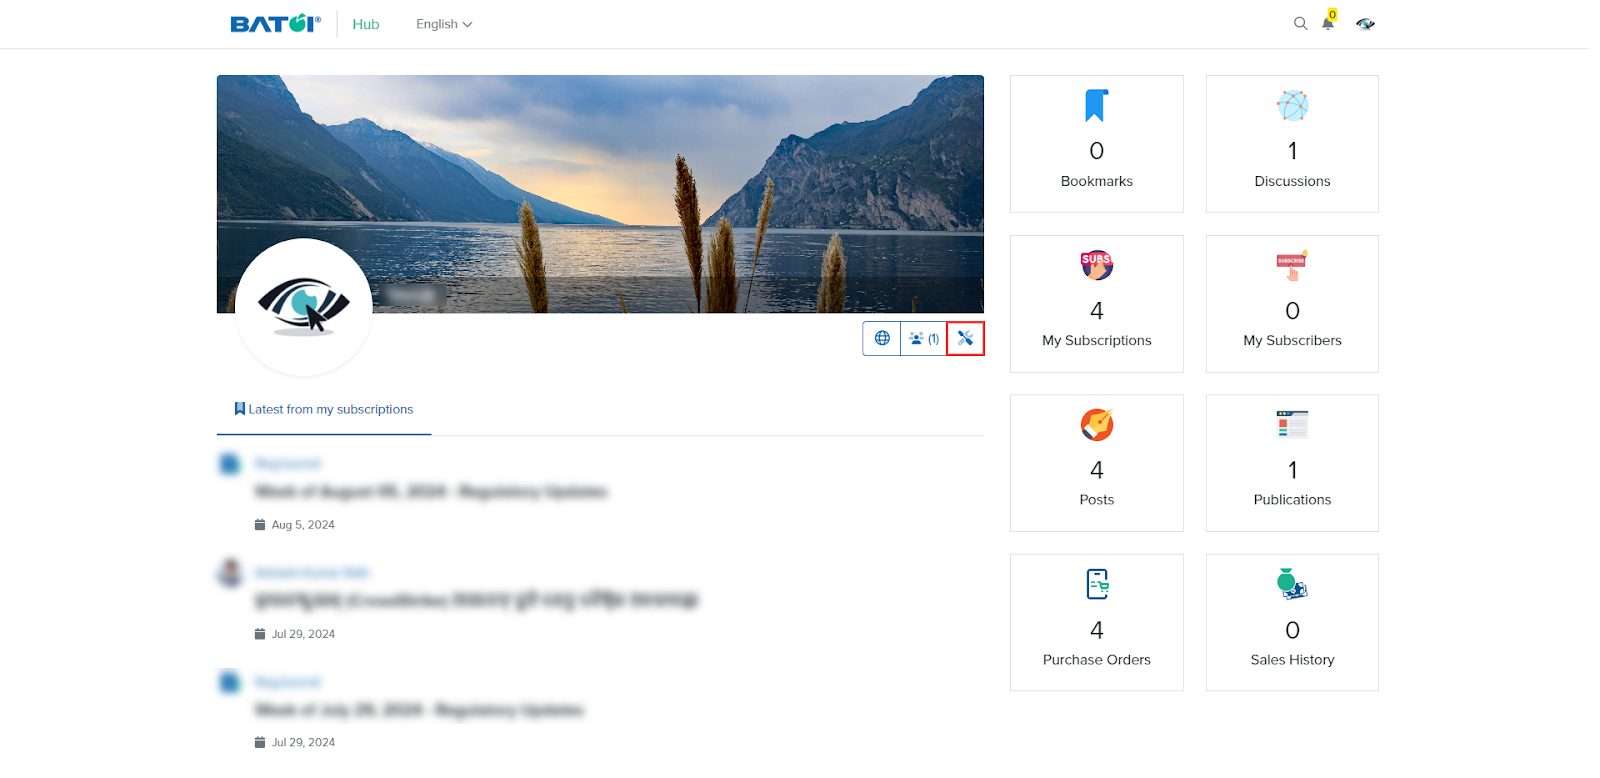
You will be directed to the Manage Personal Info page. Click the Basic Details menu. You will view the field Subscription Price. You can modify your subscription price and click the Submit button, as illustrated in Figure 32. The modified subscription amount will be shown to readers.
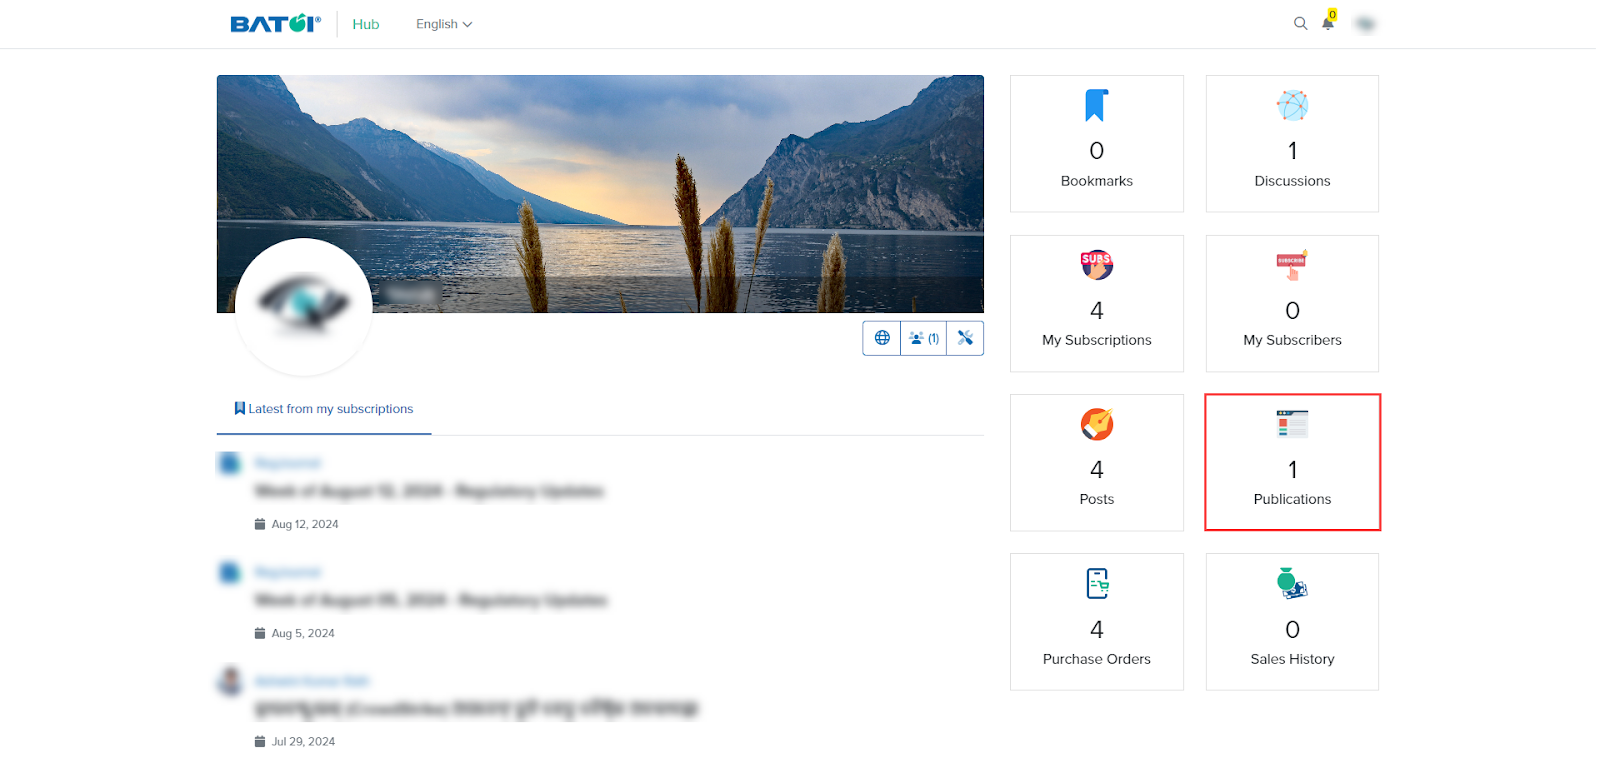
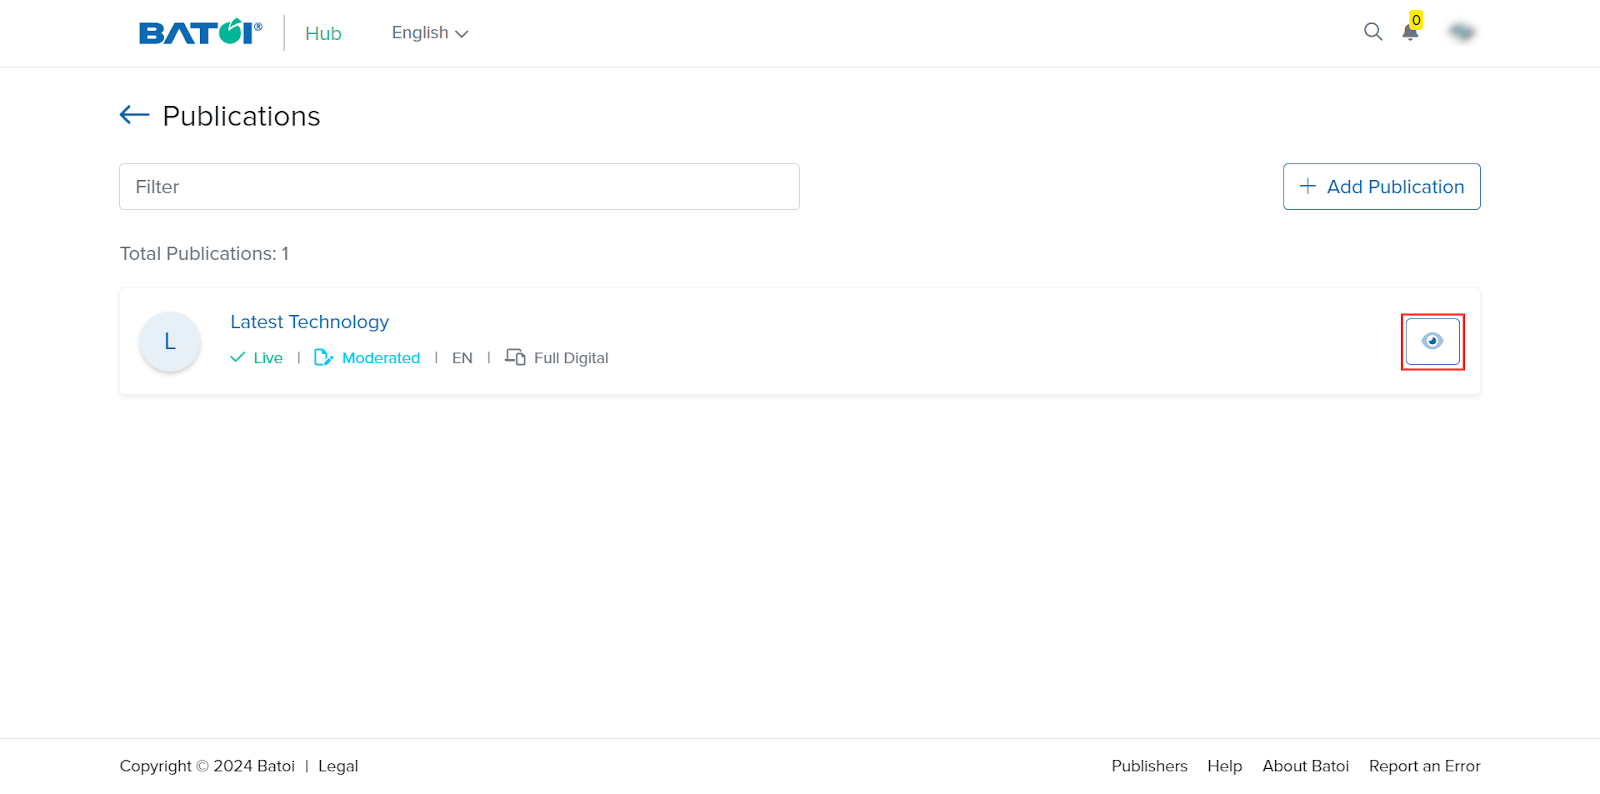
To manage the pricing of your books, click the Publications card, as illustrated in Figure 33.
Now, click the View button, as illustrated in Figure 34.
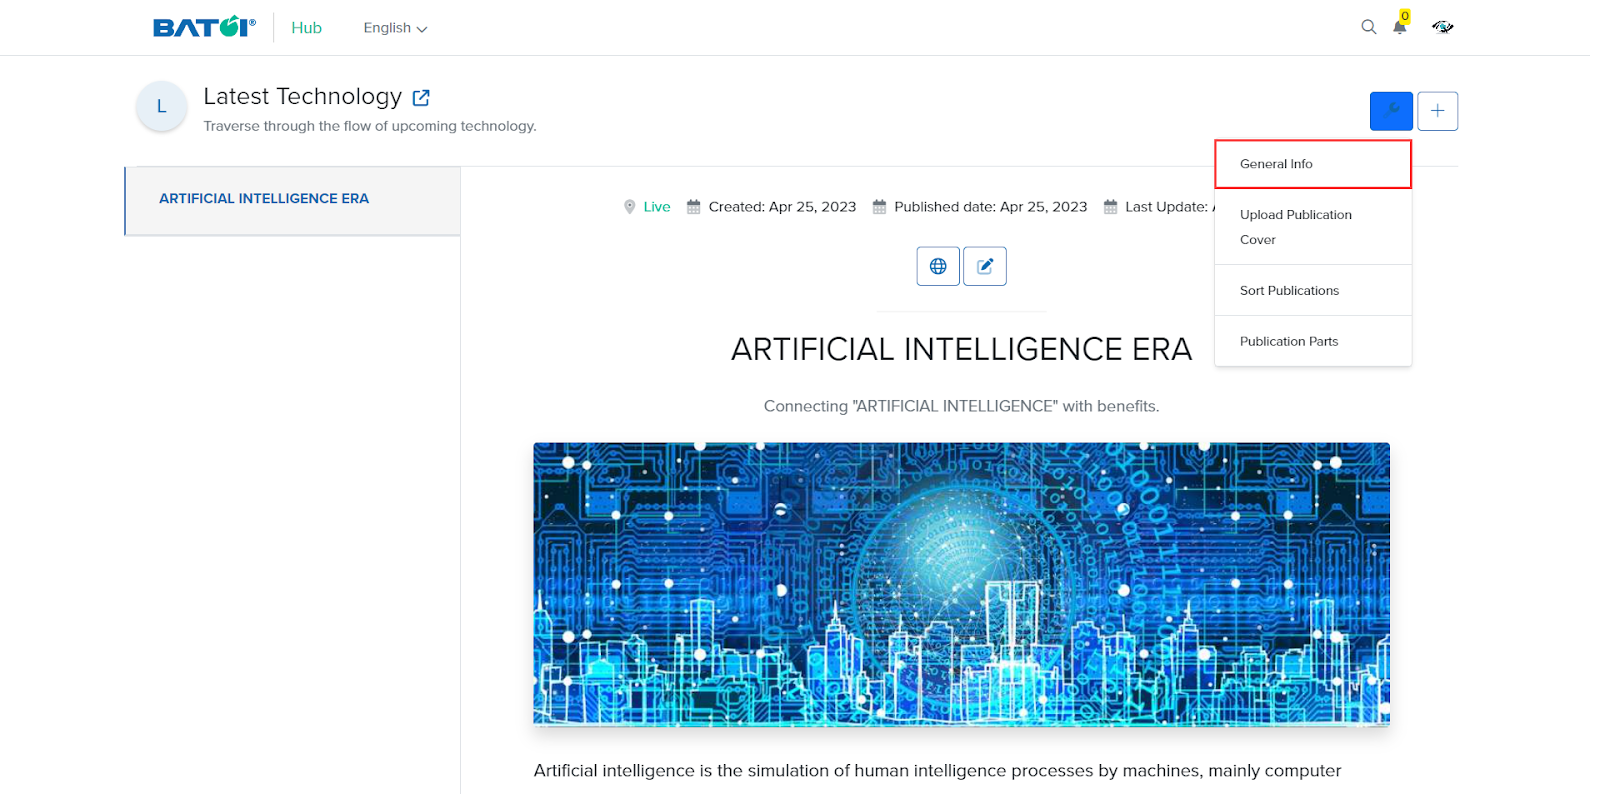
Now, click the Settings button, as illustrated in Figure 35.

Go to the General Info, as illustrated in Figure 36.
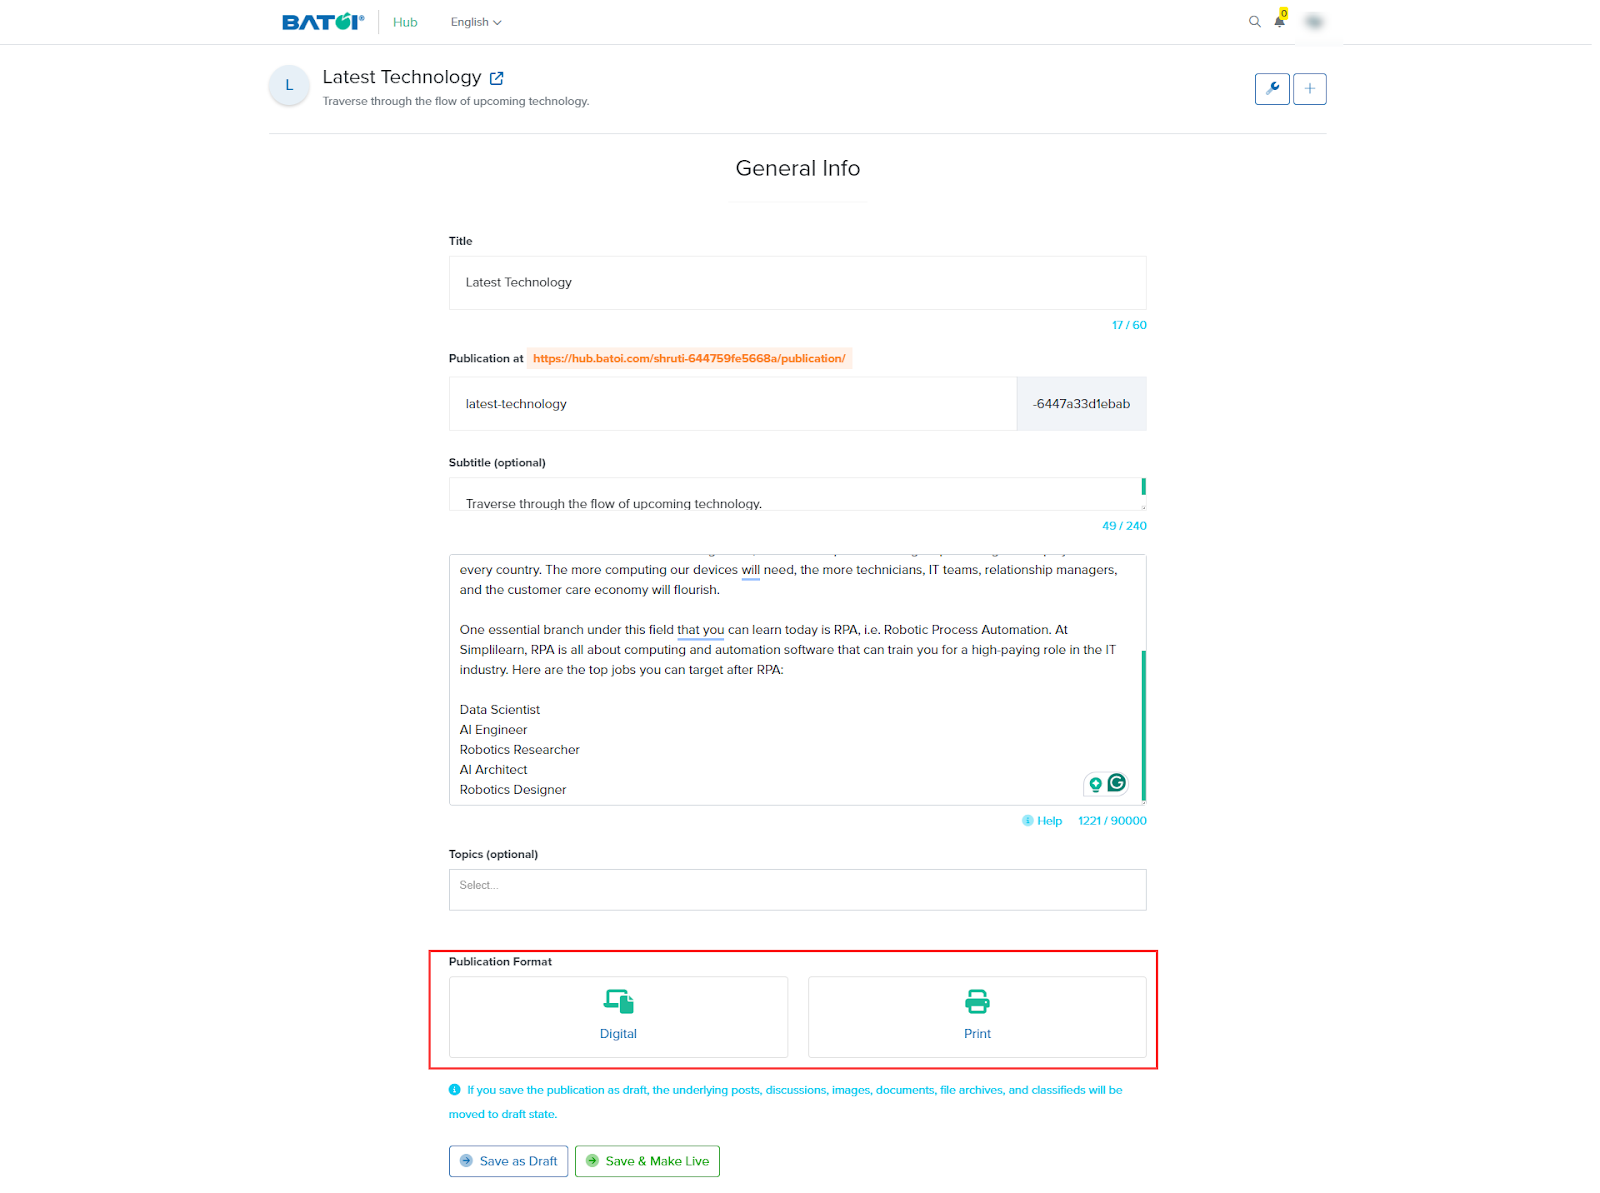
Scrolling down, you will see two publication types available, Digital and Print, as illustrated in Figure 37.
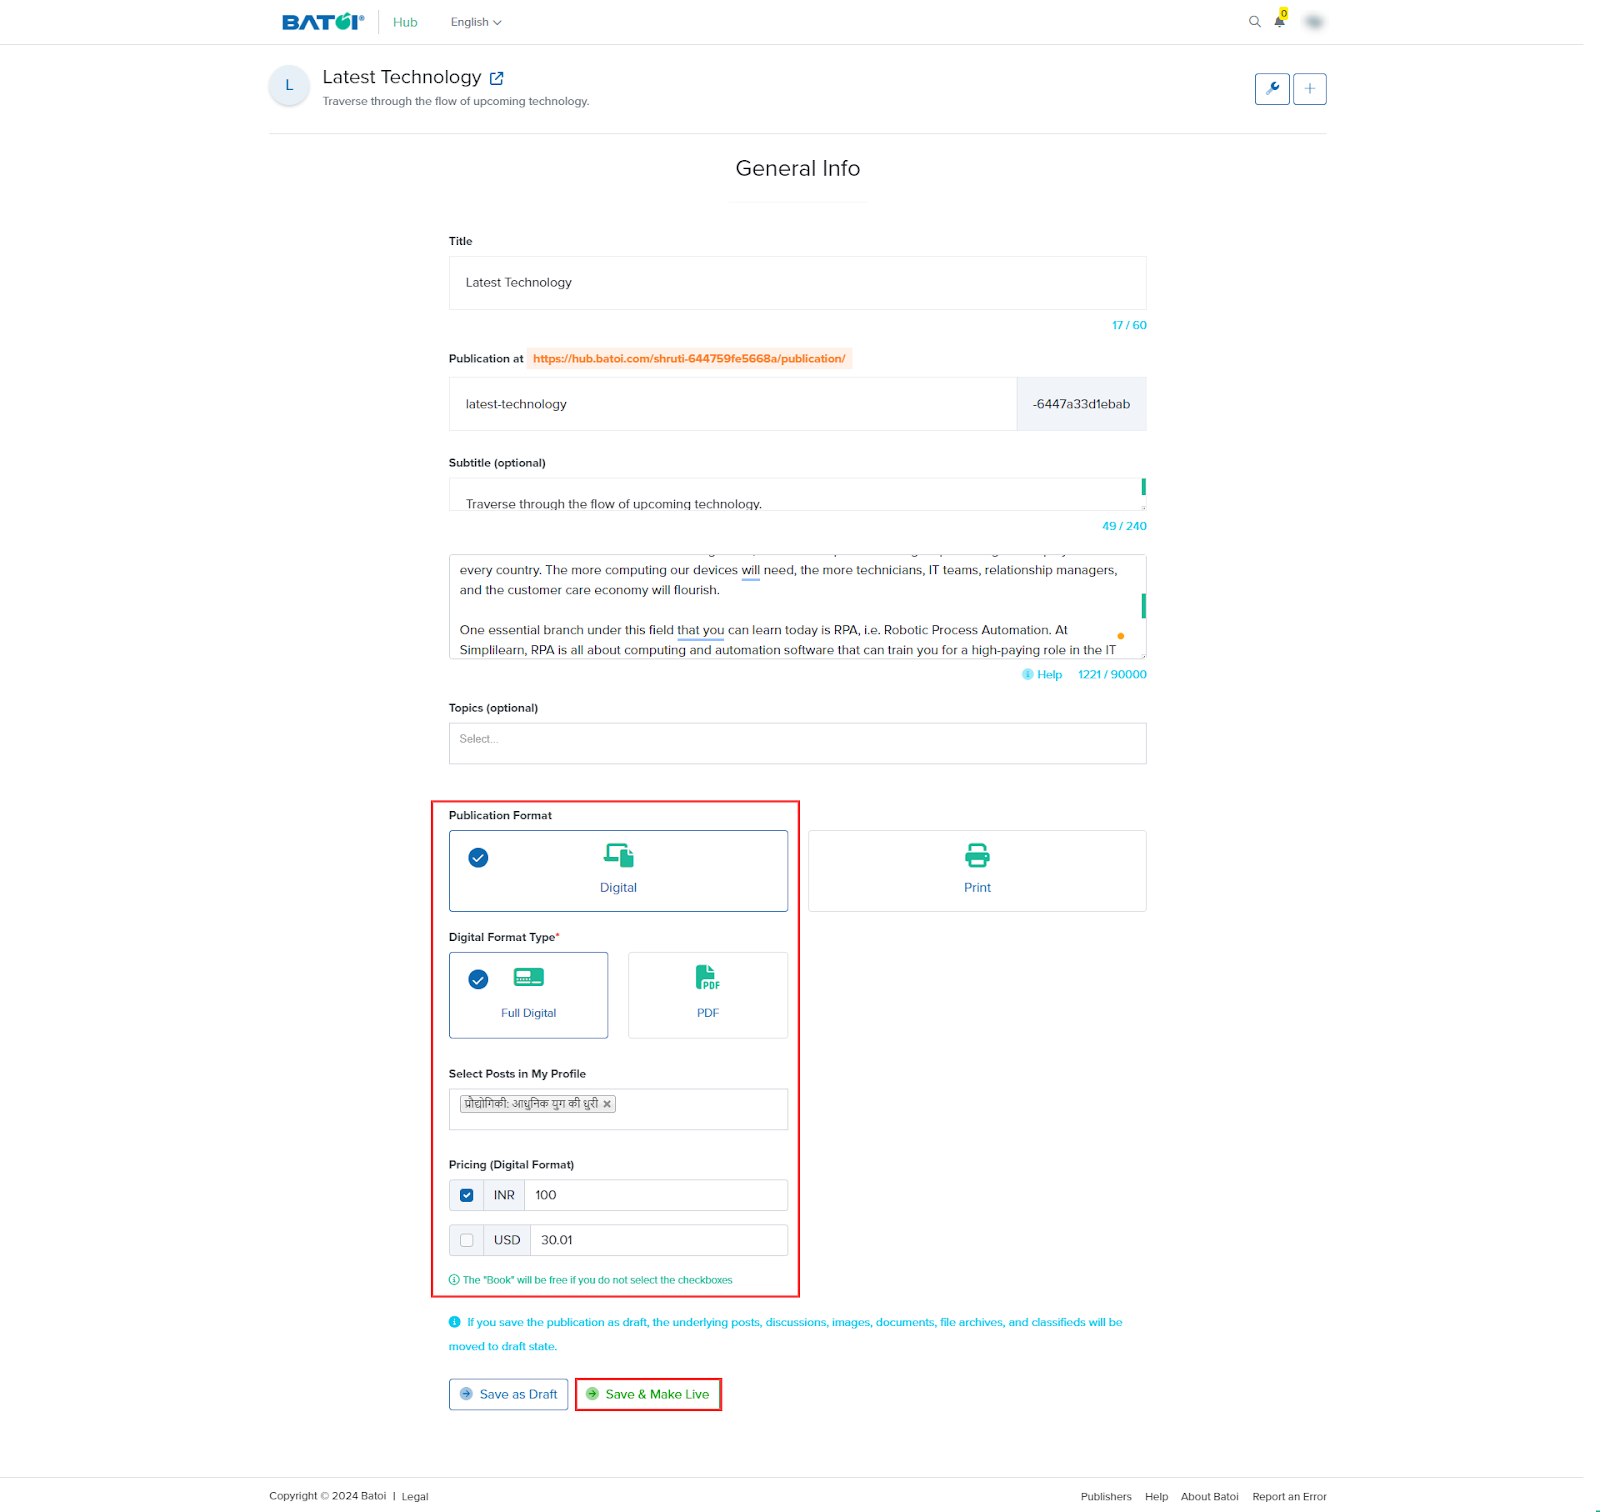
If you want to publish in Digital format, you can choose the Digital Format Type as Full Digital or PDF. Click Full Digital and choose the post in your profile that you want to be in full digital format. Enter the price you want to keep. Click the Save & Make Live button, as illustrated in Figure 38. These will be visible to your readers.
Now click PDF format. Attach the PDF file for your book, enter the price, and click the Save & Make Live button, as illustrated in Figure 39. Your readers can also download the book in PDF format.

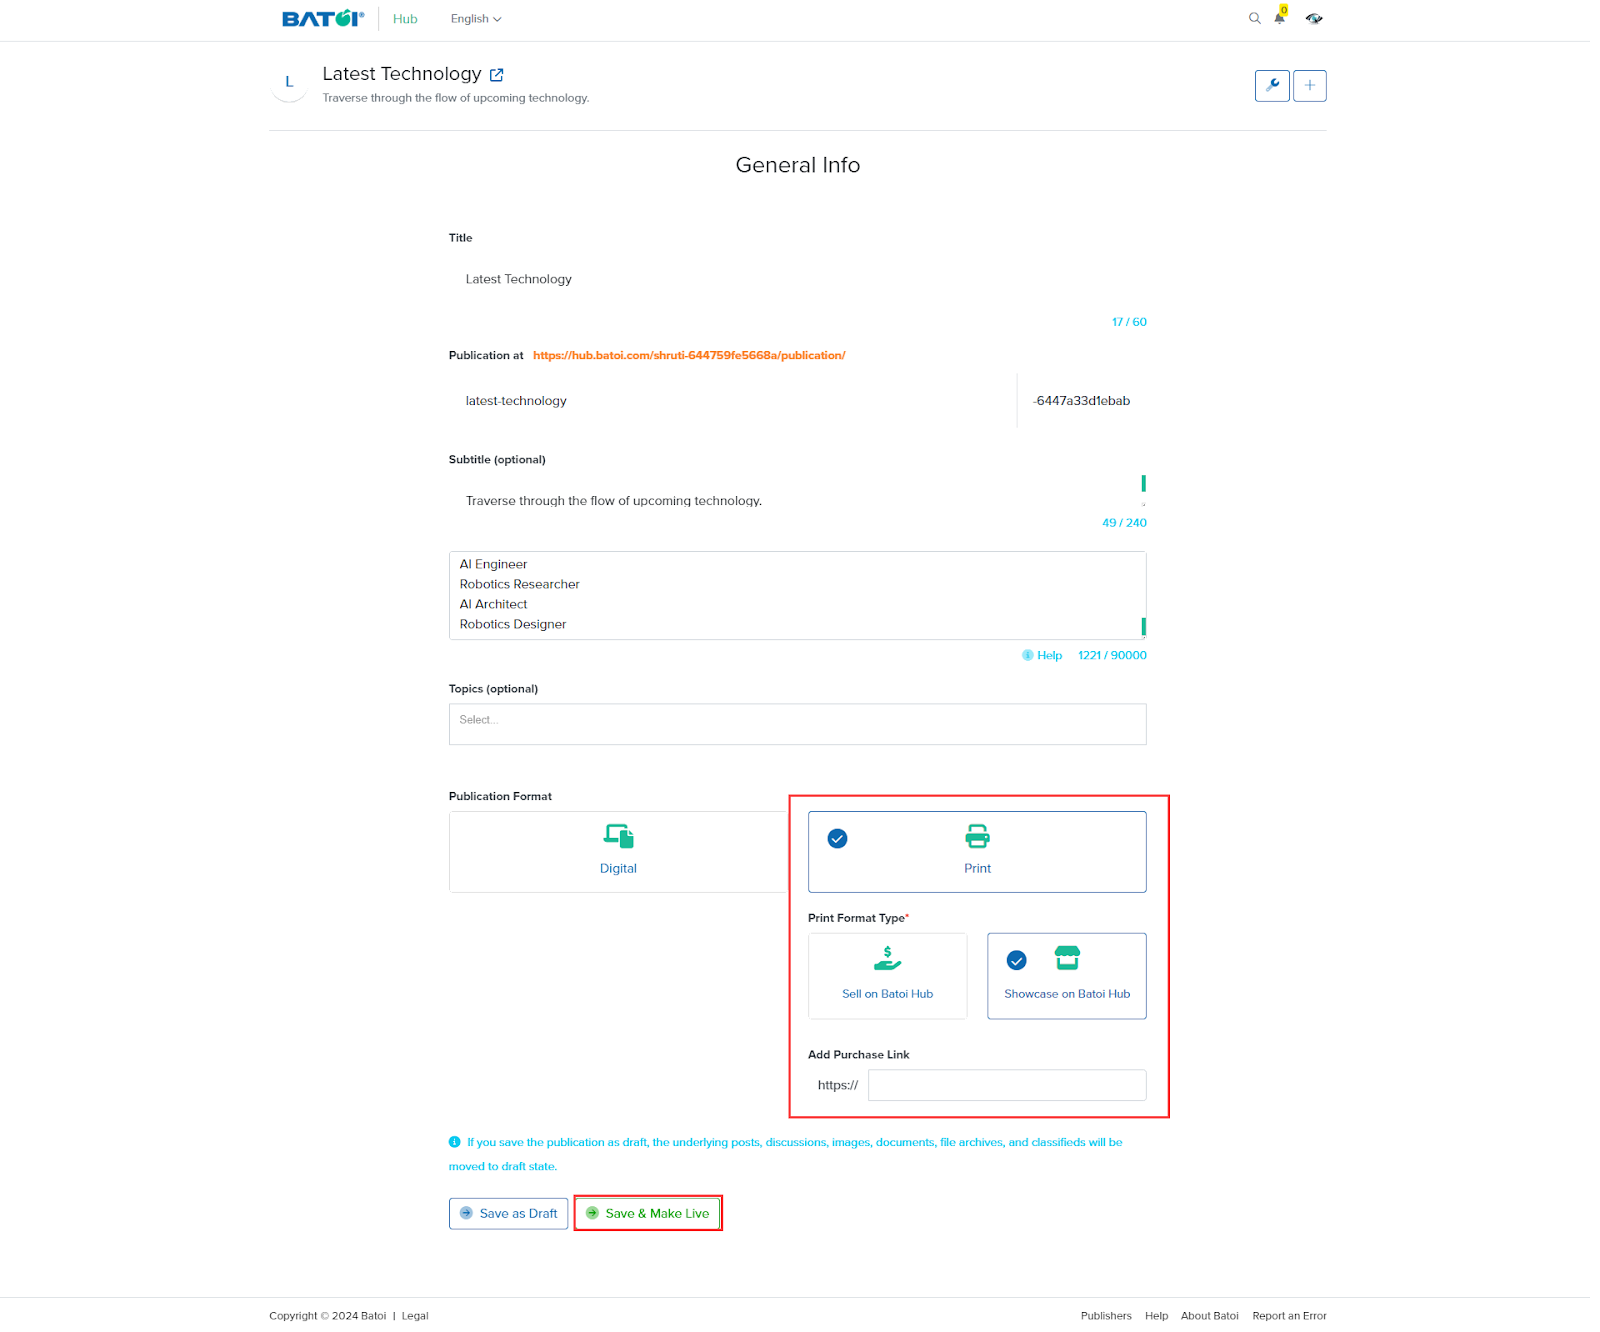
Select the Print format and click Sell on Batoi Hub. This feature helps you sell your book on Batoi Hub in print format. Enter the price and click the Save & Make Live button, as illustrated in Figure 40.

Now click Showcase on Batoi Hub. Here, you can add a link to the e-commerce website where readers can buy the books. After adding the Add Purchase Link, click the Save & Make Live button, as illustrated in Figure 41. Readers can then click the link and buy the books through the e-commerce website.
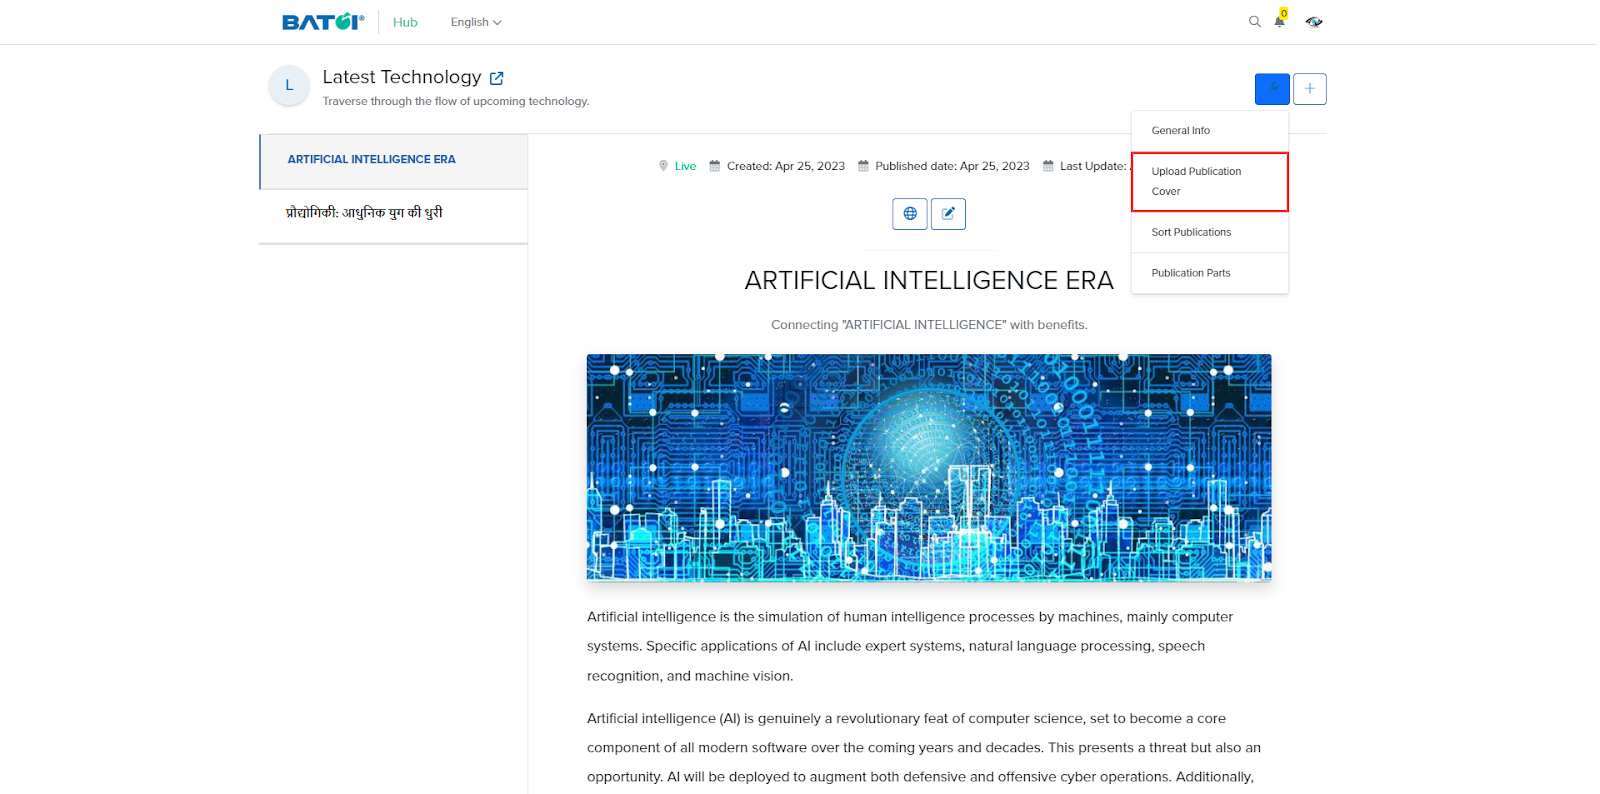
Now click the Upload Publication Cover, as illustrated in Figure 42.
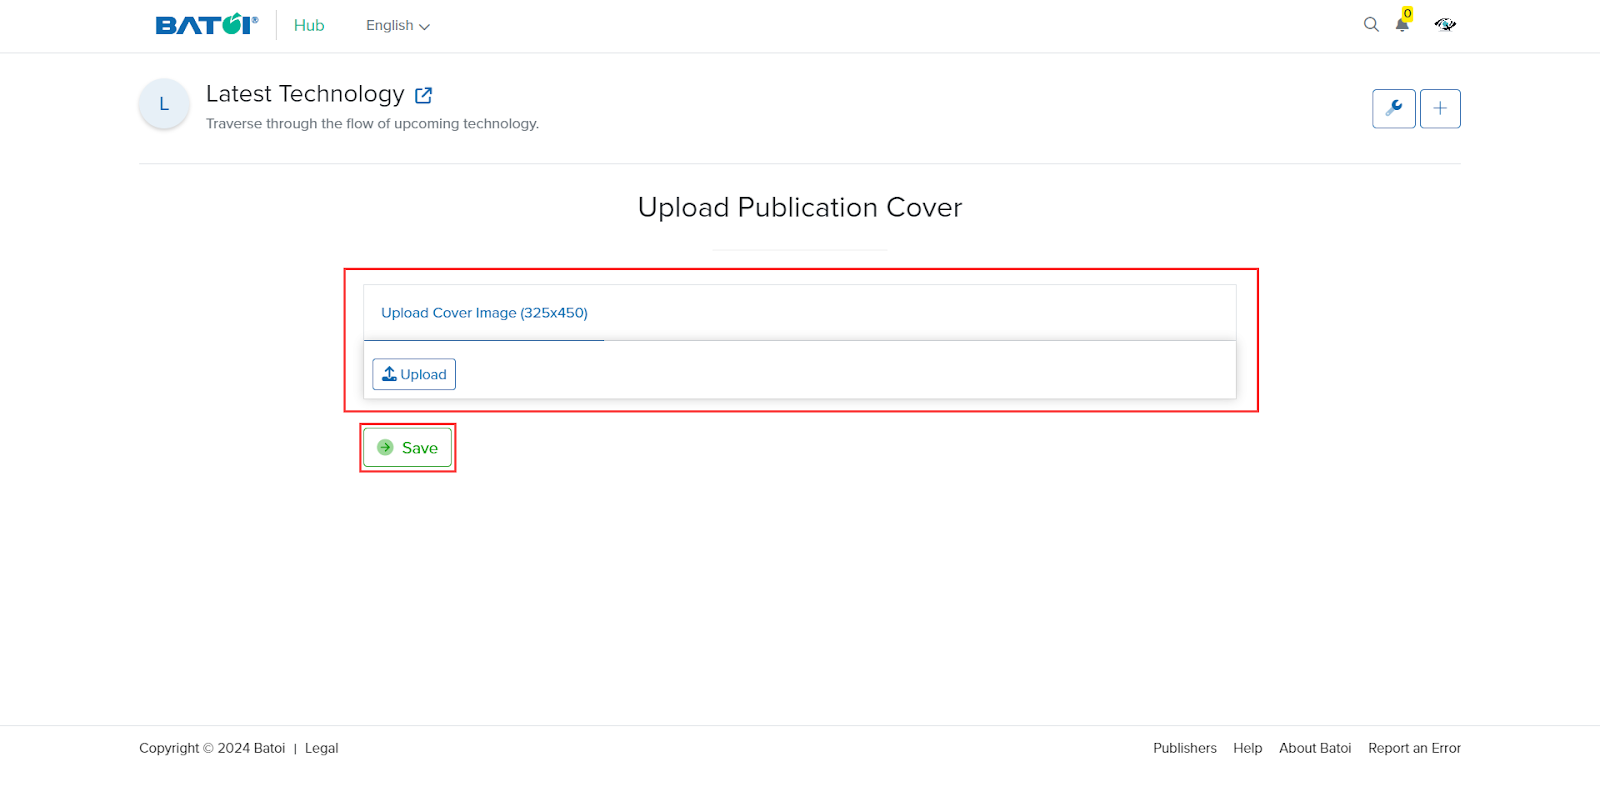
On clicking Upload Publication Cover, you can upload the book's cover image or publication. Now click the Save button, as illustrated in Figure 43. Readers can view this cover image.
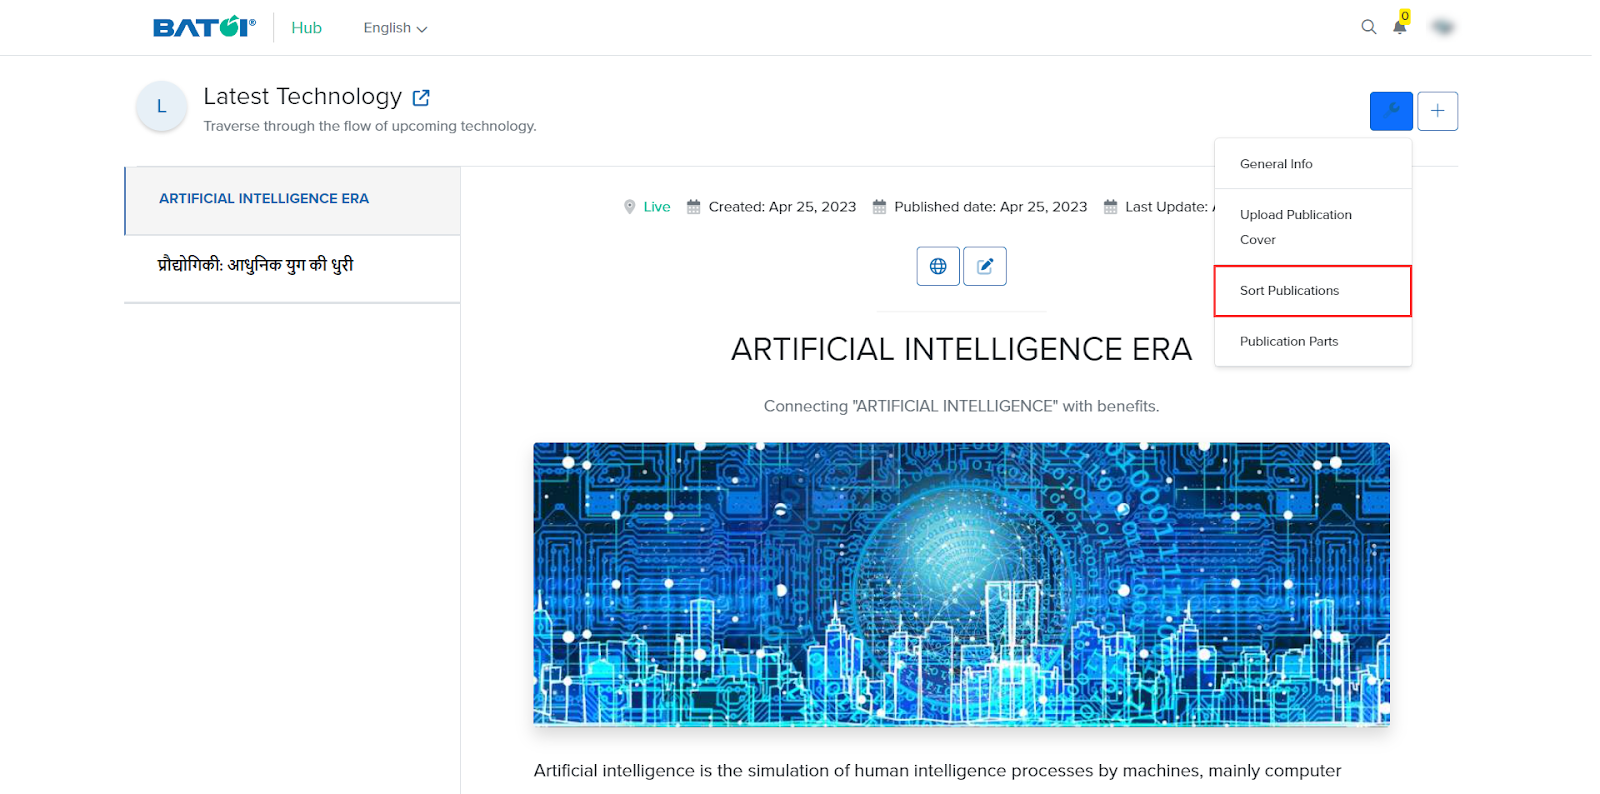
Now, click the Sort Publications menu, as illustrated in Figure 44.
A page will open where you can drag and drop the items, and it will auto-save the order, as illustrated in Figure 45.

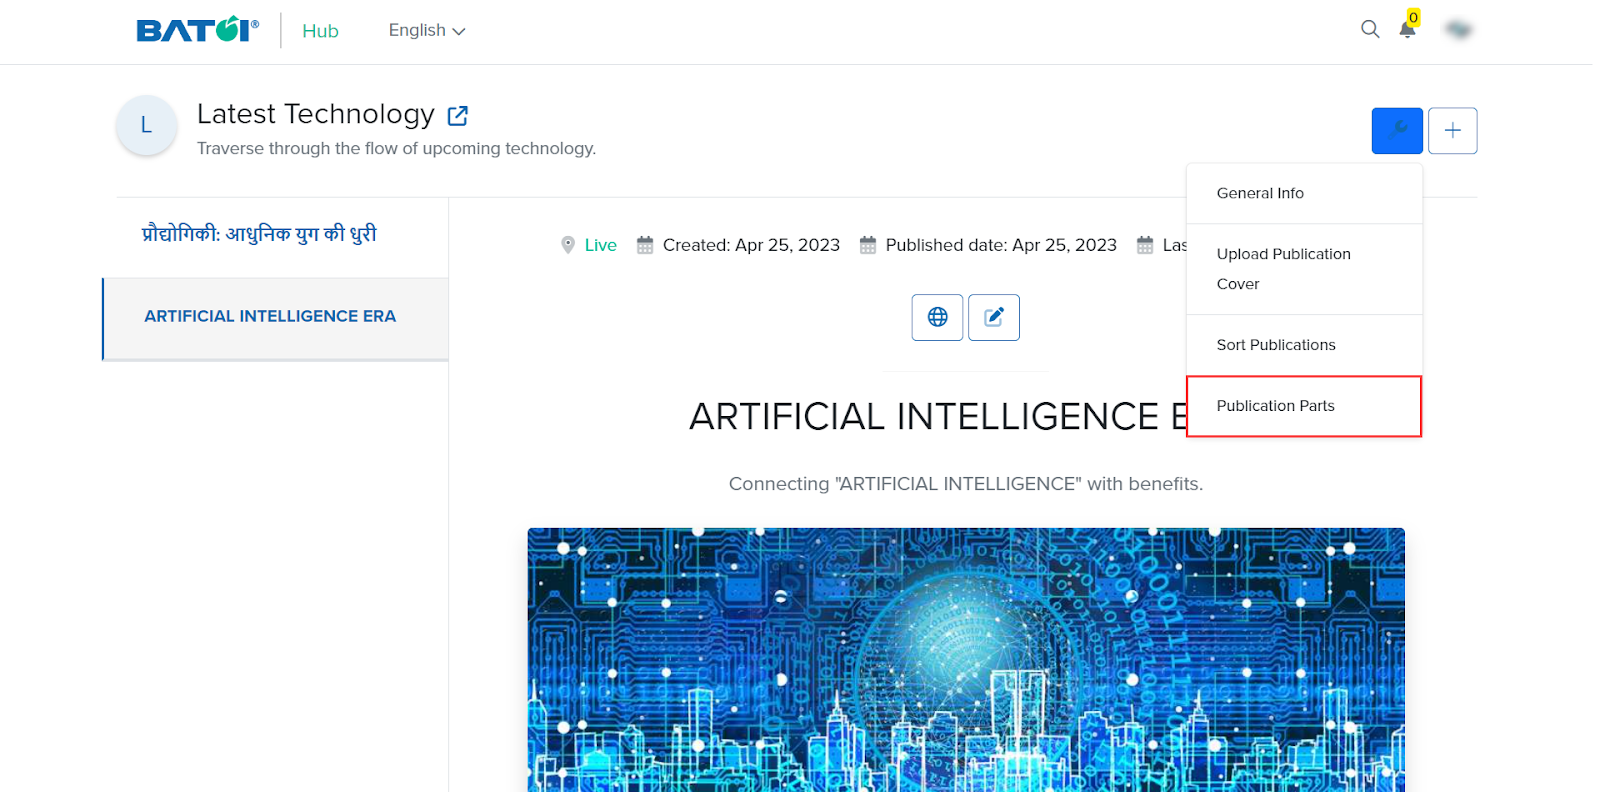
Click the Publication Parts menu, as illustrated in Figure 46.
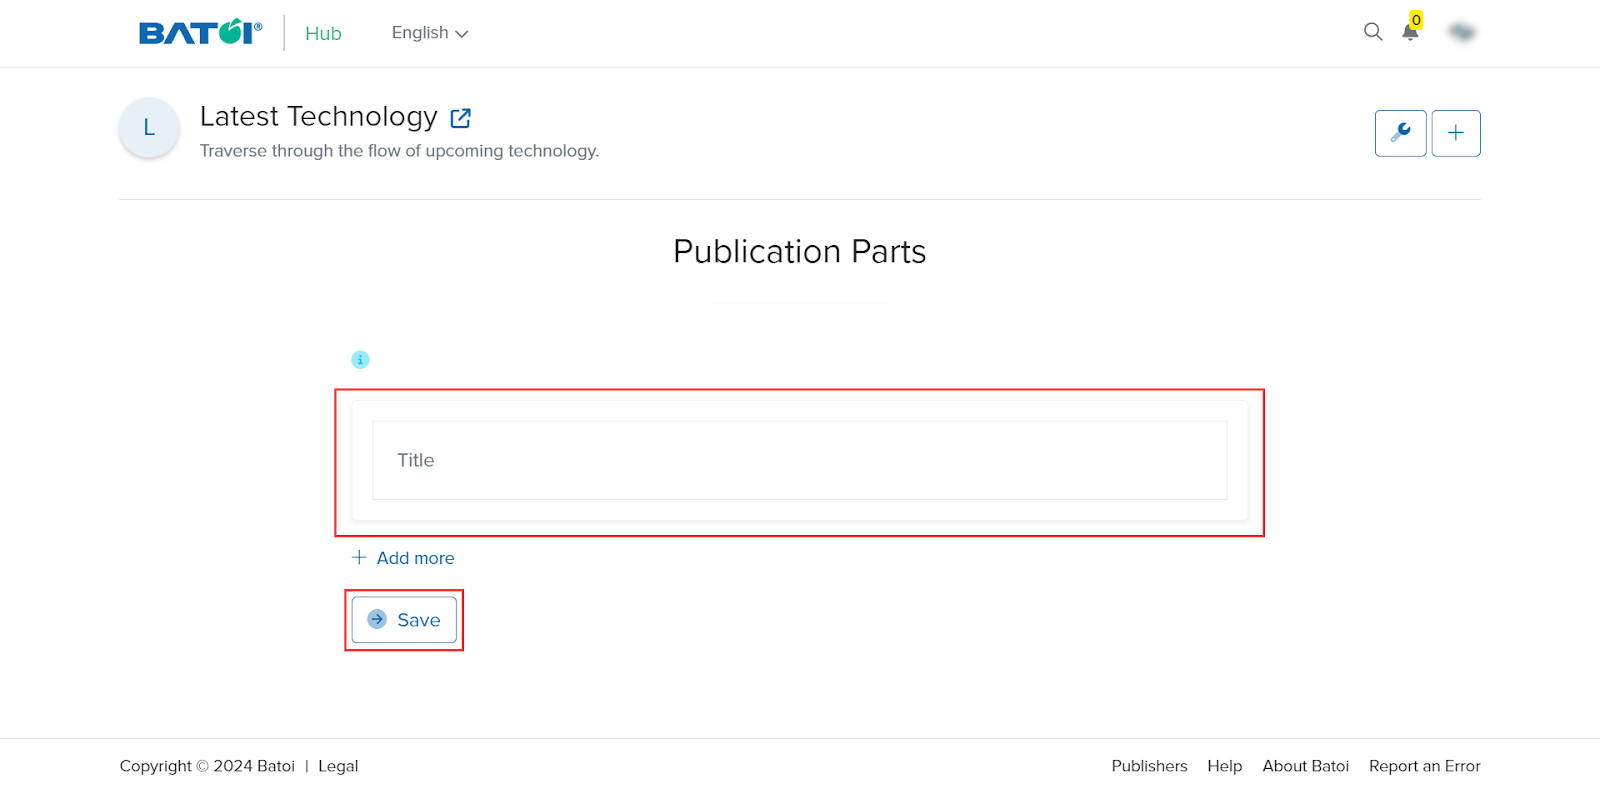
After doing so, you will get a page showing publication parts. Here, you can add publications in parts. After adding publications in parts, click the Save button, as illustrated in Figure 47. Readers can read the publication in parts.
View payments from subscribers
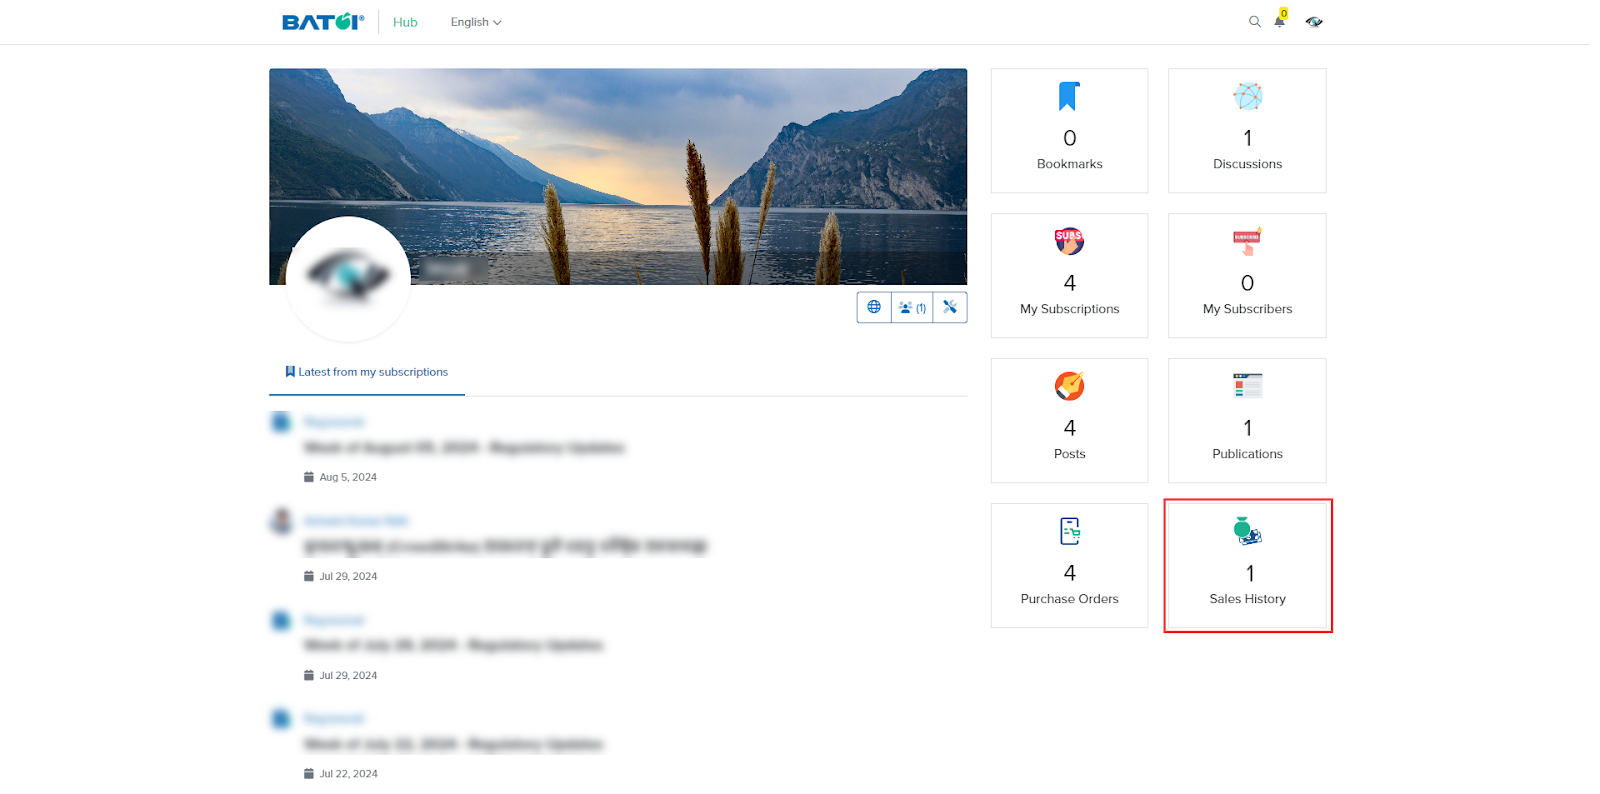
To view payment details from subscribers, click the Sales History card, as illustrated in Figure 48.
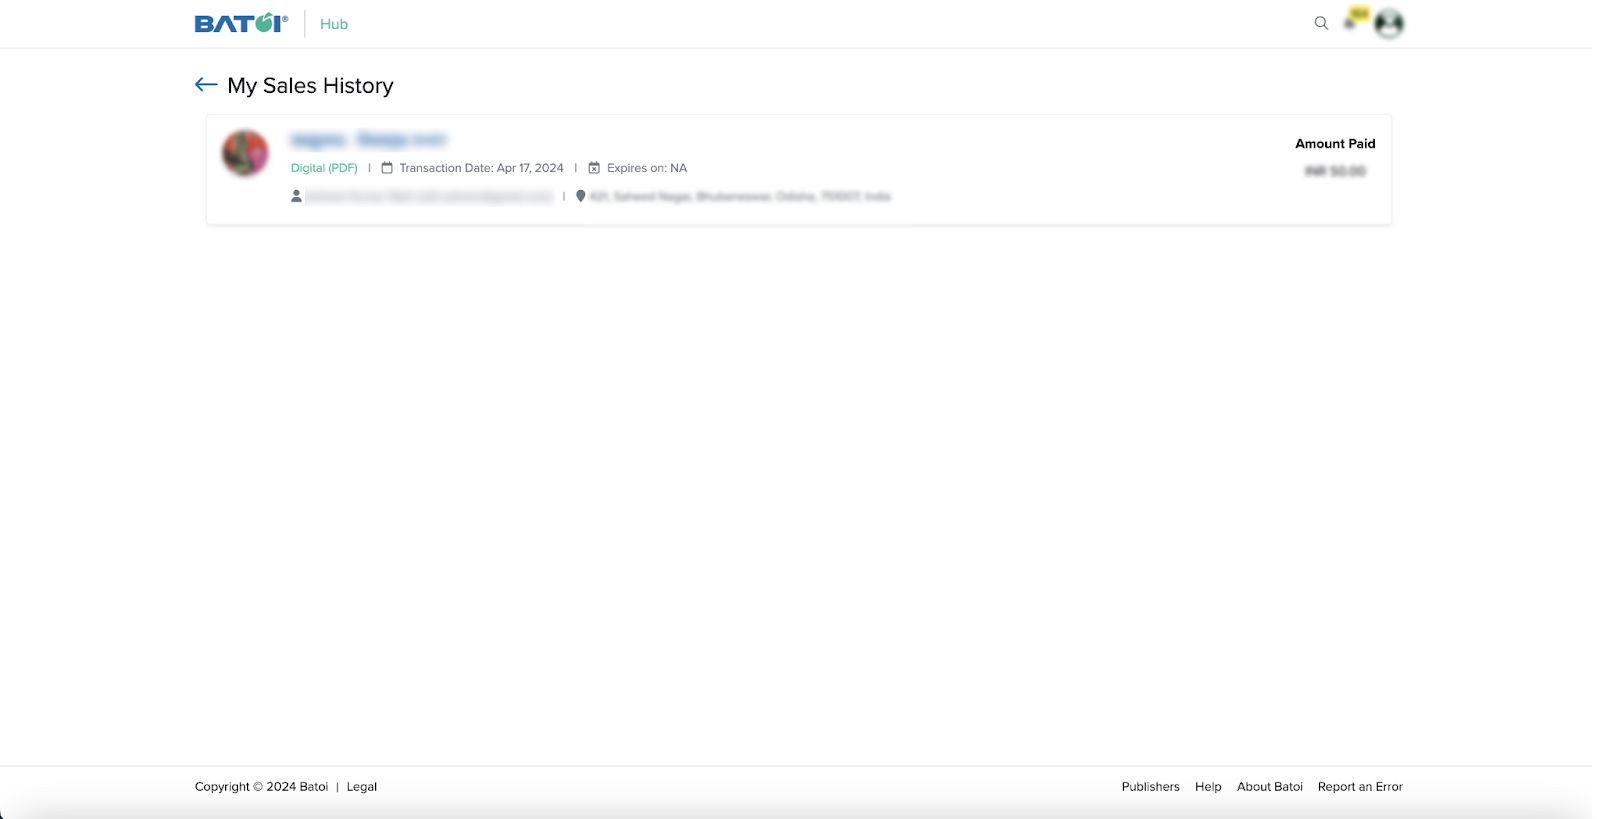
You will get a list of all the sales, as illustrated in Figure 49.
Get Help from Support
For more details and support, you may visit: https://www.batoi.com/support/