Mastering Contact Management within Batoi's Domain Control Panel
Introduction
Managing domain contacts seamlessly is critical for efficient domain management. Batoi's Domain Control Panel offers you a centralized interface for this task. This guide aims to equip you with the knowledge you need to add, modify, and manage contacts within your Domain Control Panel.
Section 1: Accessing Domain Control Panel
Login to Batoi Hosting: To start, you must access your domain control panel at Batoi. You can do this by typing the URL https://myhostmart.batoi.com/customer or via the link provided by our Support Team. Use your username and password to log in, as illustrated in Figure 1 below.

Section 2: Accessing Contact Management in Domain Control Panel
You will land on the dashboard page upon successful login, as illustrated in Figure 2 below.
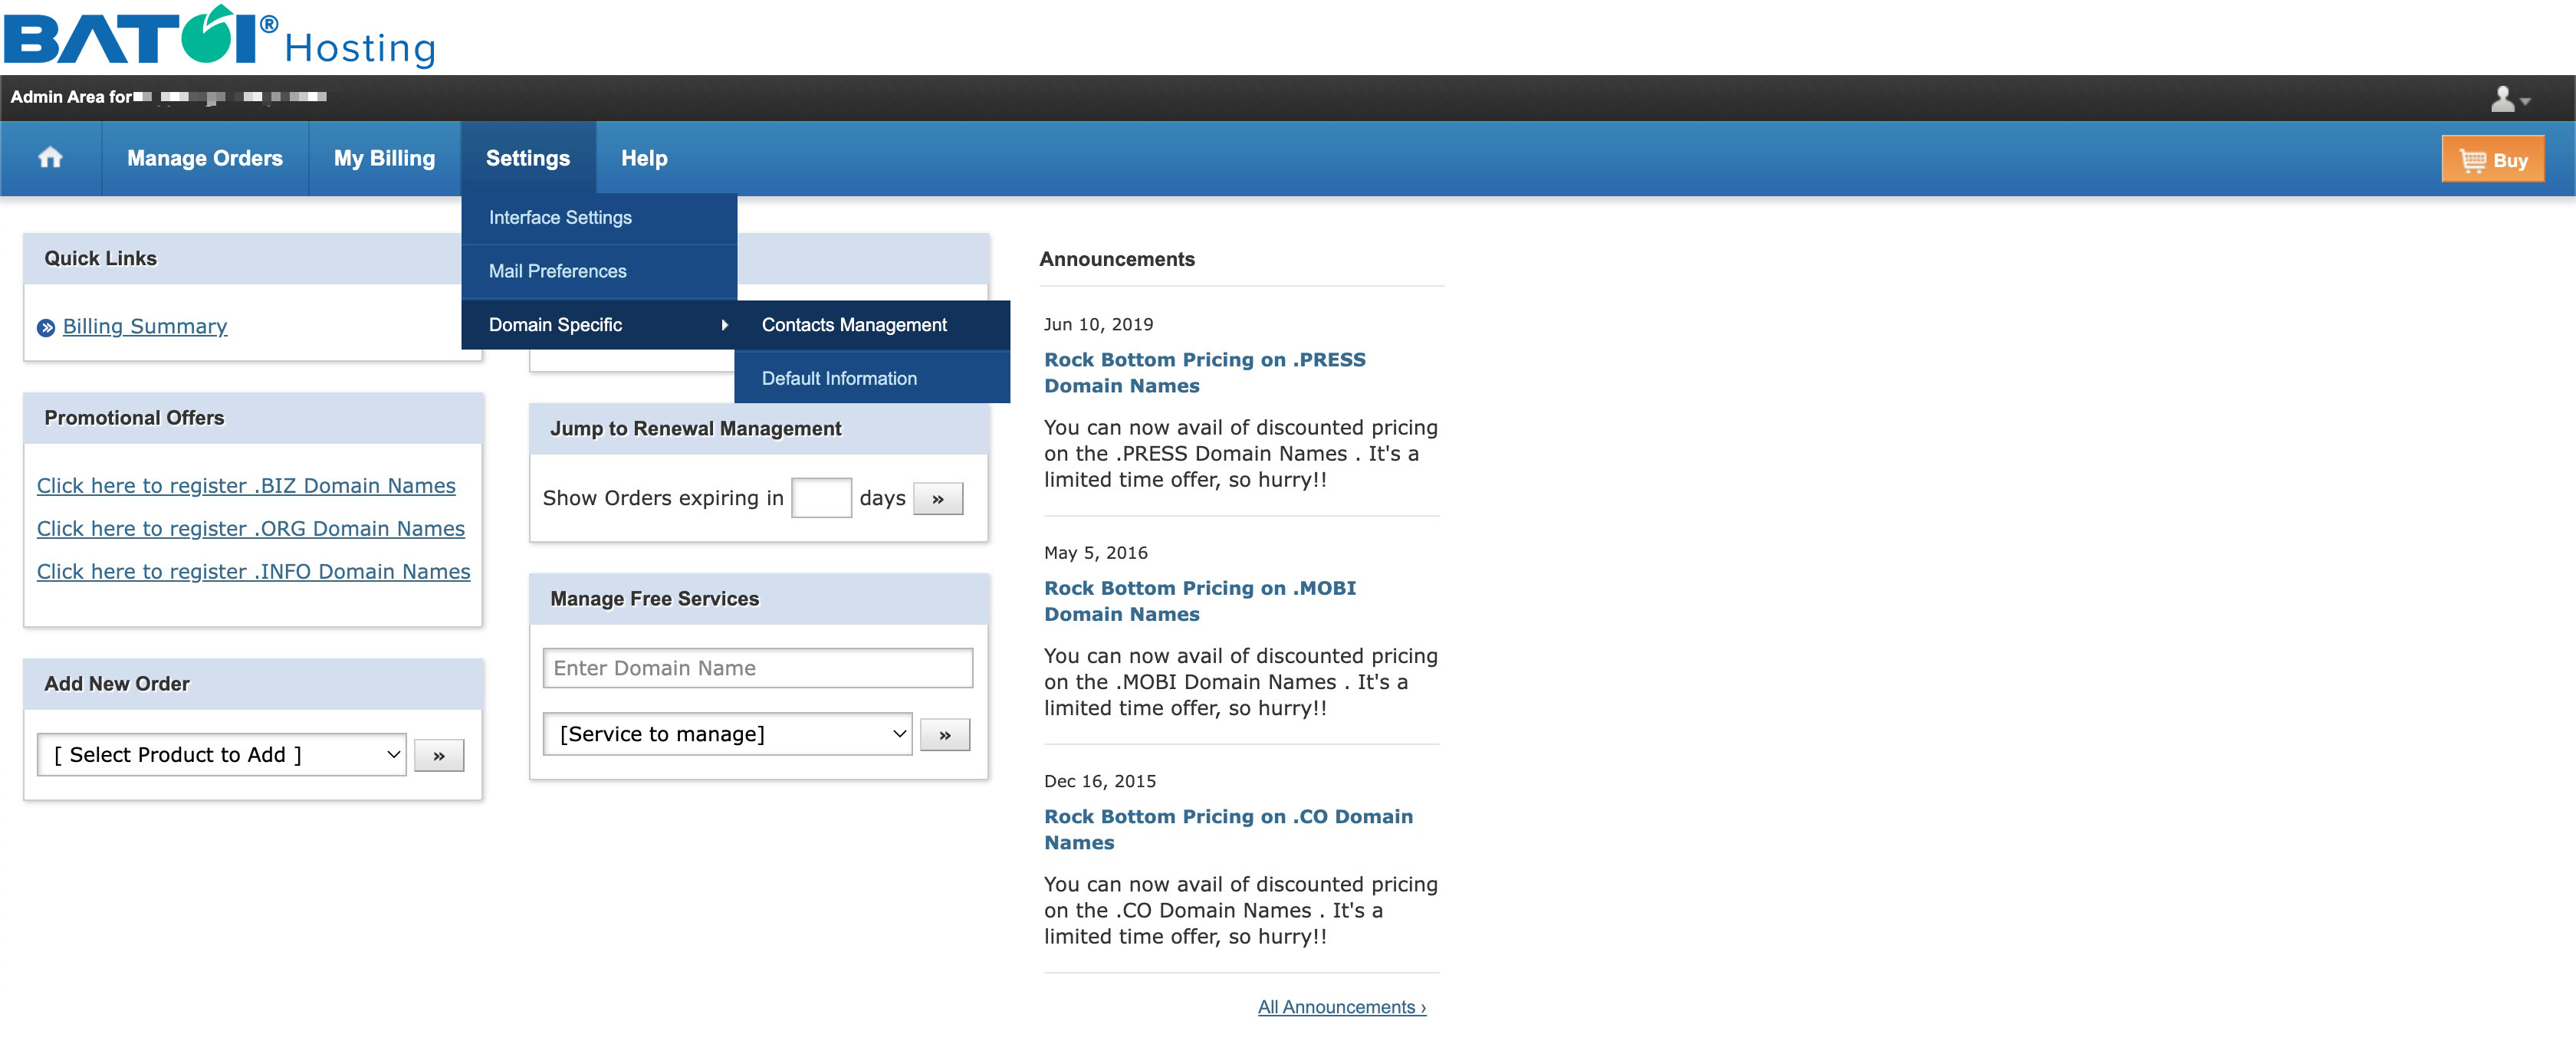
Click on the Settings menu and then go to the Domain Specific sub-menu. Under the Domain Specific sub-menu, click Contact Management, as illustrated in Figure 2 above, and the system will take you to the list page, as illustrated in Figure 3 below.
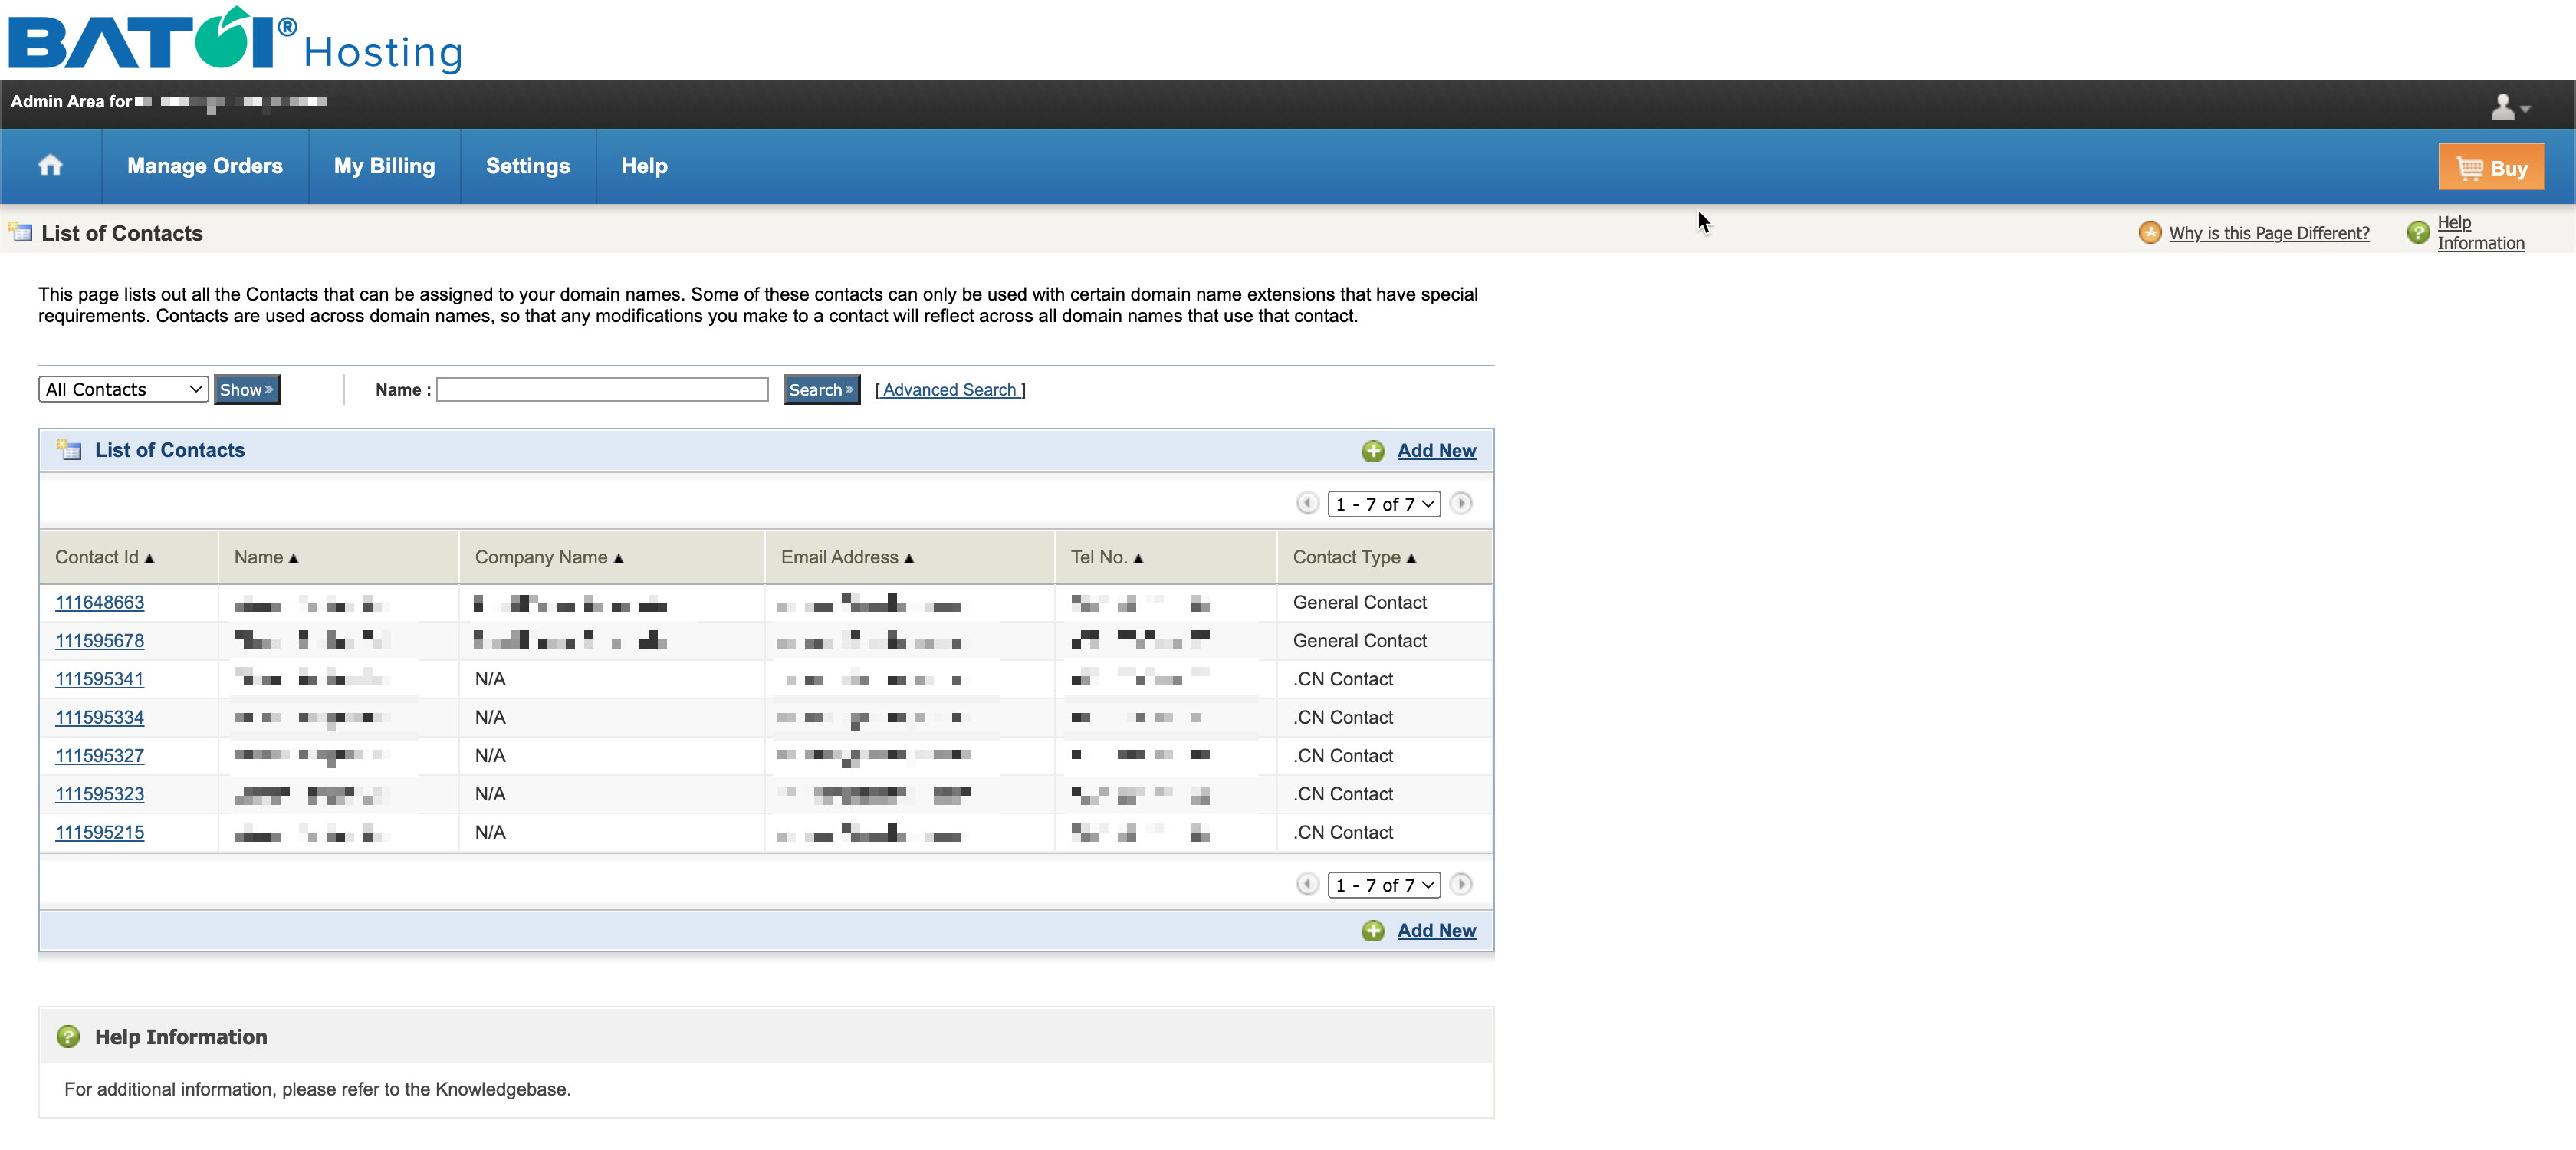
Click on the dropdown arrow for the all contact drop menu, and you can filter the domain-specific contacts as illustrated in Figure 4 below.
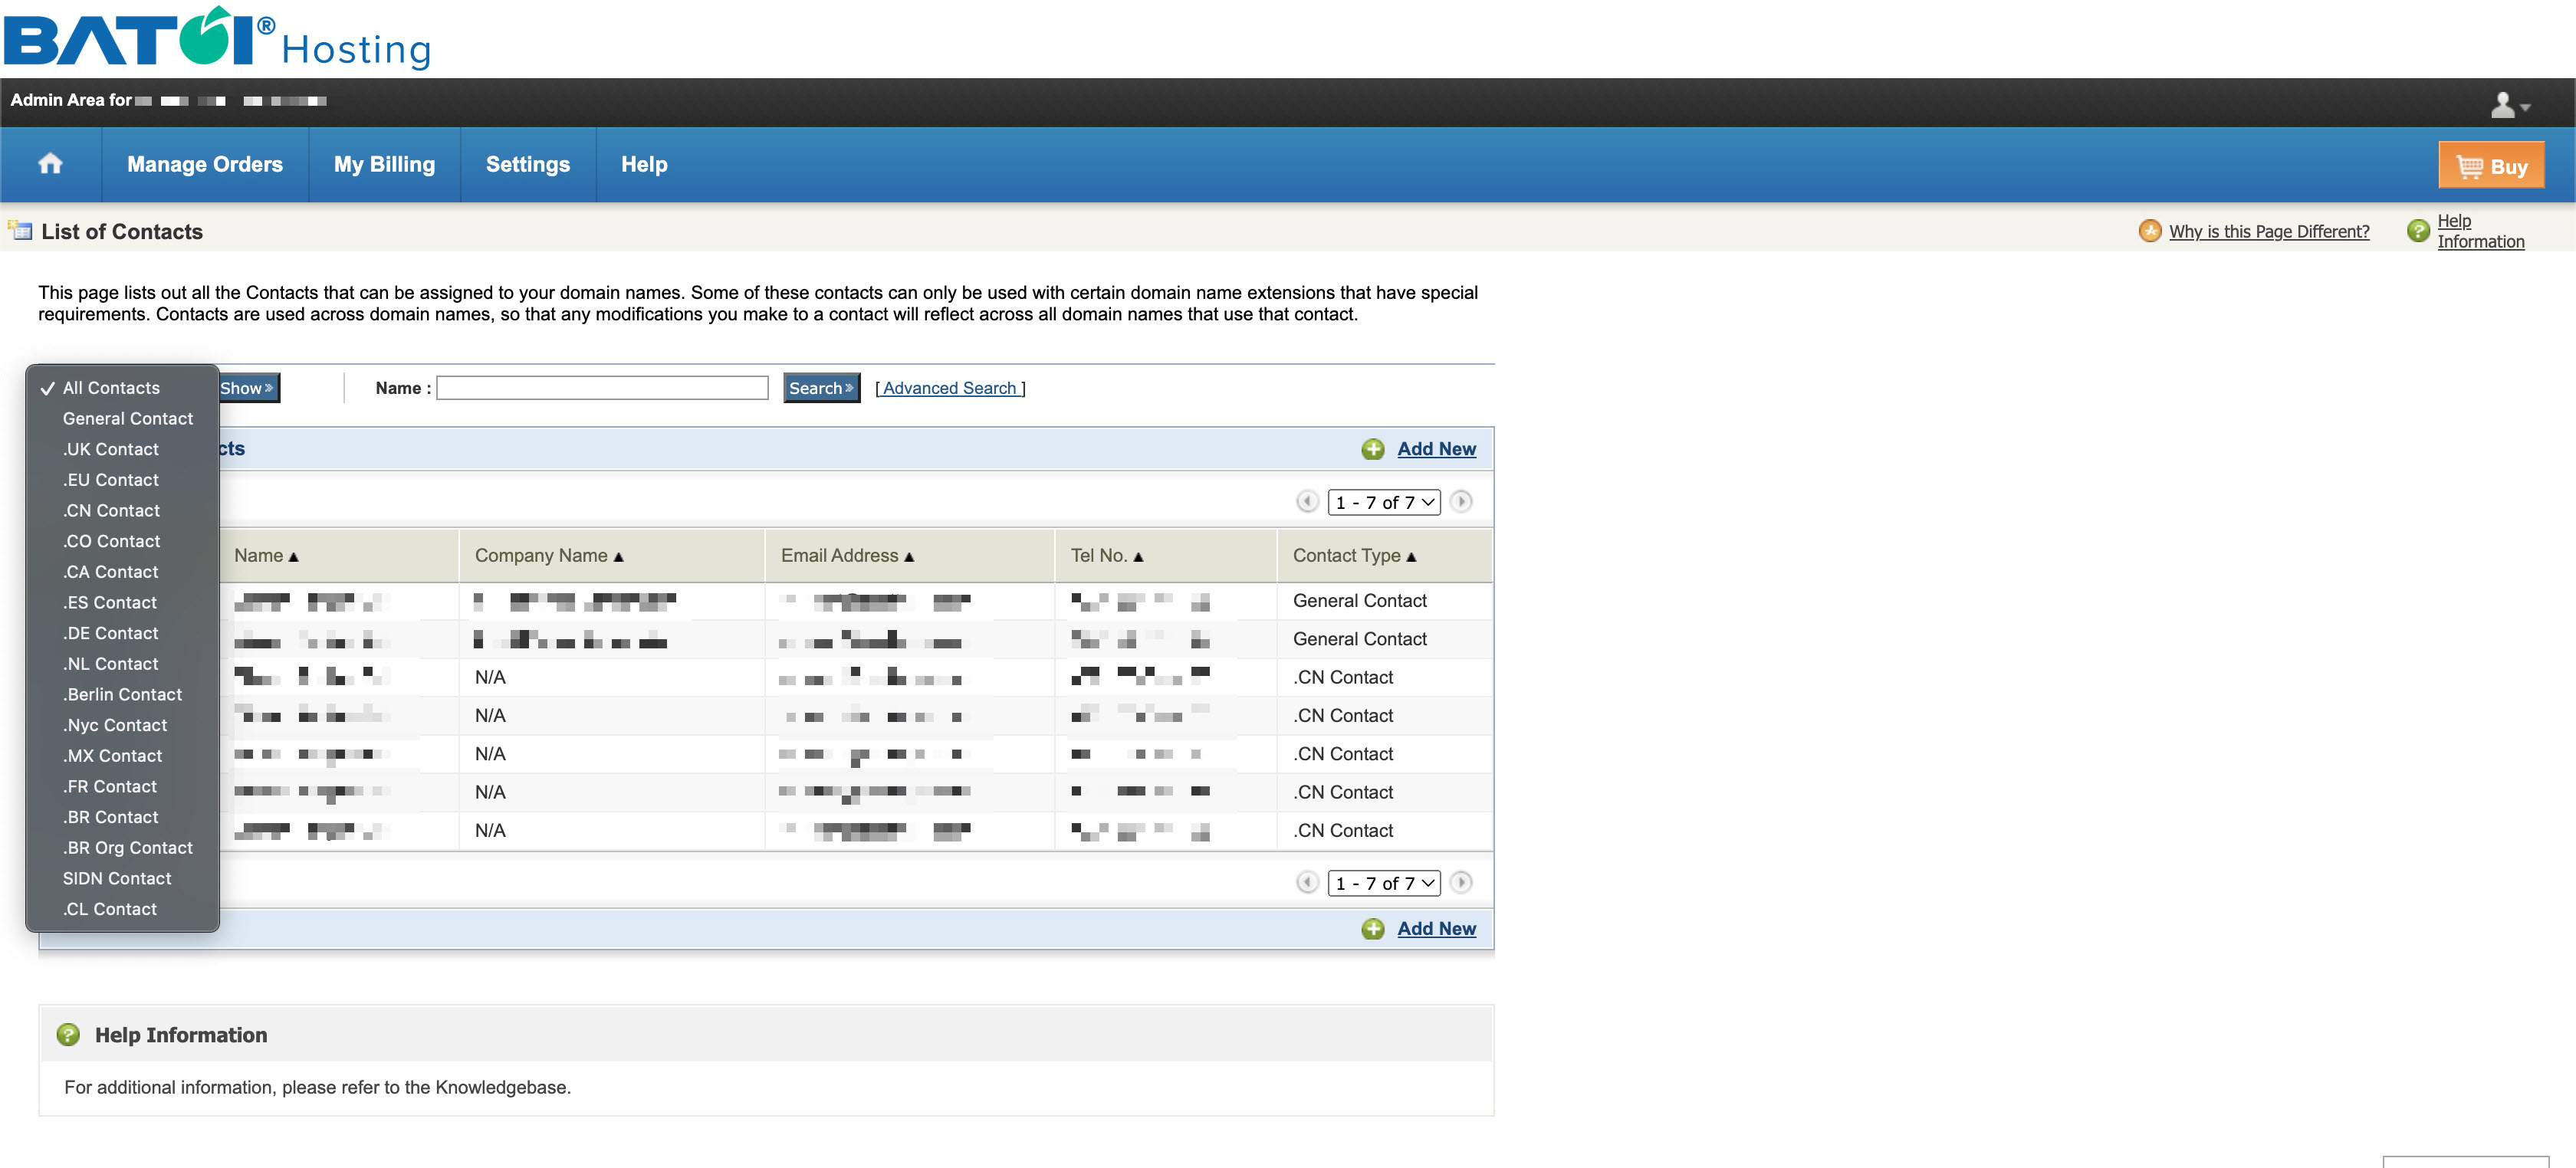
Section 3: Add New Contact Details
Click on the Add New link available on the top right side of the list page, as illustrated in Figure 4 above and the system will open the page, as illustrated in Figure 5 below.
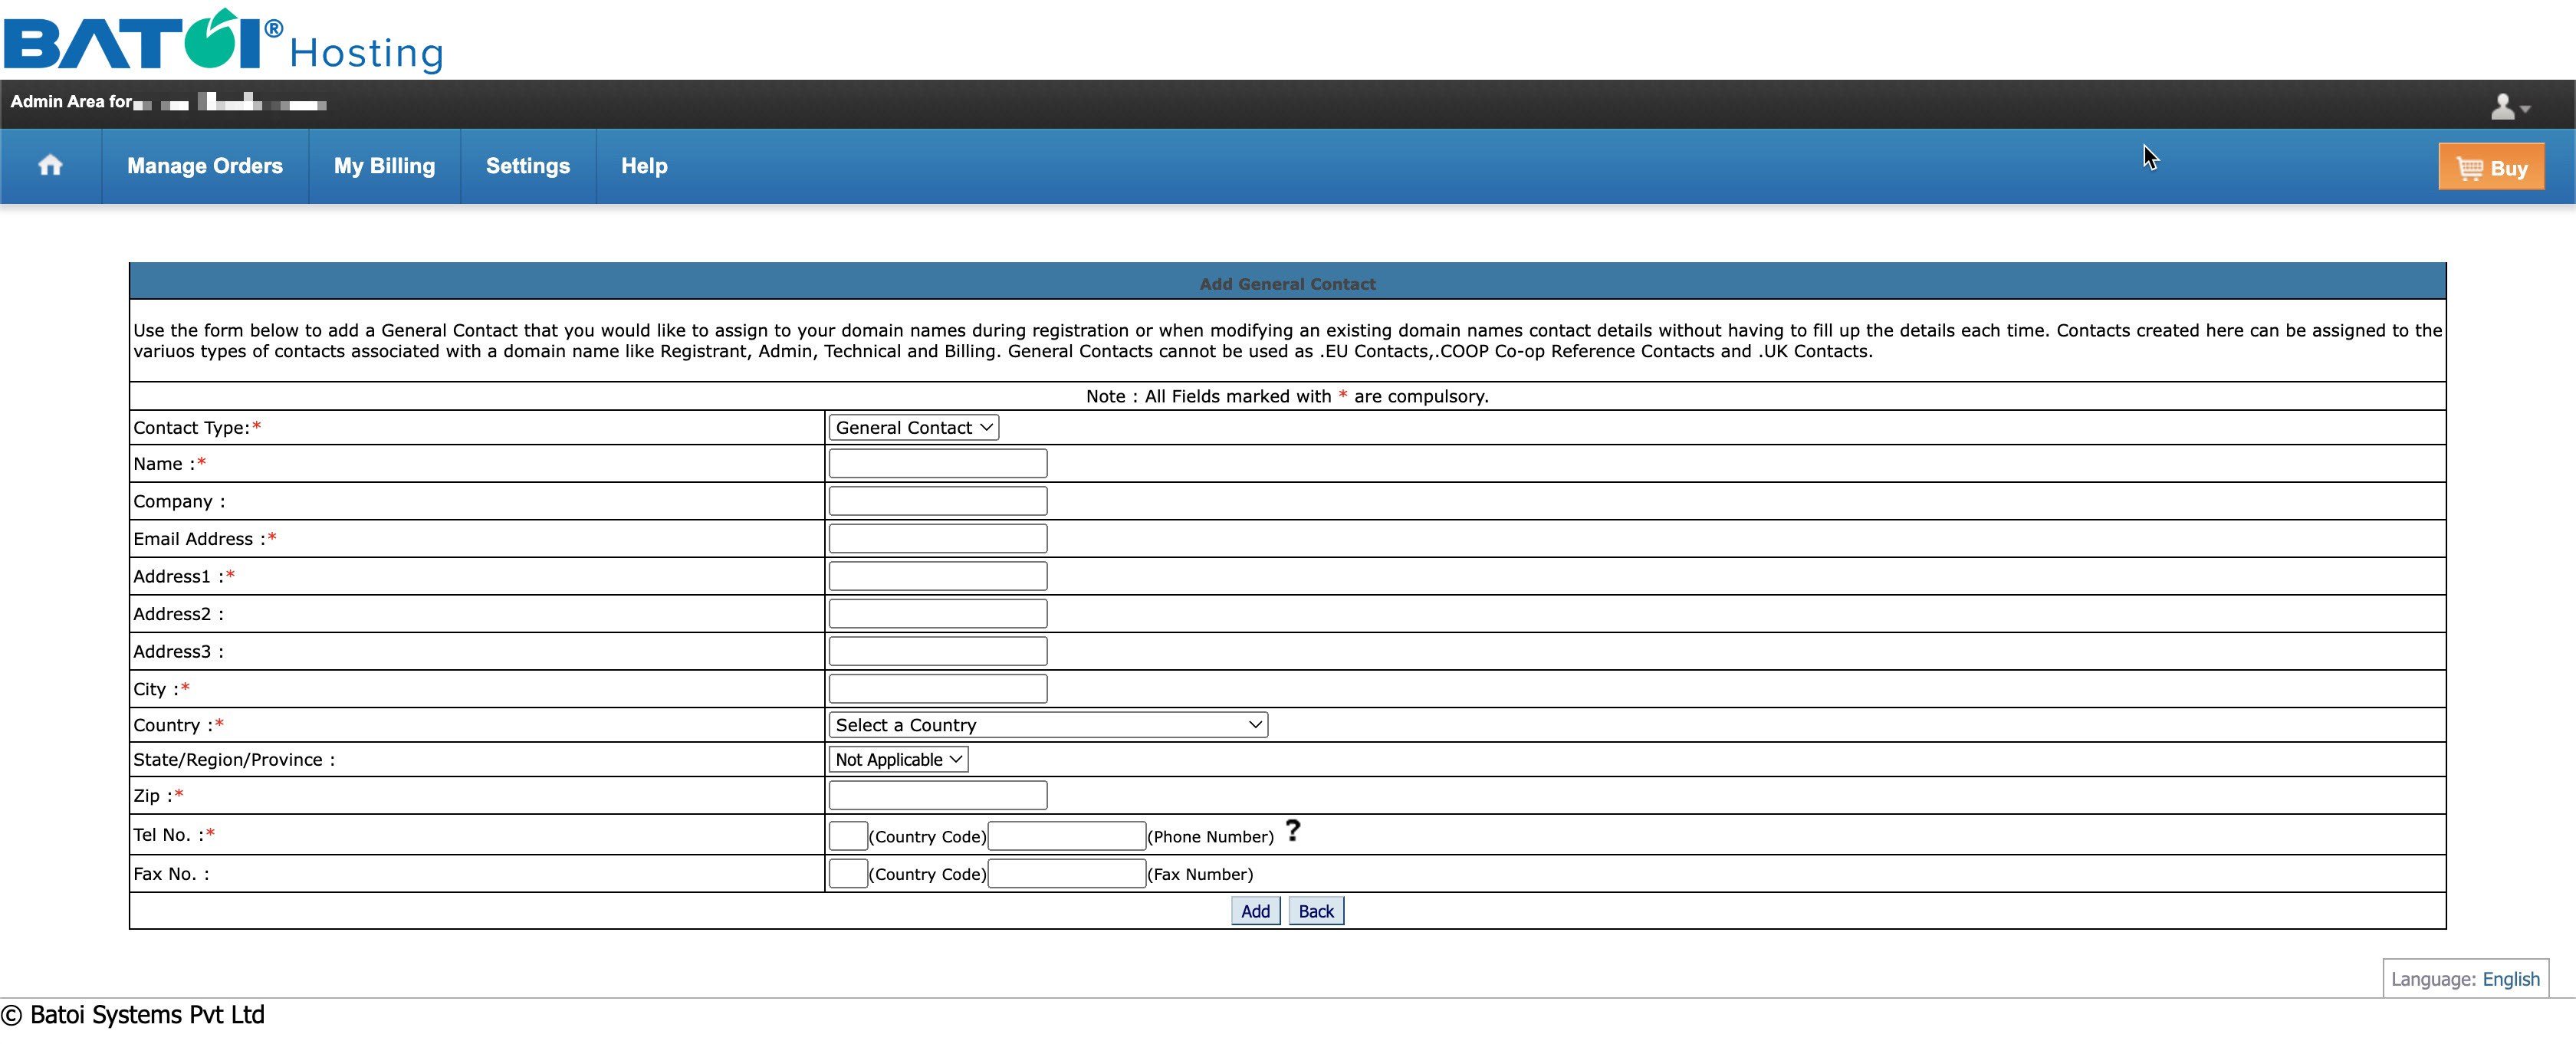
Select the type of contact from the Contact Type drop menu, fill in the details marked in (*), and click on the Add button to save the contact details as illustrated in Figure 5 above.
You can see the newly added contact on the contact list page, as illustrated in Figure 6 below.
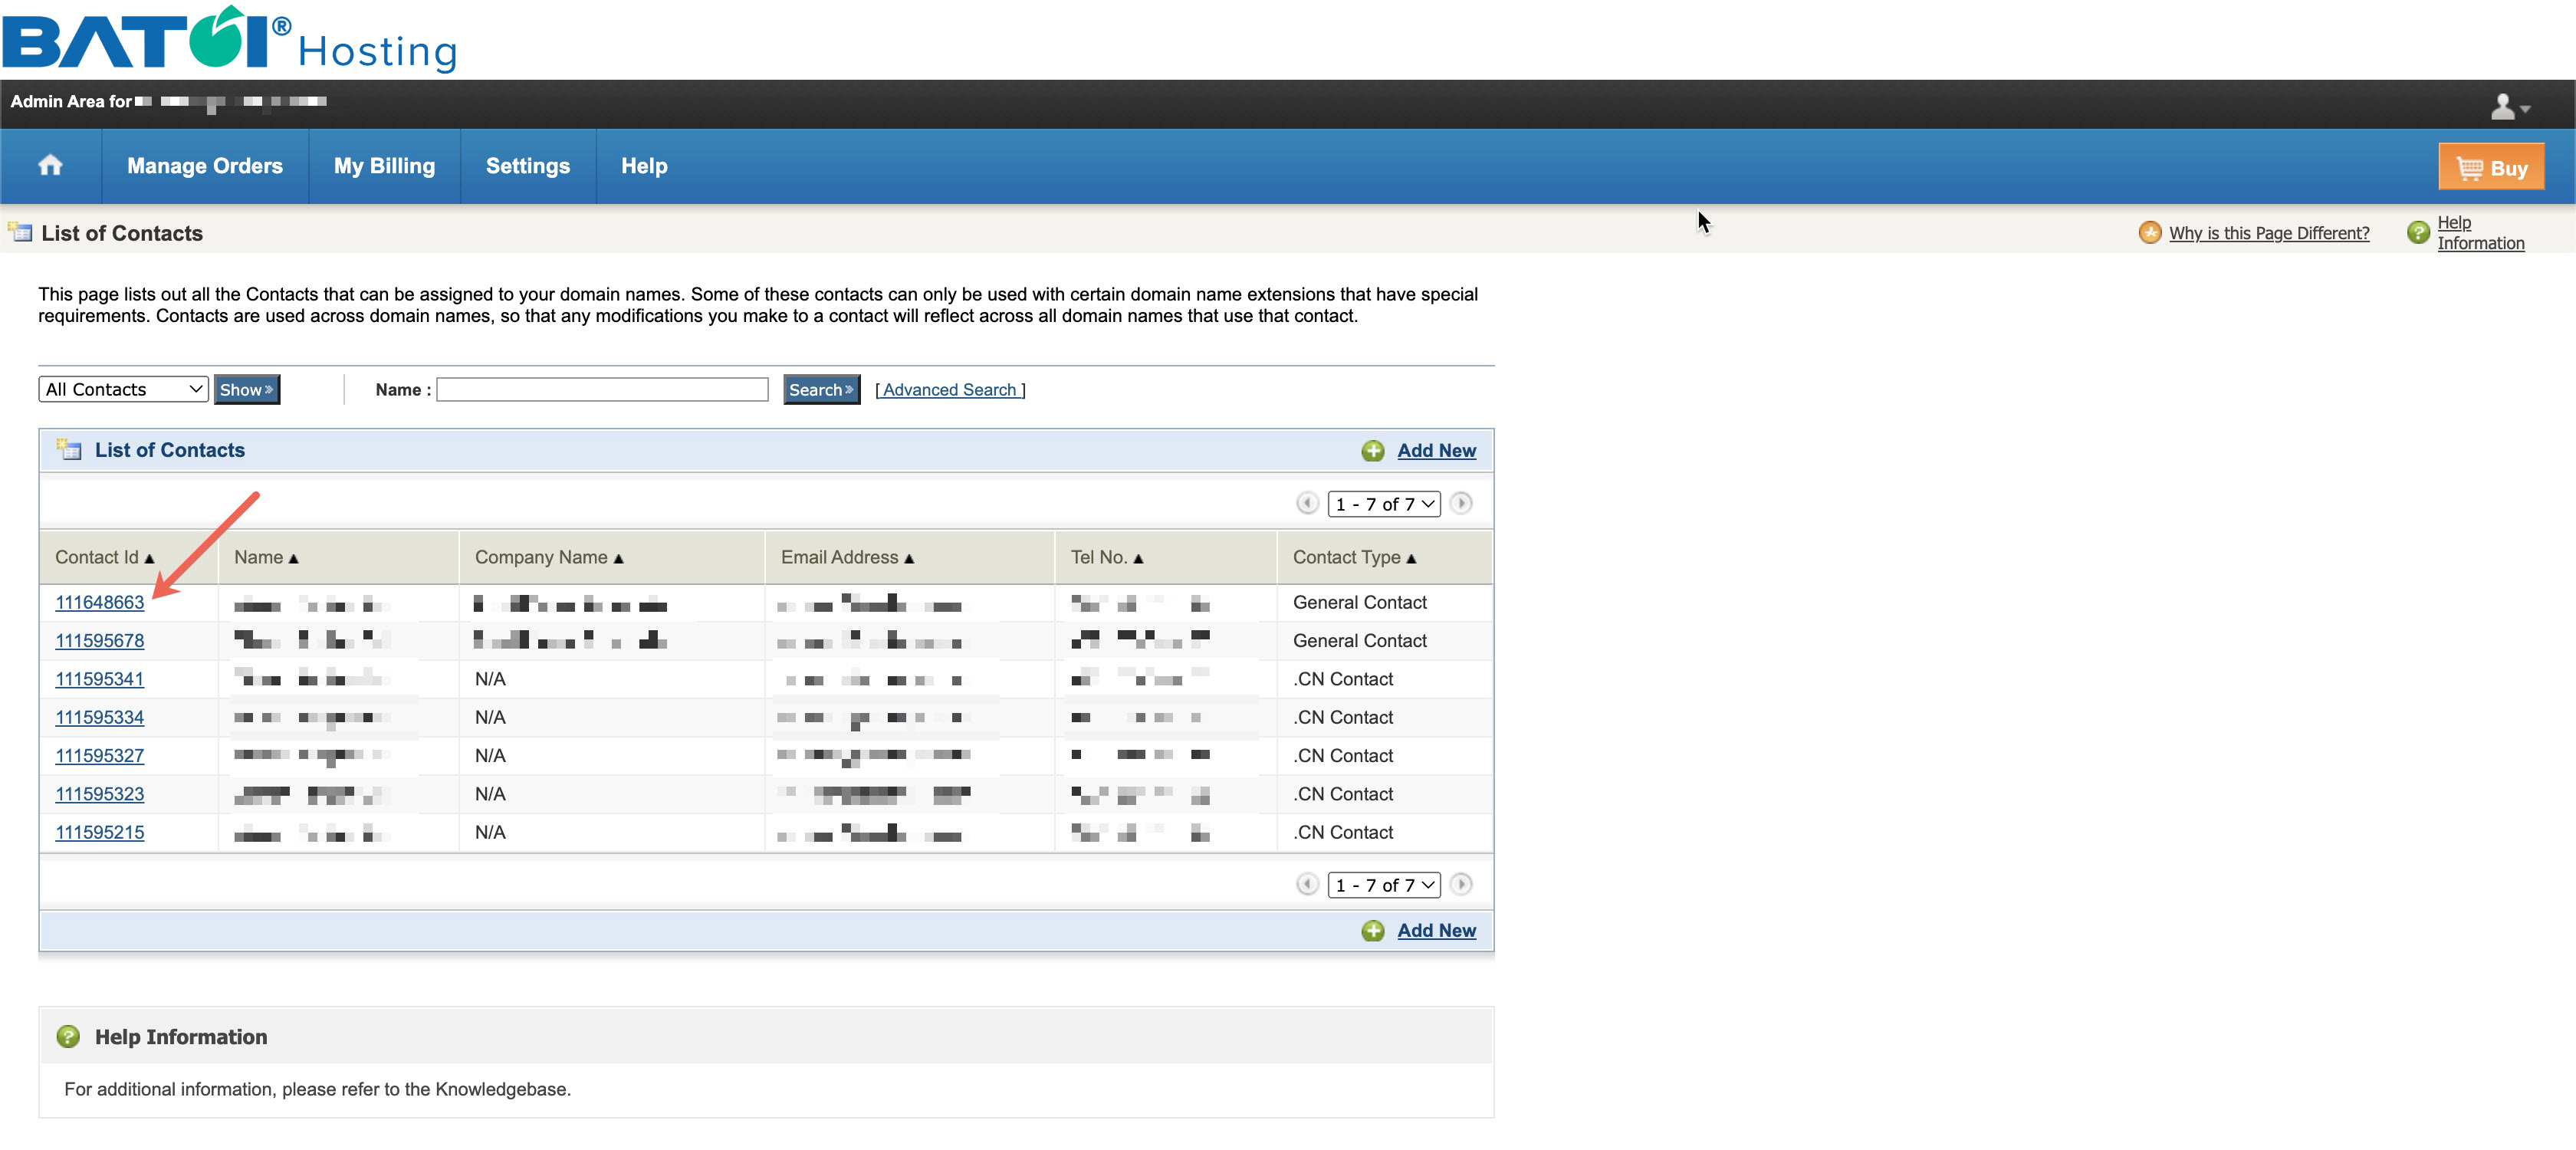
Click on the contact ID for the contact that you want to view, as illustrated in Figure 6 above, and the system will show you the detail page, as illustrated in Figure 7 below.
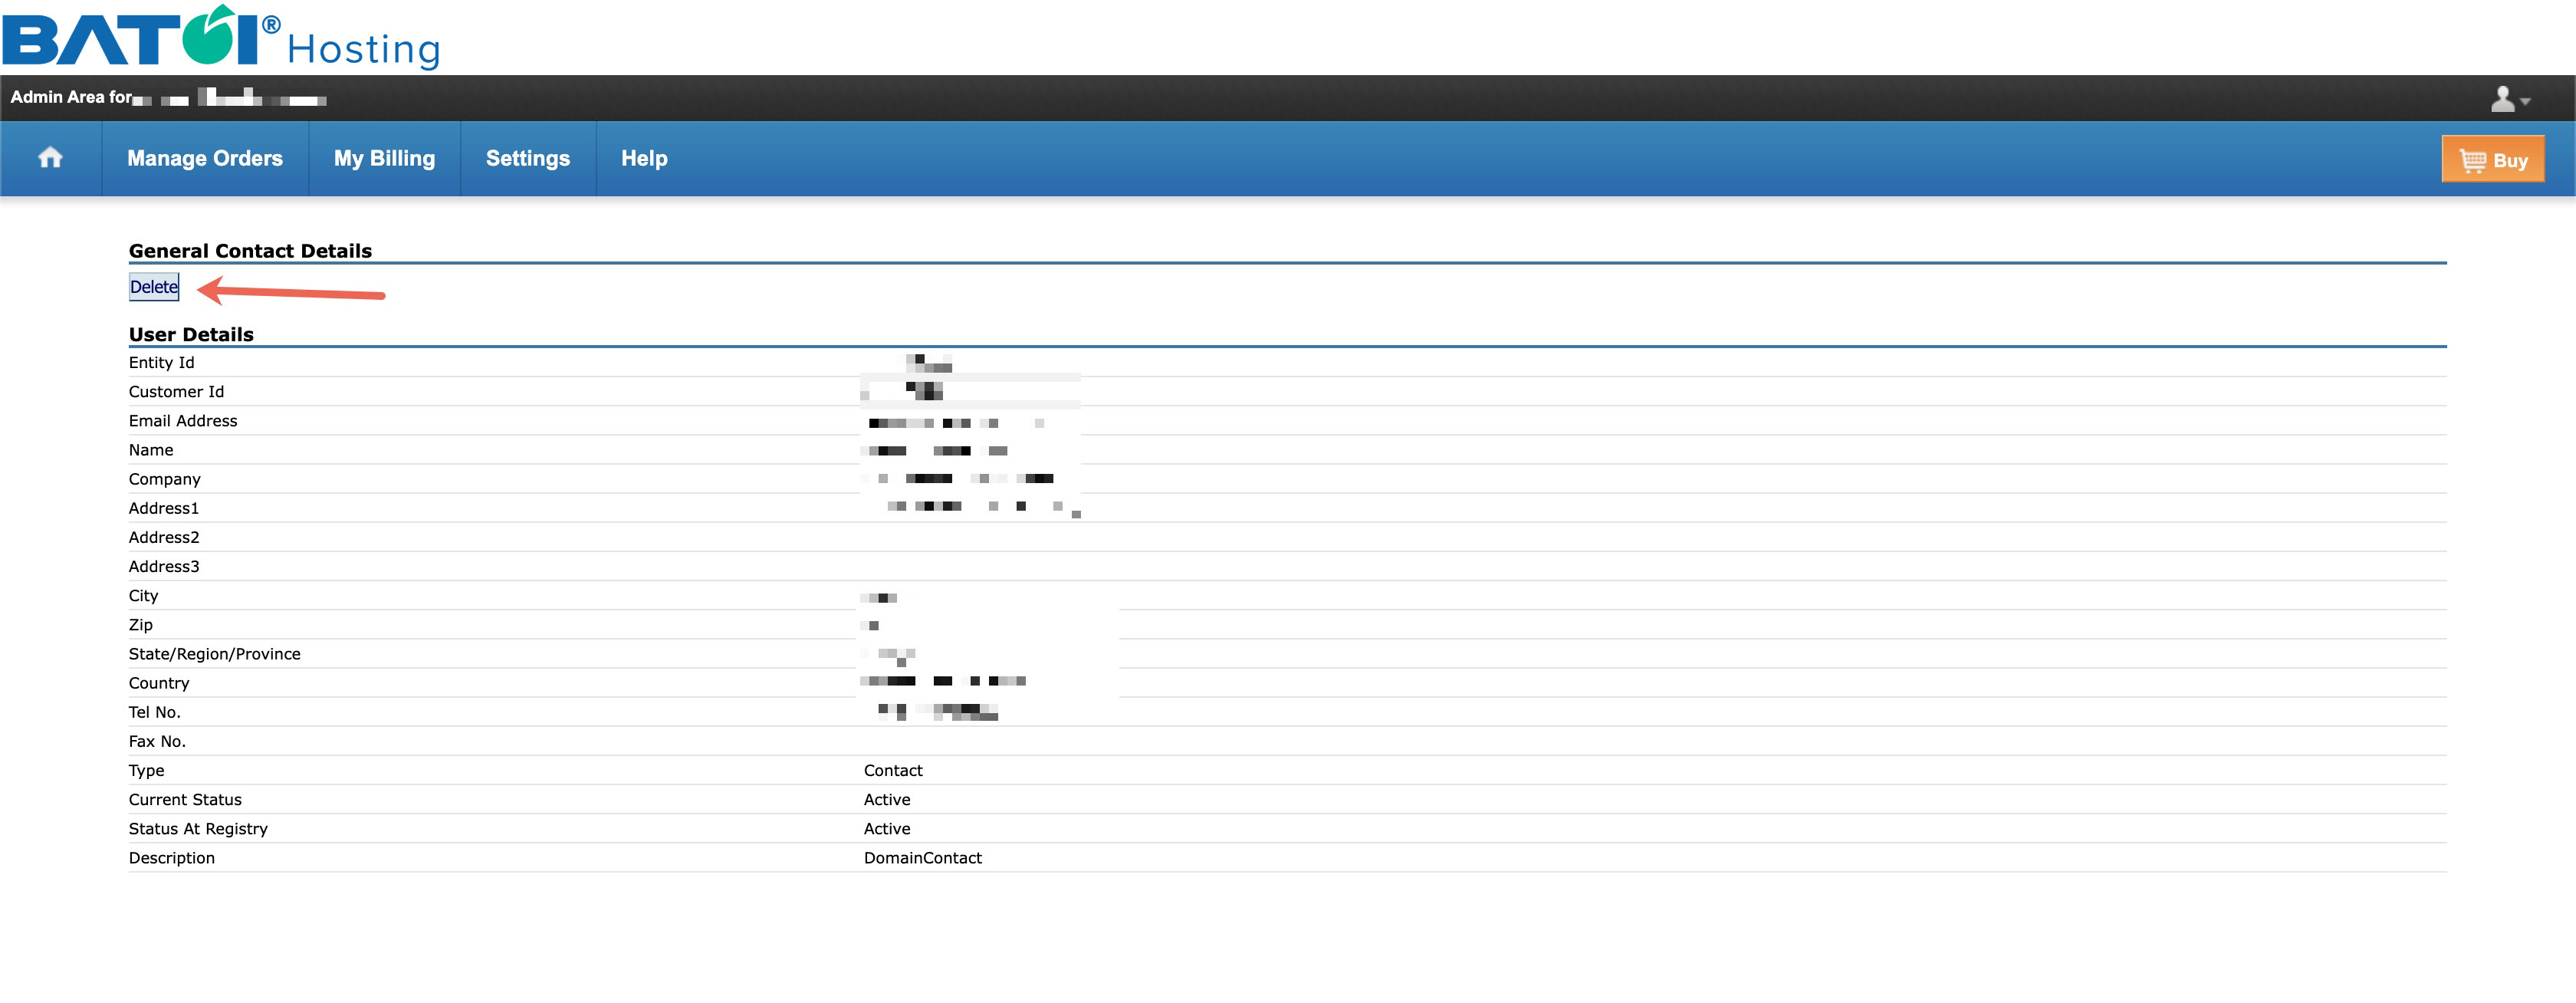
Click on the Delete button, and the system will remove the contact, as illustrated in Figure 7 above.
Section 4: Manage Default Contact Details
Click on the Settings menu and go to the Domain Specific sub-menu, and under the Domain Specific sub-menu, click Default Information as illustrated in Figure 8 below.
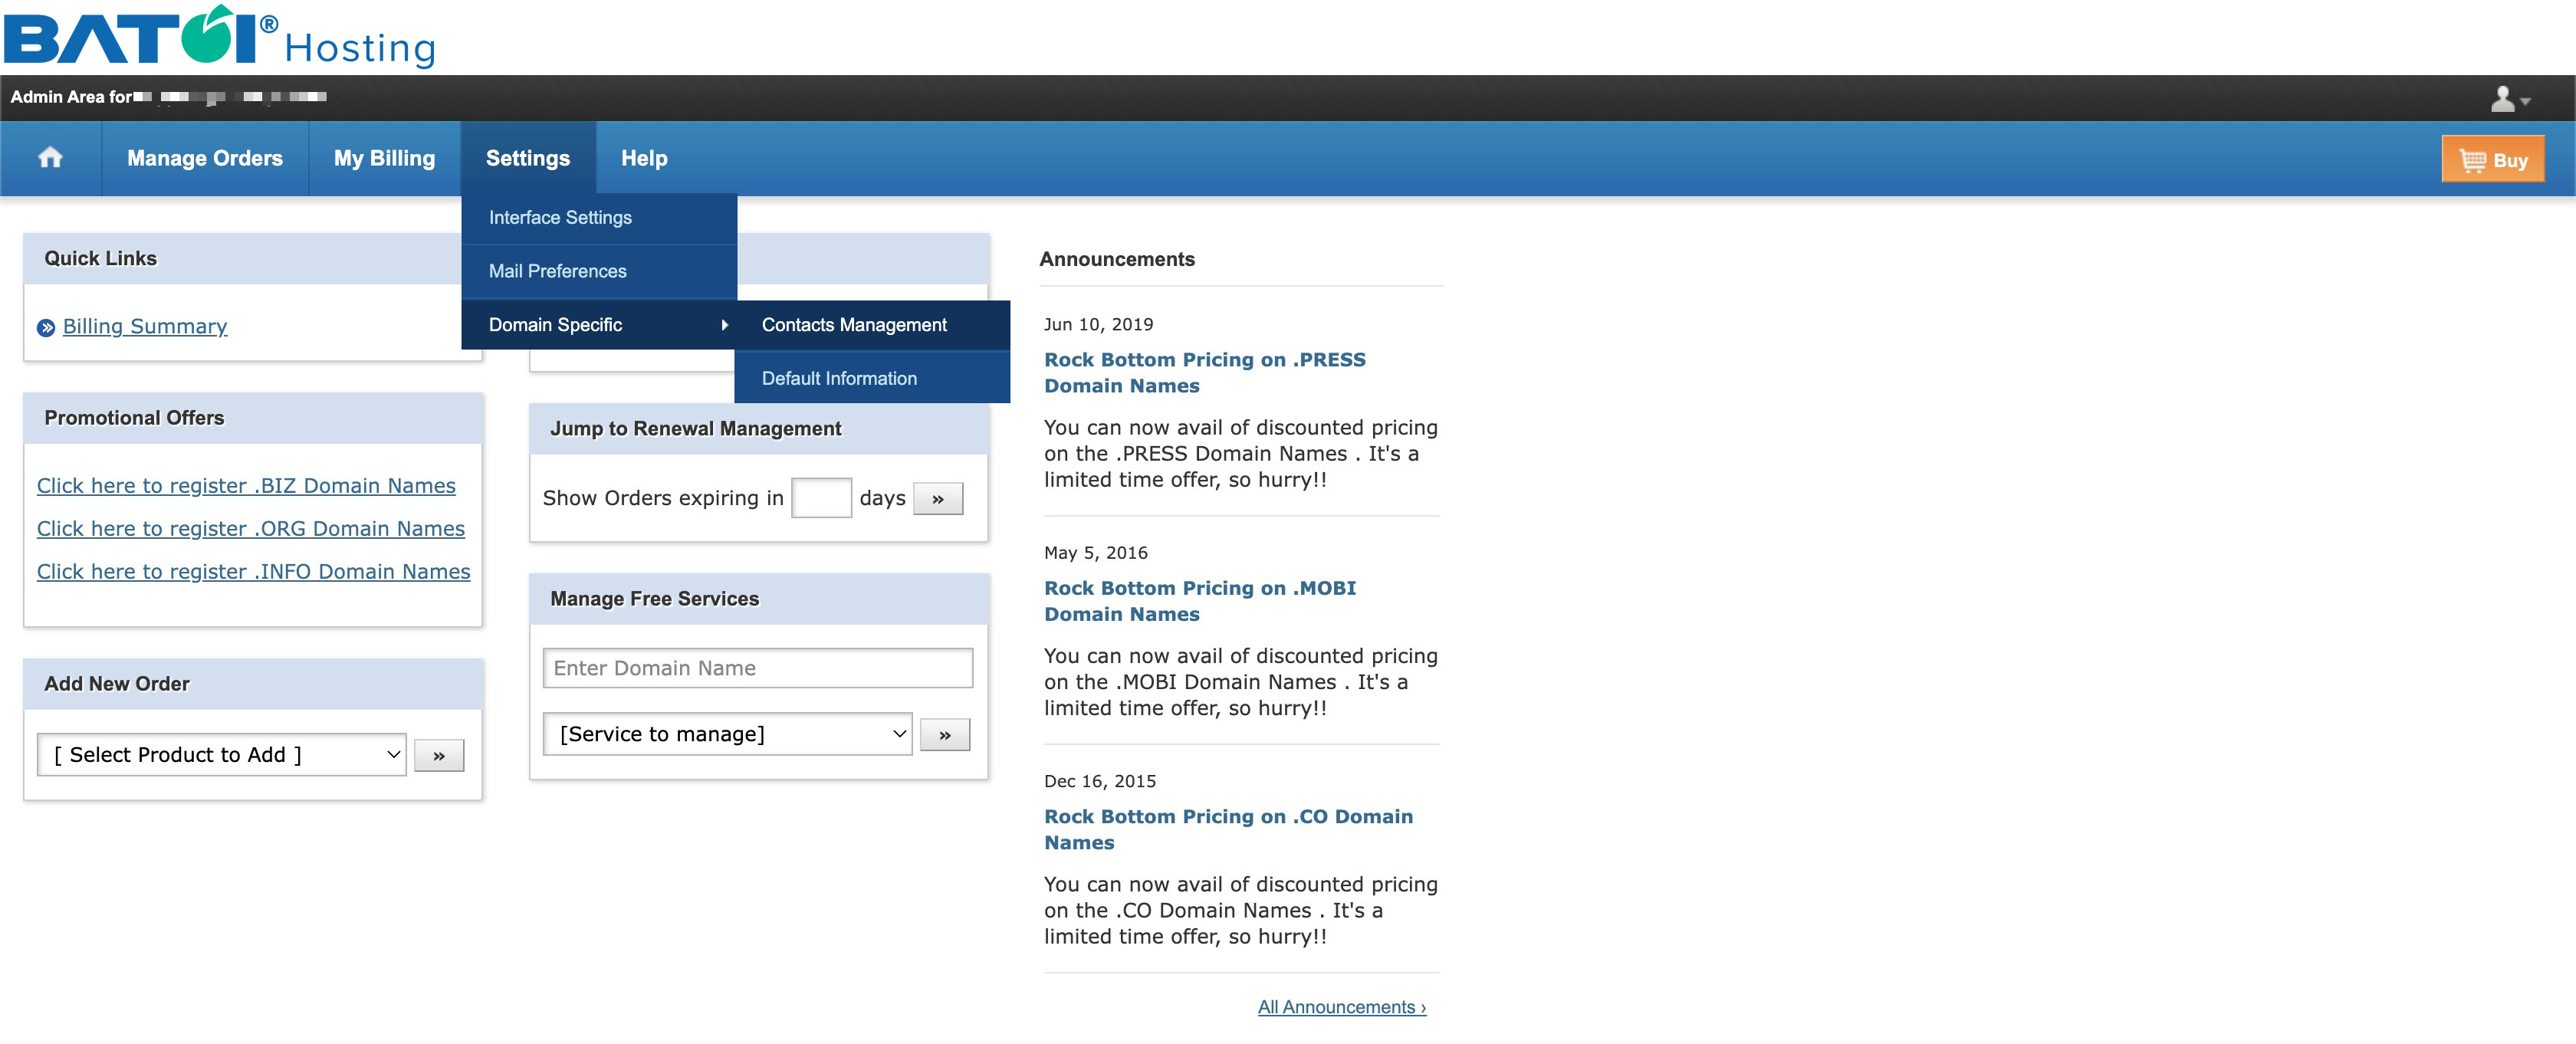
Once you click the Default Information link, the system will open the page, as illustrated in Figure 9 below.

By default, the General Contact, which was created during the time of the creation of your control panel, will be shown.
You can select the Contact Type drop menu and select the domain-specific TLD type for which you want to specify the contact, as illustrated in Figure 9 above.
Once the contact type is selected, click on the Edit link as illustrated in Figure 9 above for each type like ‘Tech’, ‘Admin’, ‘Registrant’, and ‘Billing’, and the system will open the available contact list in a pop-up window as illustrated in Figure 10 below.
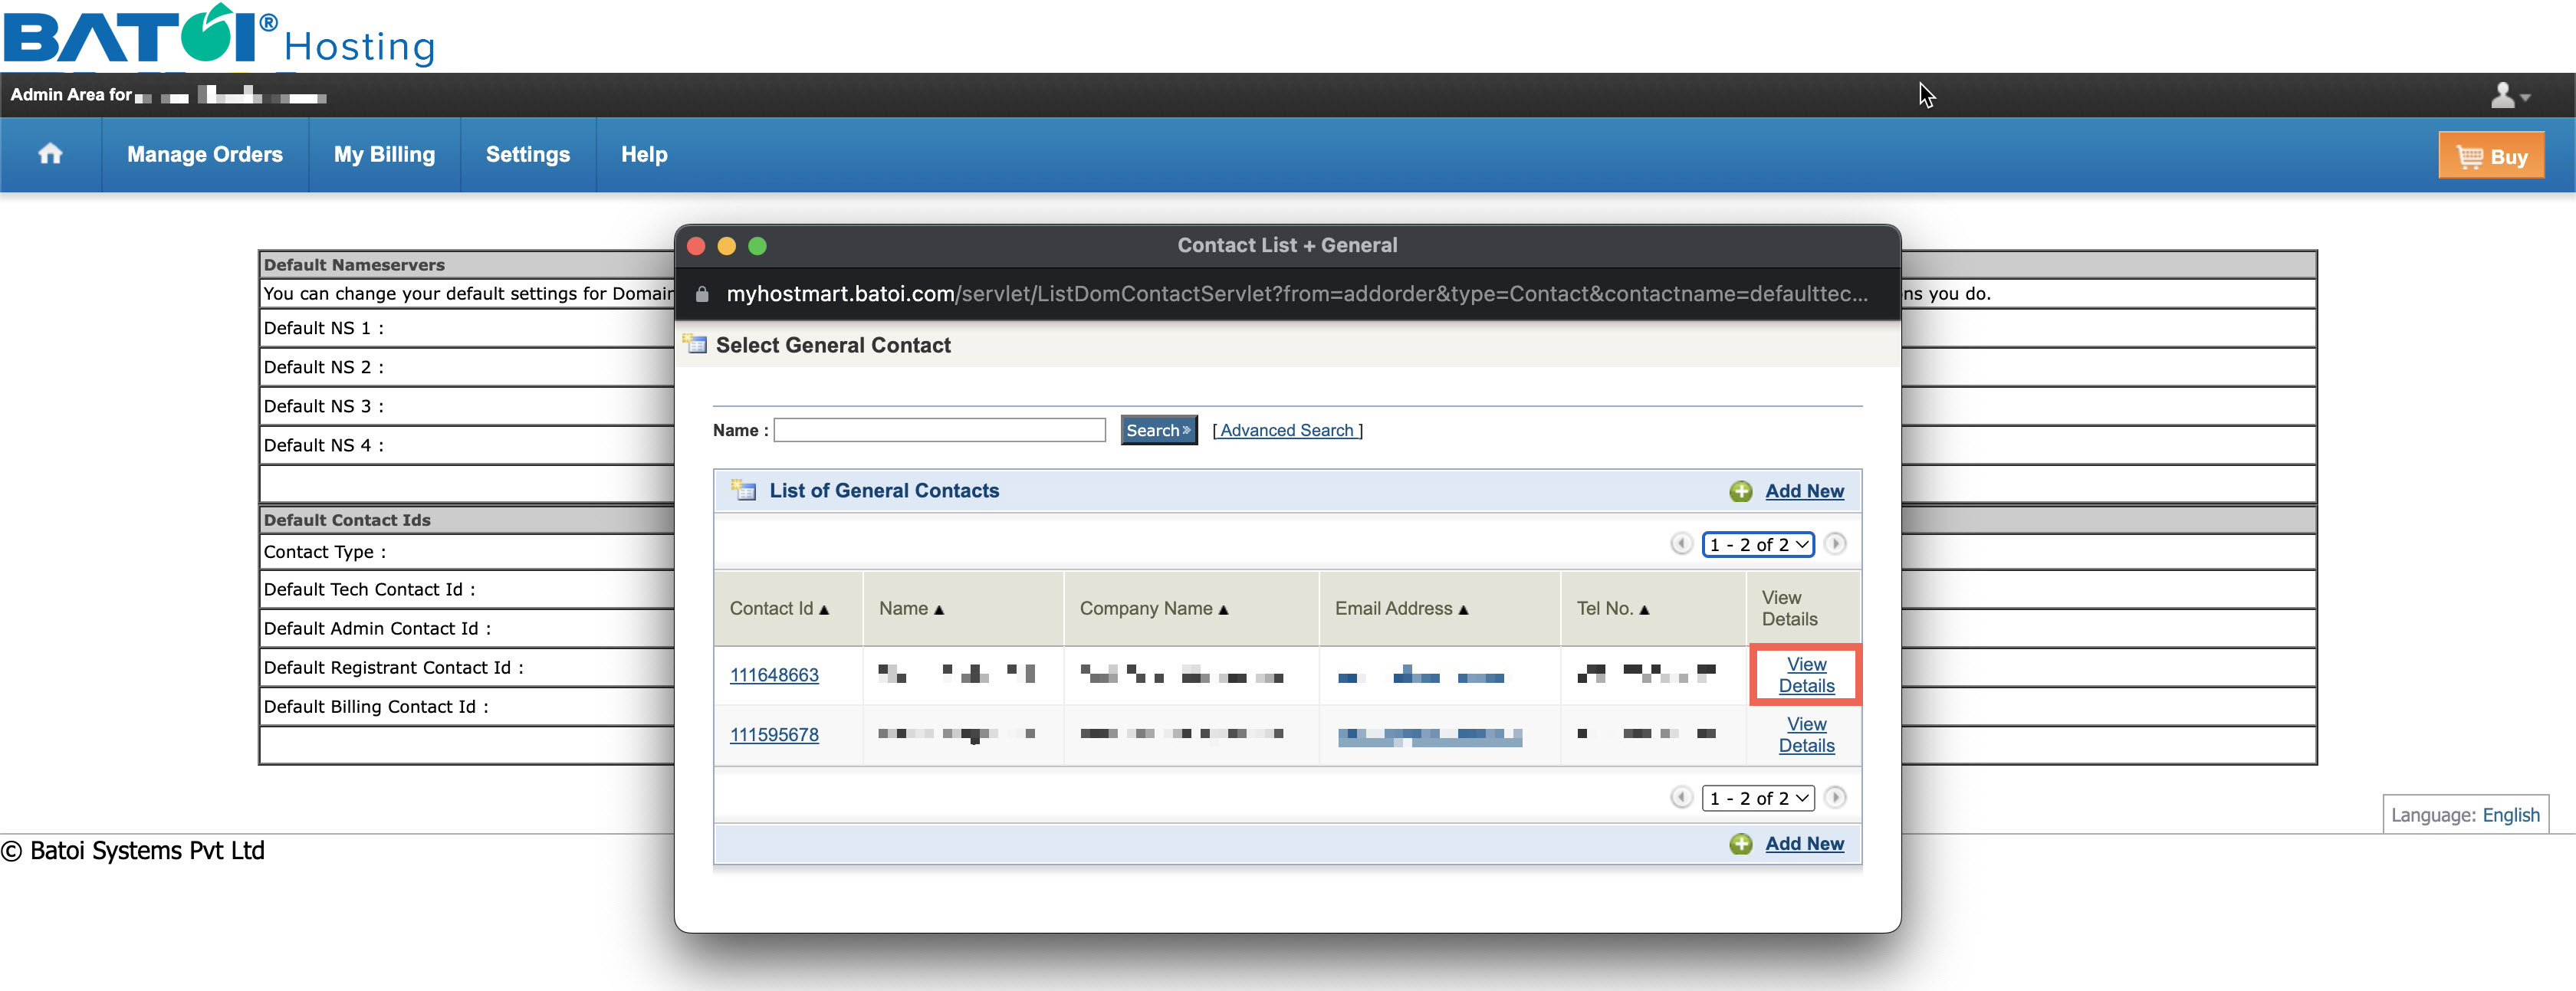
Click on the View Details link and the details page will open in a pop-up window, as illustrated in Figure 11 below.
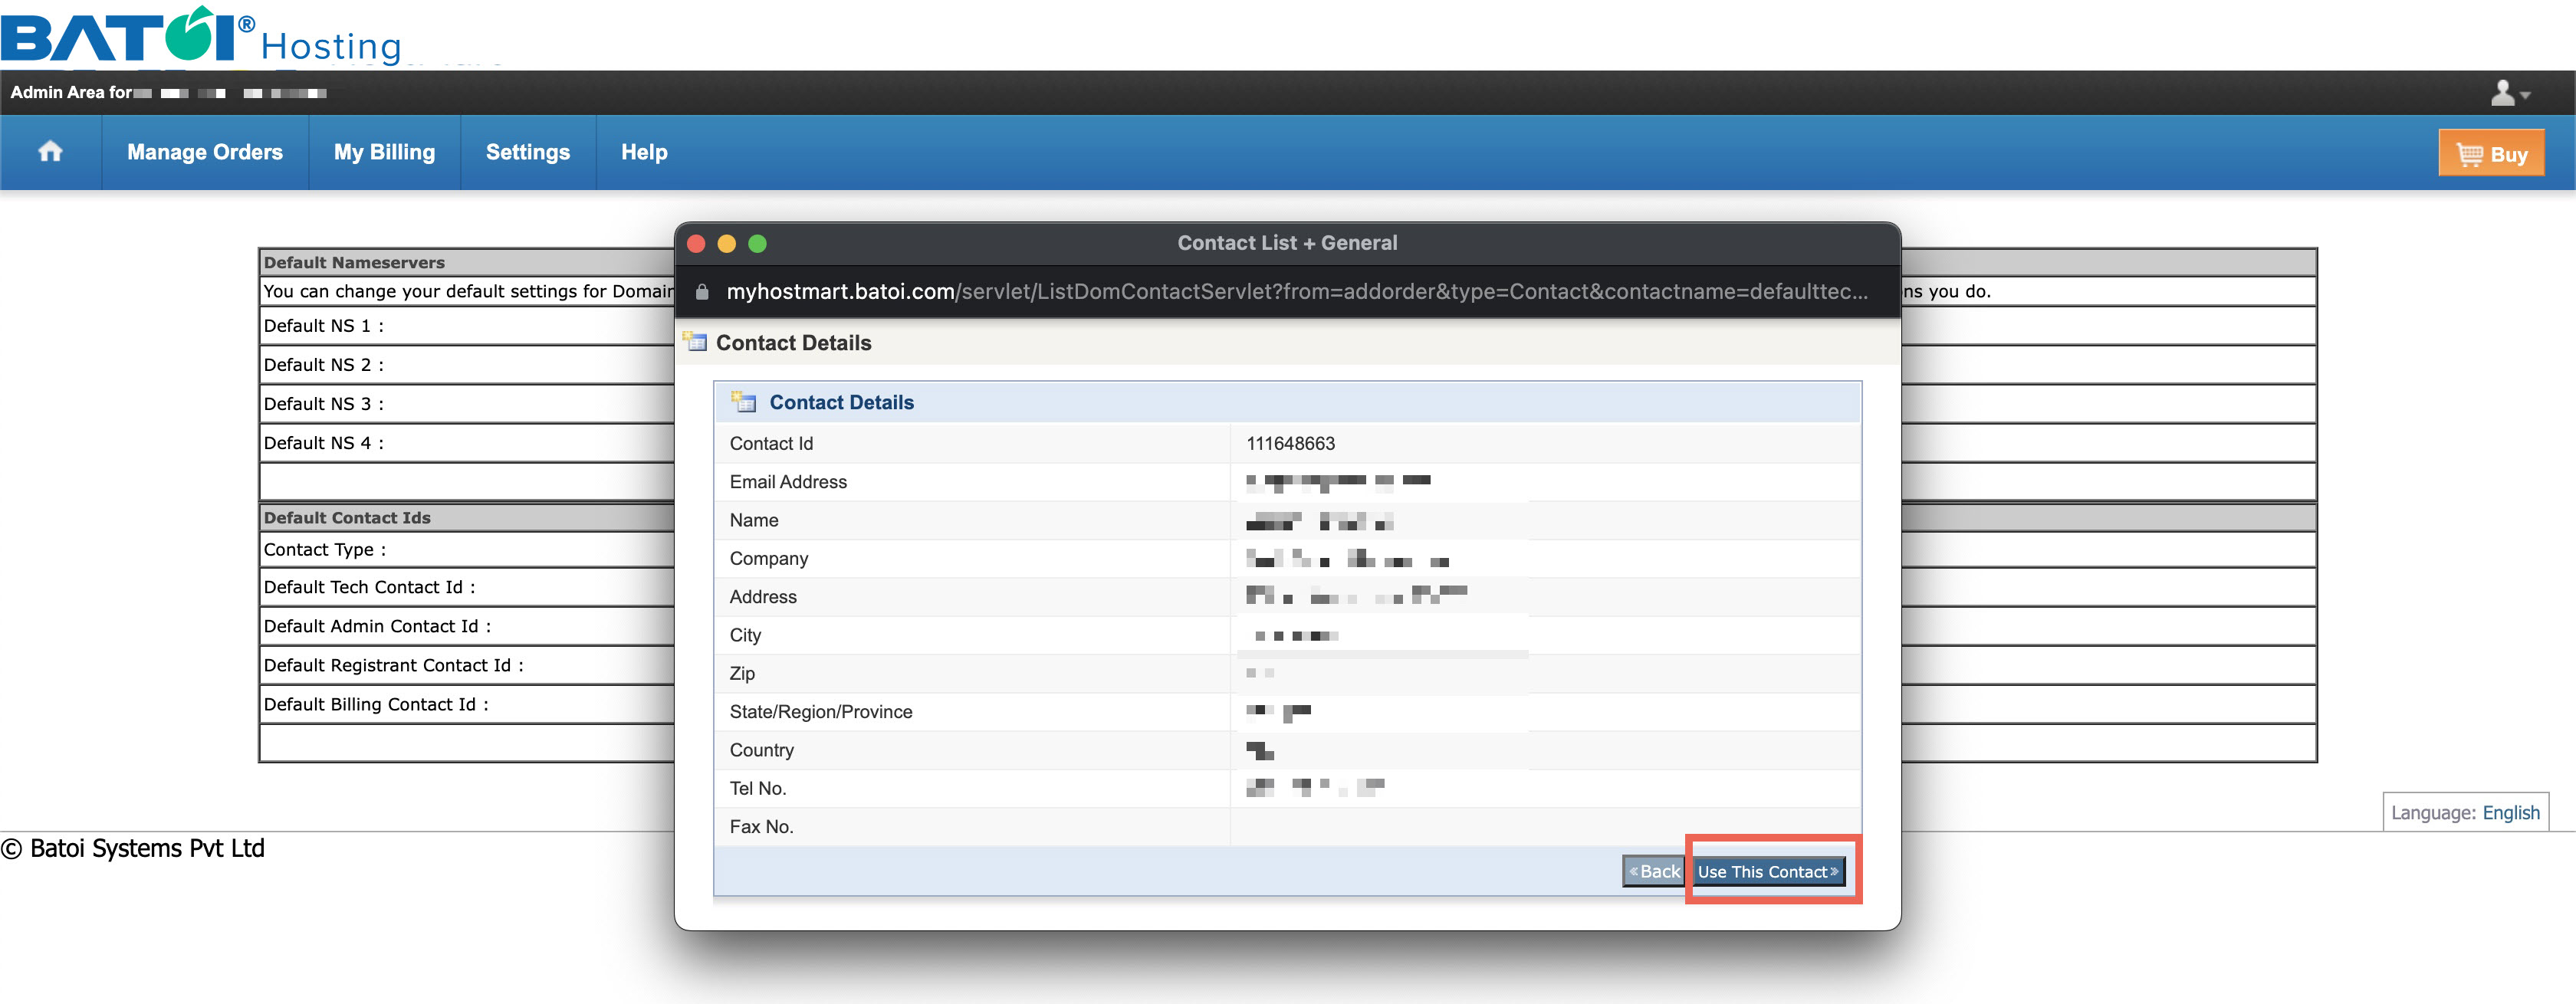
Click on the Use This Contact button available on the pop-up page, and the information will be saved, as illustrated in Figure 11 above.
Conclusion
By following these steps, you can now confidently manage contacts within your Batoi Domain Control Panel. This feature is not just a time-saver but also an organizational tool that streamlines your domain management tasks. Should you require further assistance, our Support Team is here to help you.


