Creating Email Accounts with cPanel on Linux
Type the cPanel access details received from Batoi Priority Support Team in your browser and press Enter. You will find the login screen for your hosting control panel. Type your hosting control panel Username and Password to login to the home page.
Note: To know more on how to access hosting control panel follow the steps in our help article.
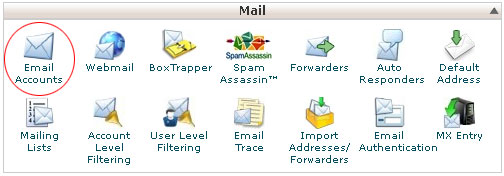
After successful login you will find the home page as shown in Figure 1. From the home page click Email Accounts under category Mail. The system will take you to the Email creation page.

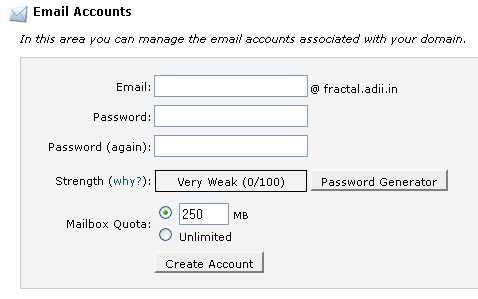
In the Email field, type the name you want. The email account created here will be associated with your domain name (For ex: 'abc@yourDomain Name.tld'). After entering the desired Email username click the Password Generator button and the system will generate a password for you which will be used to authenticate this Email account. Copy the password in a text file for future reference. Alternatively you can also manually enter a password as per your requirement. Retype the password in the Password (Again) text box. You can allocate disk space to this Email account from Mailbox Quota section. Either you can allocate a specific MB or you can choose the Unlimited option. Then click the Create Account button and the system will create a new email account for you.

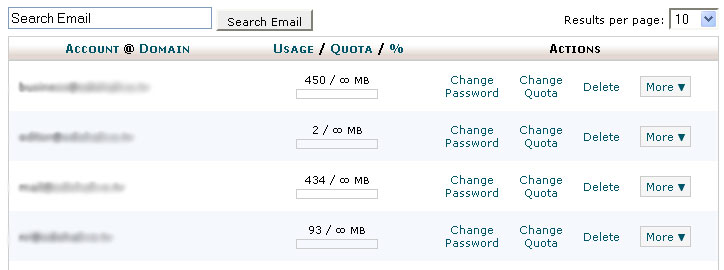
After the creation of the account, the account creation page will show the created account in a tabular form. From here you can change the allocated Disk Space and Password for the email account or even you can delete a particular account as shown in Figure 3.

Logout from the control panel and type the Webmail access details received from Batoi Priority Support Team in your browser and press Enter to access your Webmail. Enter the email address and password of your mail account and go to the dashboard of your Webmail.


