


Networking by a Batoi Bridge Member
Click the Members menu from the primary menu section, as shown in Figure 1 above and the members list page will open, as shown in Figure 2 below.
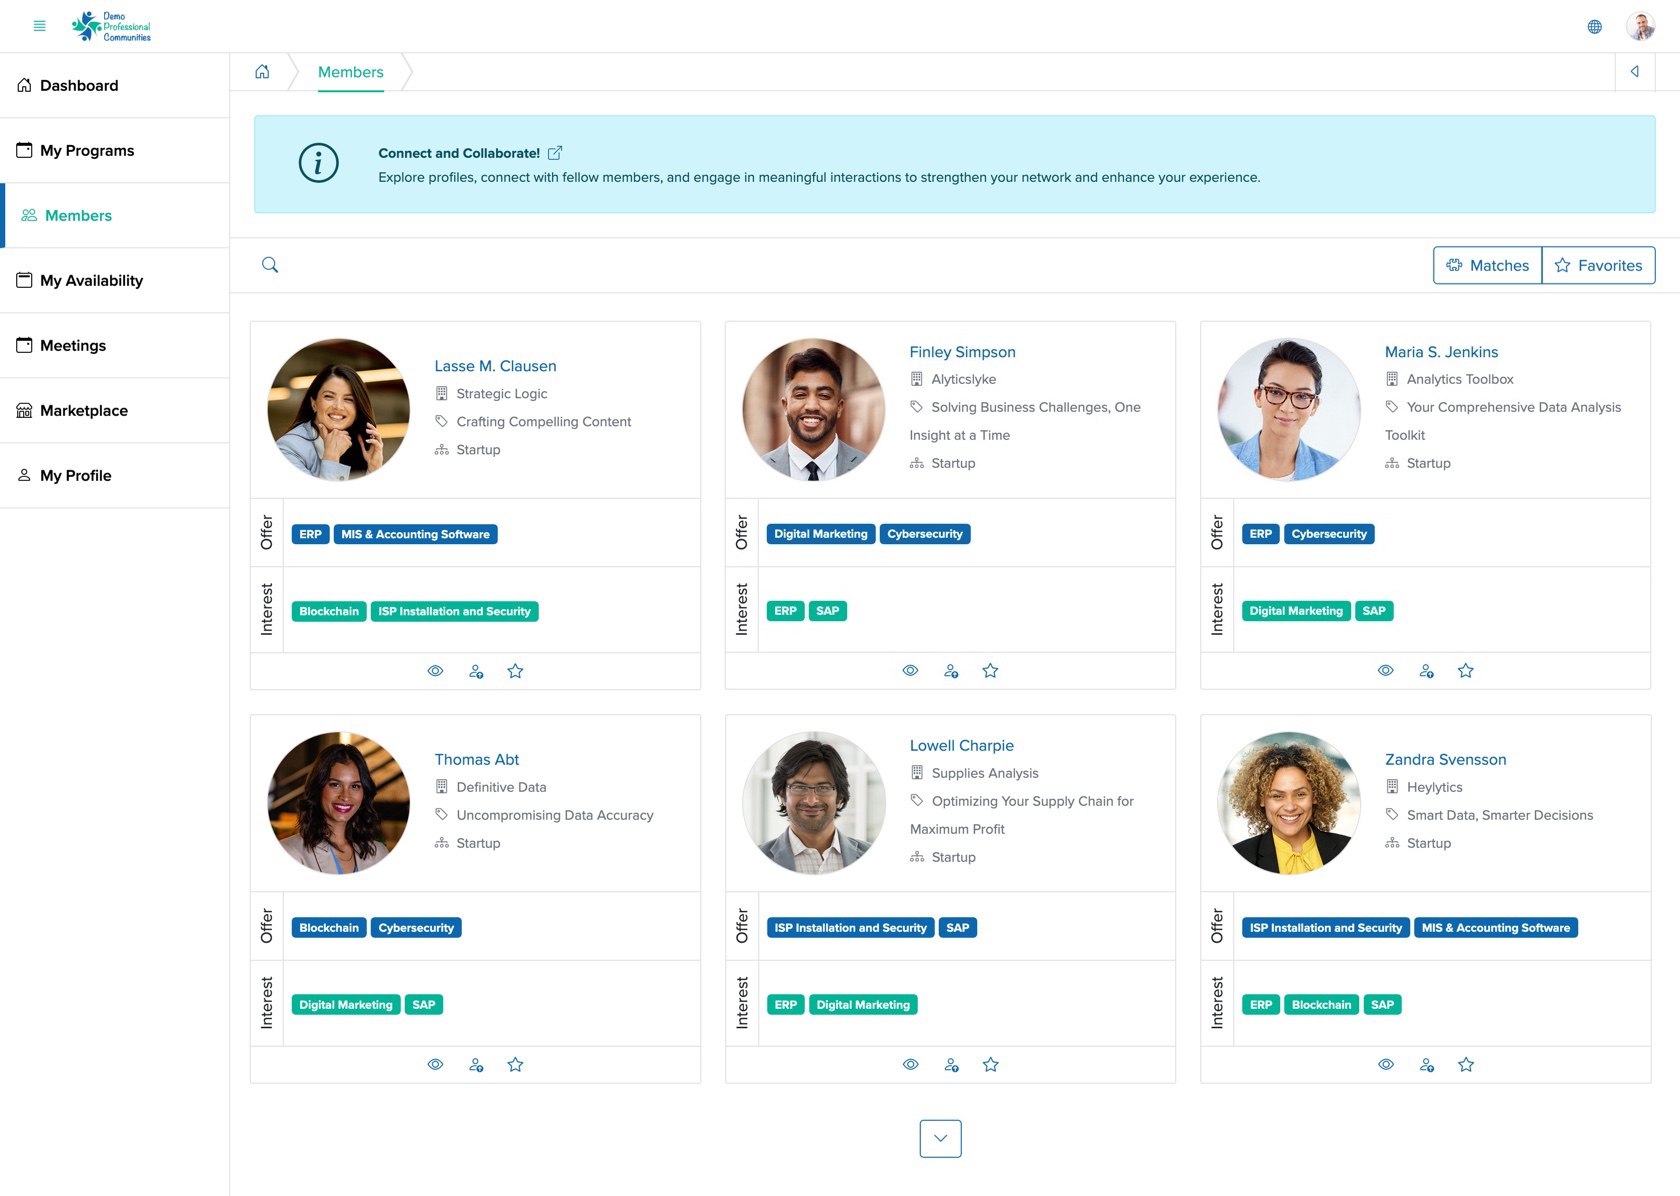
To view the member details, click the View linked icon associated with the member, as shown in Figure 2 above.
To request a member for a meeting, click the Request Meeting linked icon associated with the member, as shown in Figure 2 above.
To add a member as your favourite, click the Add to Favorite linked icon associated with the member, as shown in Figure 2 above.
Click the down arrow button available on the bottom of the page to load more member, as shown in Figure 2 above.
Matches
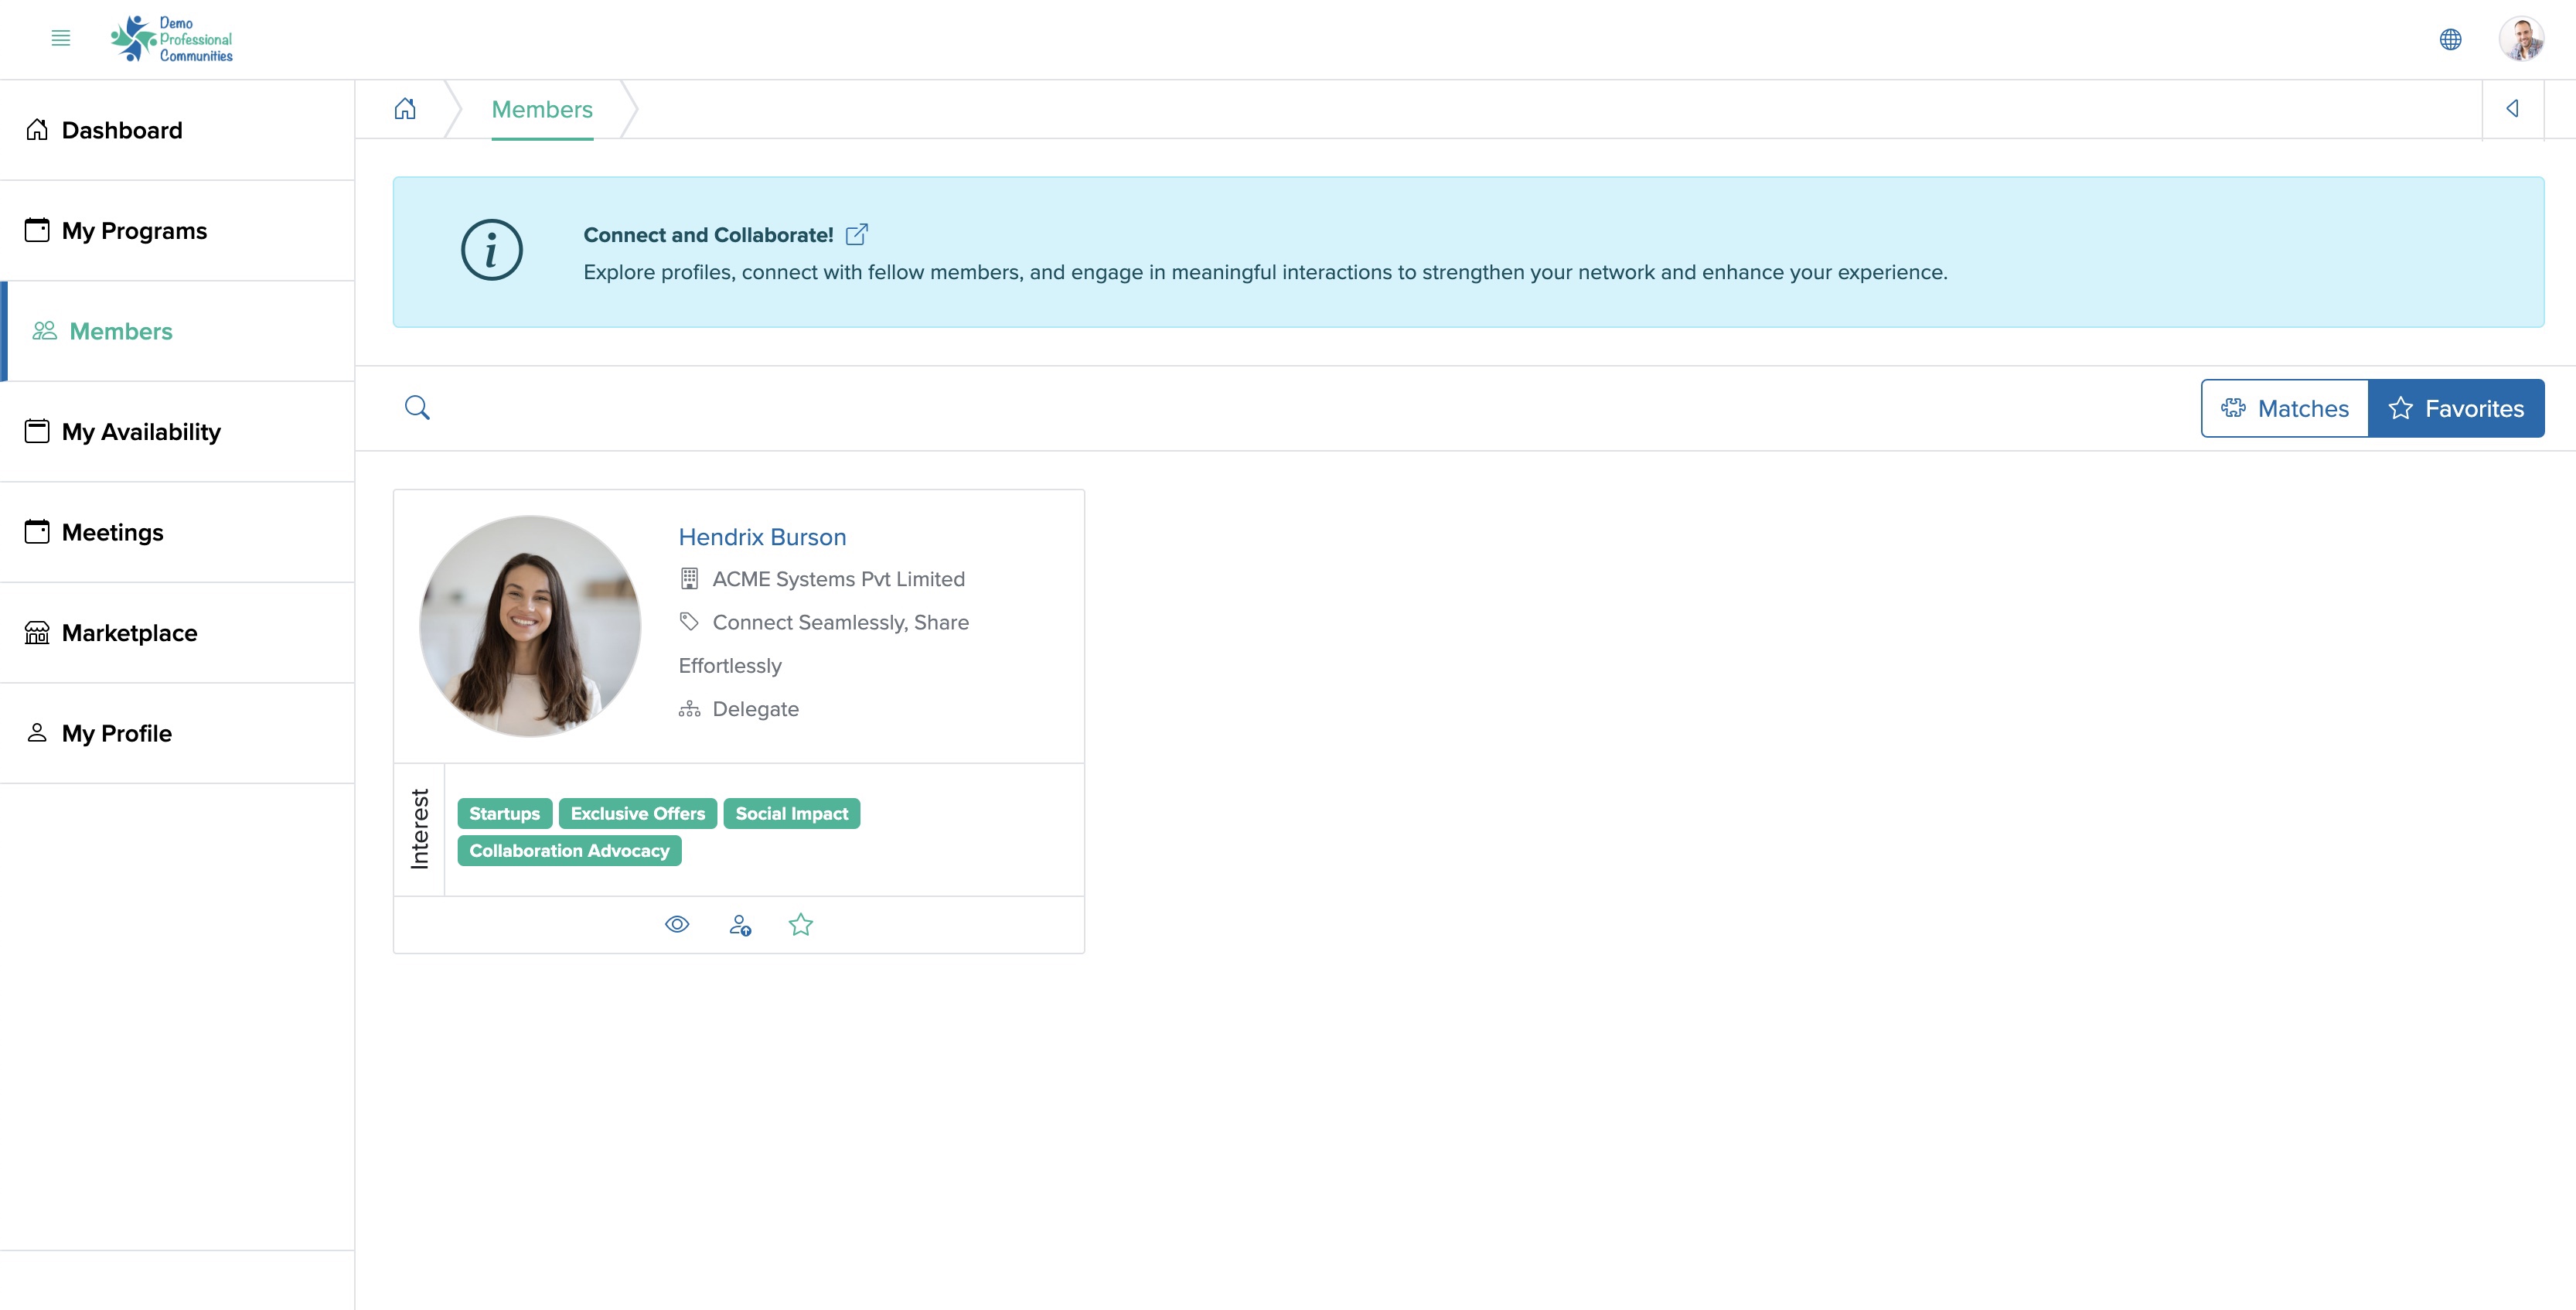
Click on the Matches button at the top right of the member list page, as shown in Figure 3 above, and the matches list will open based on Offer and Interest values, as shown in Figure 4 below.

Favourites
Click on the Favorites button at the top right of the member list page, as shown in Figure 4 above, and the favourites list will open based on Offer and Interest values, as shown in Figure 5 below.
Search
Click on the Search icon at the top left of the member list page, as shown in Figure 5 above, and the search dropdown screen will open, as shown in Figure 6 below.
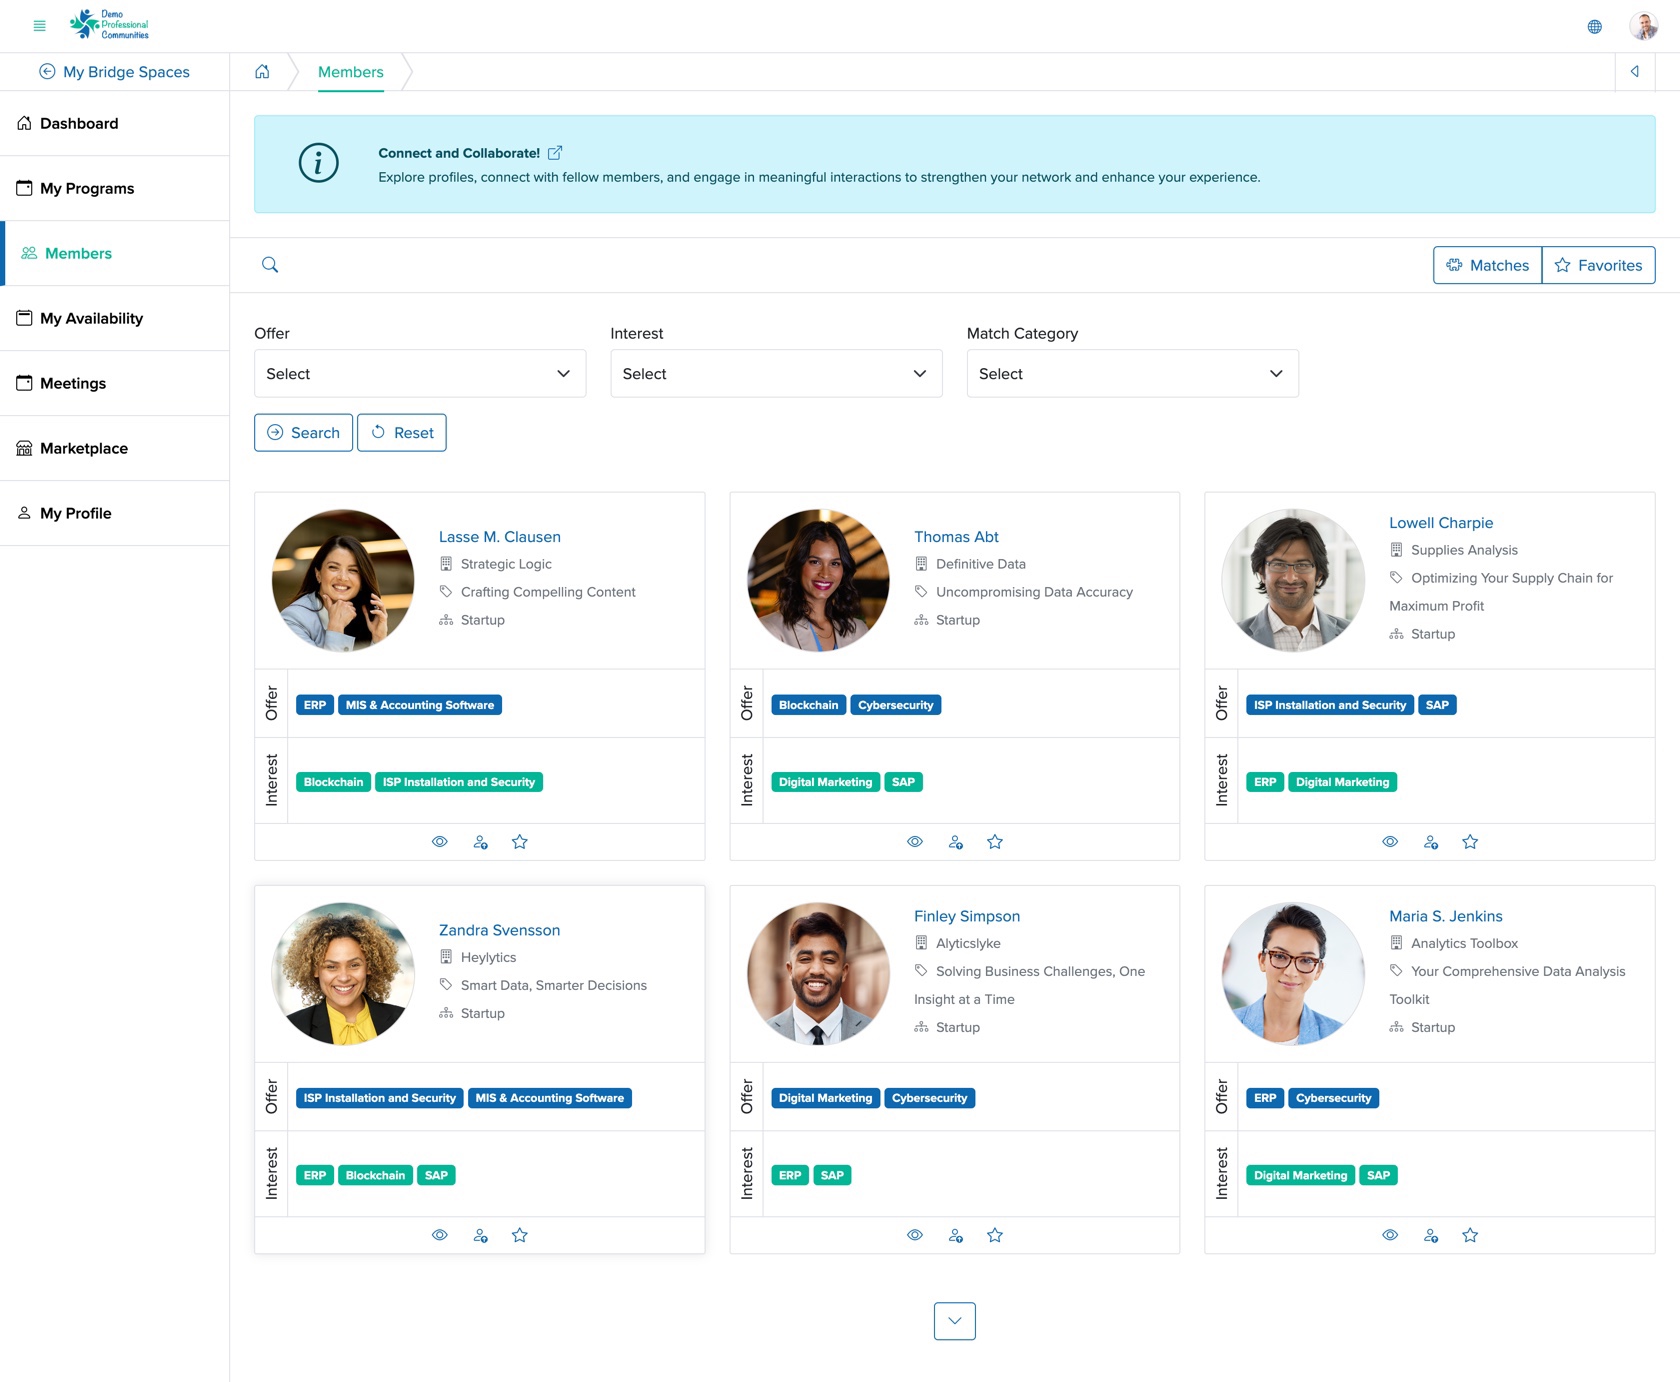
Select the search parameters from the Offers, Interests, and Match Category dropdown list, as shown in Figure 6 above and click the Search button and the system will filter the desired data for you.
Click the Reset button to remove the search, as shown in Figure 6 above.
View Profile
Click on the Profile Image or the Name of each each member, as shown in Figure 6 above, and the View Profile screen will open for that particular member, as shown in Figure 7 below.
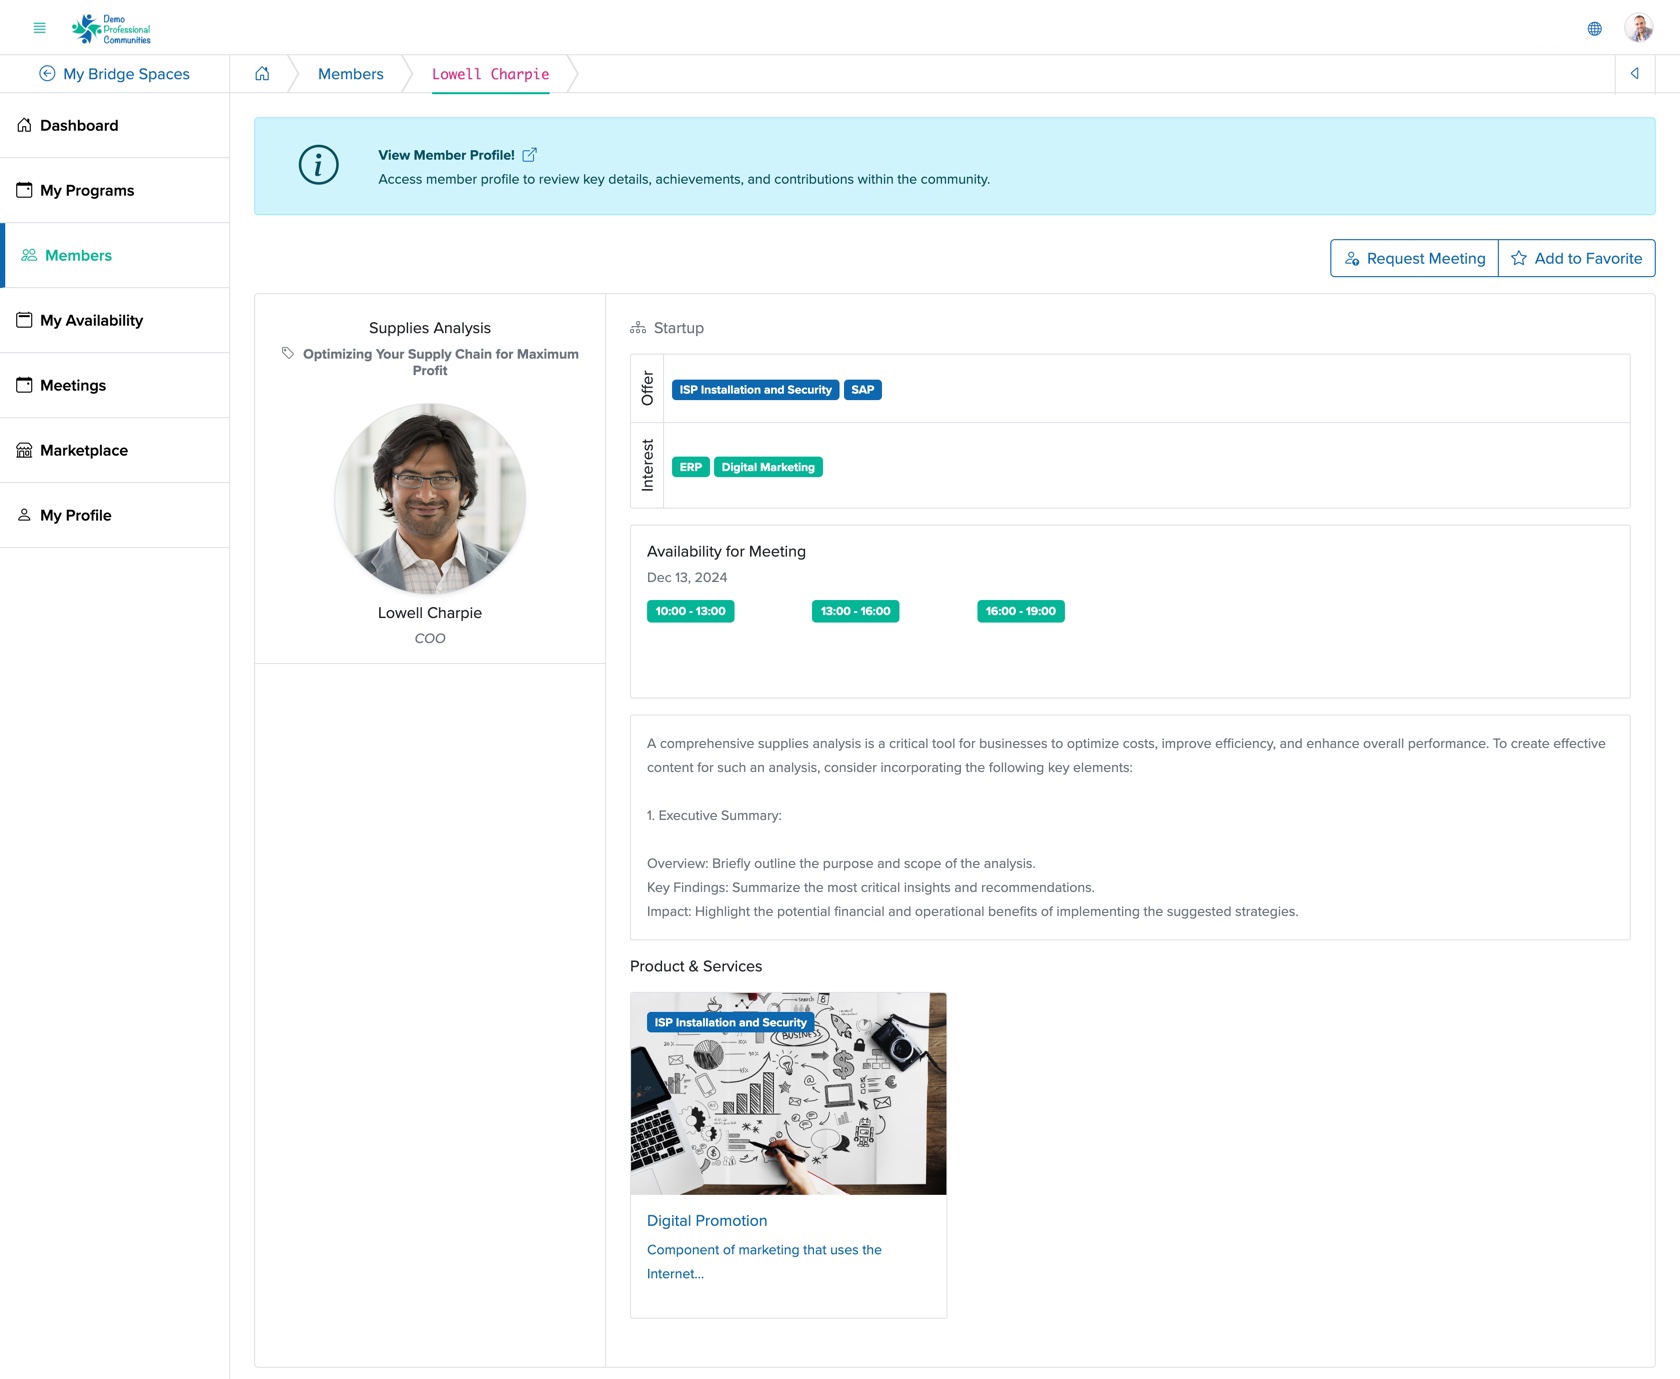
On the left side of the profile screen, the basic details of the member will be displayed: Photo, Name, Organization Name, Tagline text, Contact, and Social Media Handle details.
As shown in Figure 7 above, the offers and interests, availability for meeting, about, and products and services are displayed on the right side of the profile screen.
The availability buttons are defined in three colours:
- Green: Available Slots
- Yellow: Booked Slots
- Grey: Inactive Slots
Add to Favorite
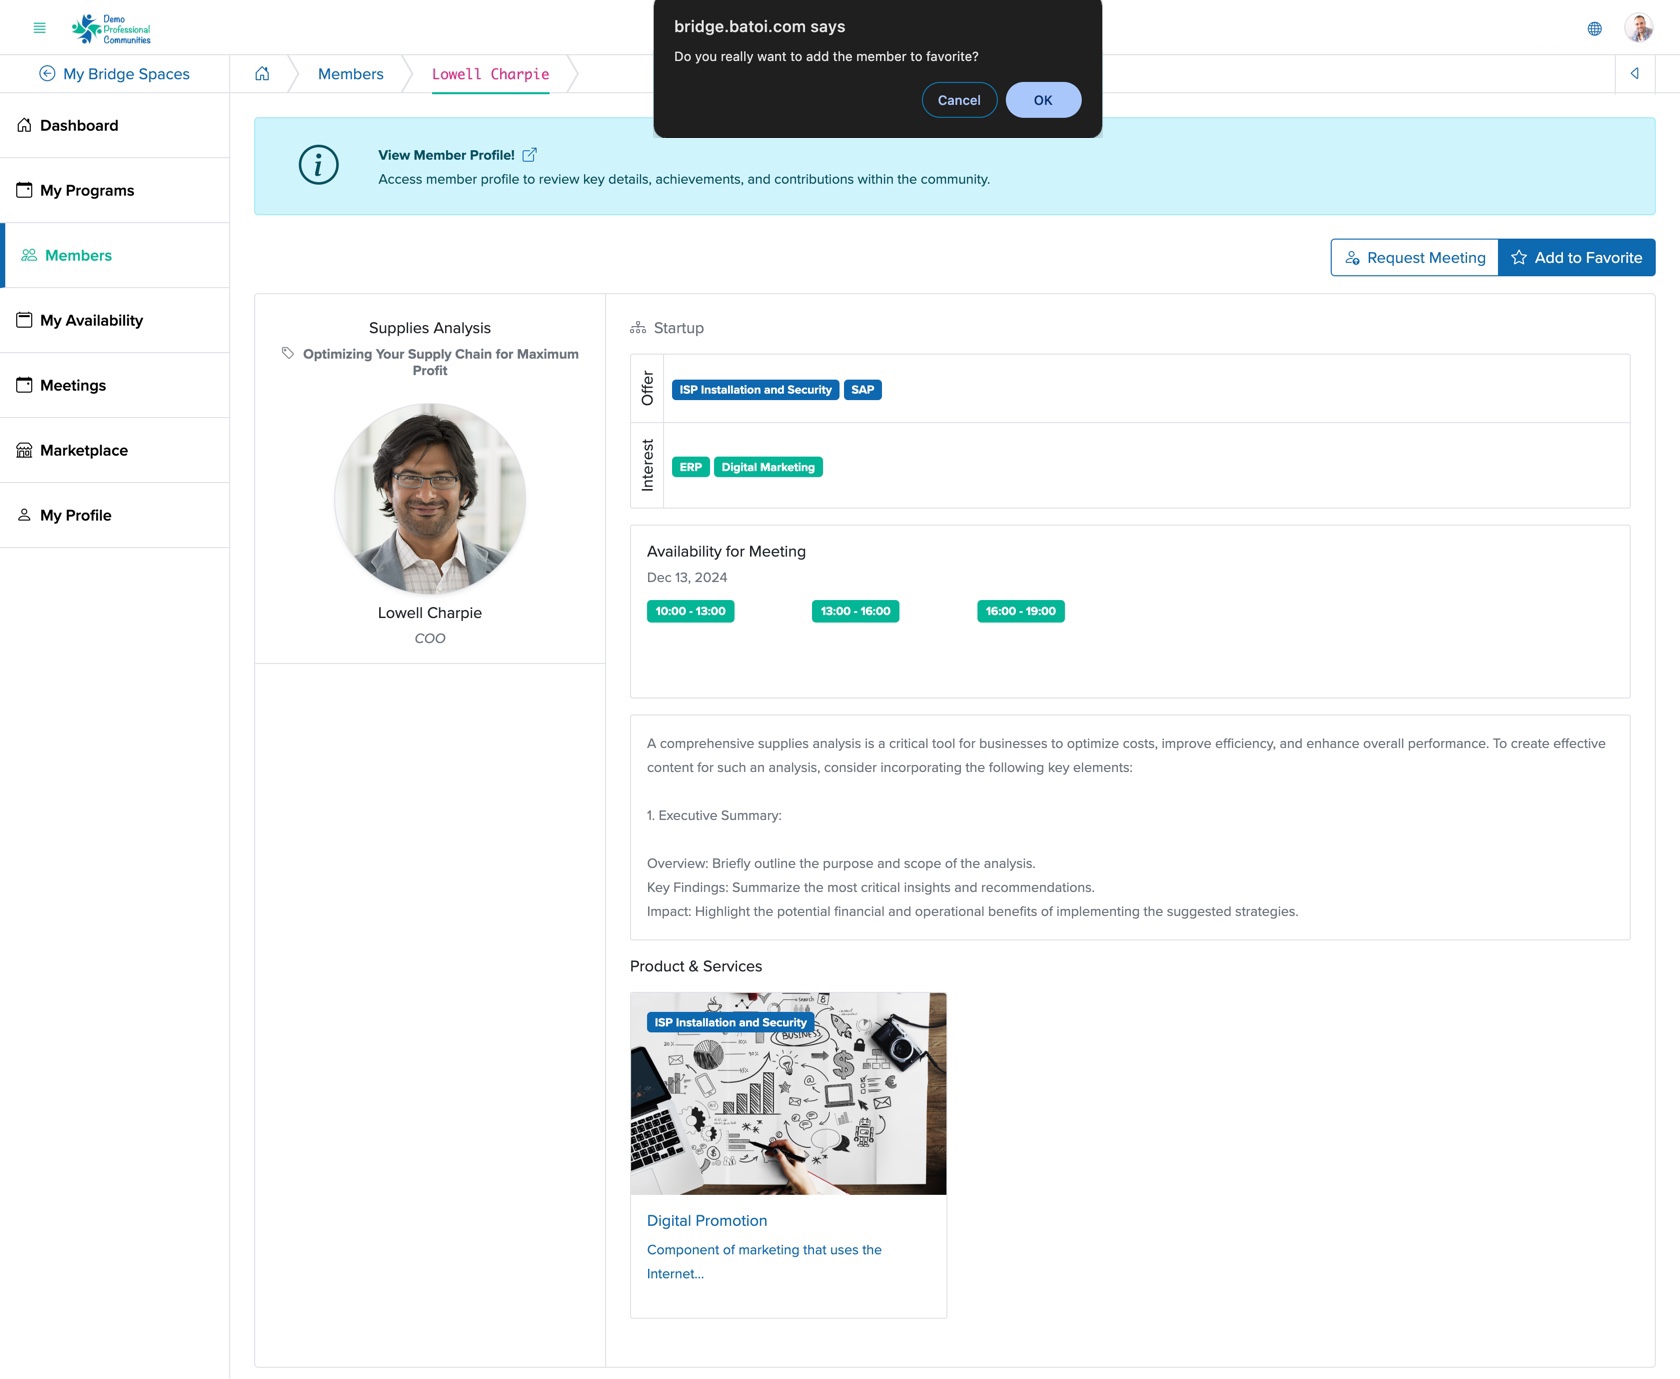
Click on the Add to Favorite button on the top right side of the screen, as shown in Figure 7 above. A popup screen will appear, and you need to accept it to add that particular member as a favourite, as shown in Figure 8 below.
Request Meeting
Click on the Request Meeting button available on the top right side of the screen, as shown in Figure 8 above, and the Request Meeting screen will open for that particular member, as shown in Figure 9 below.
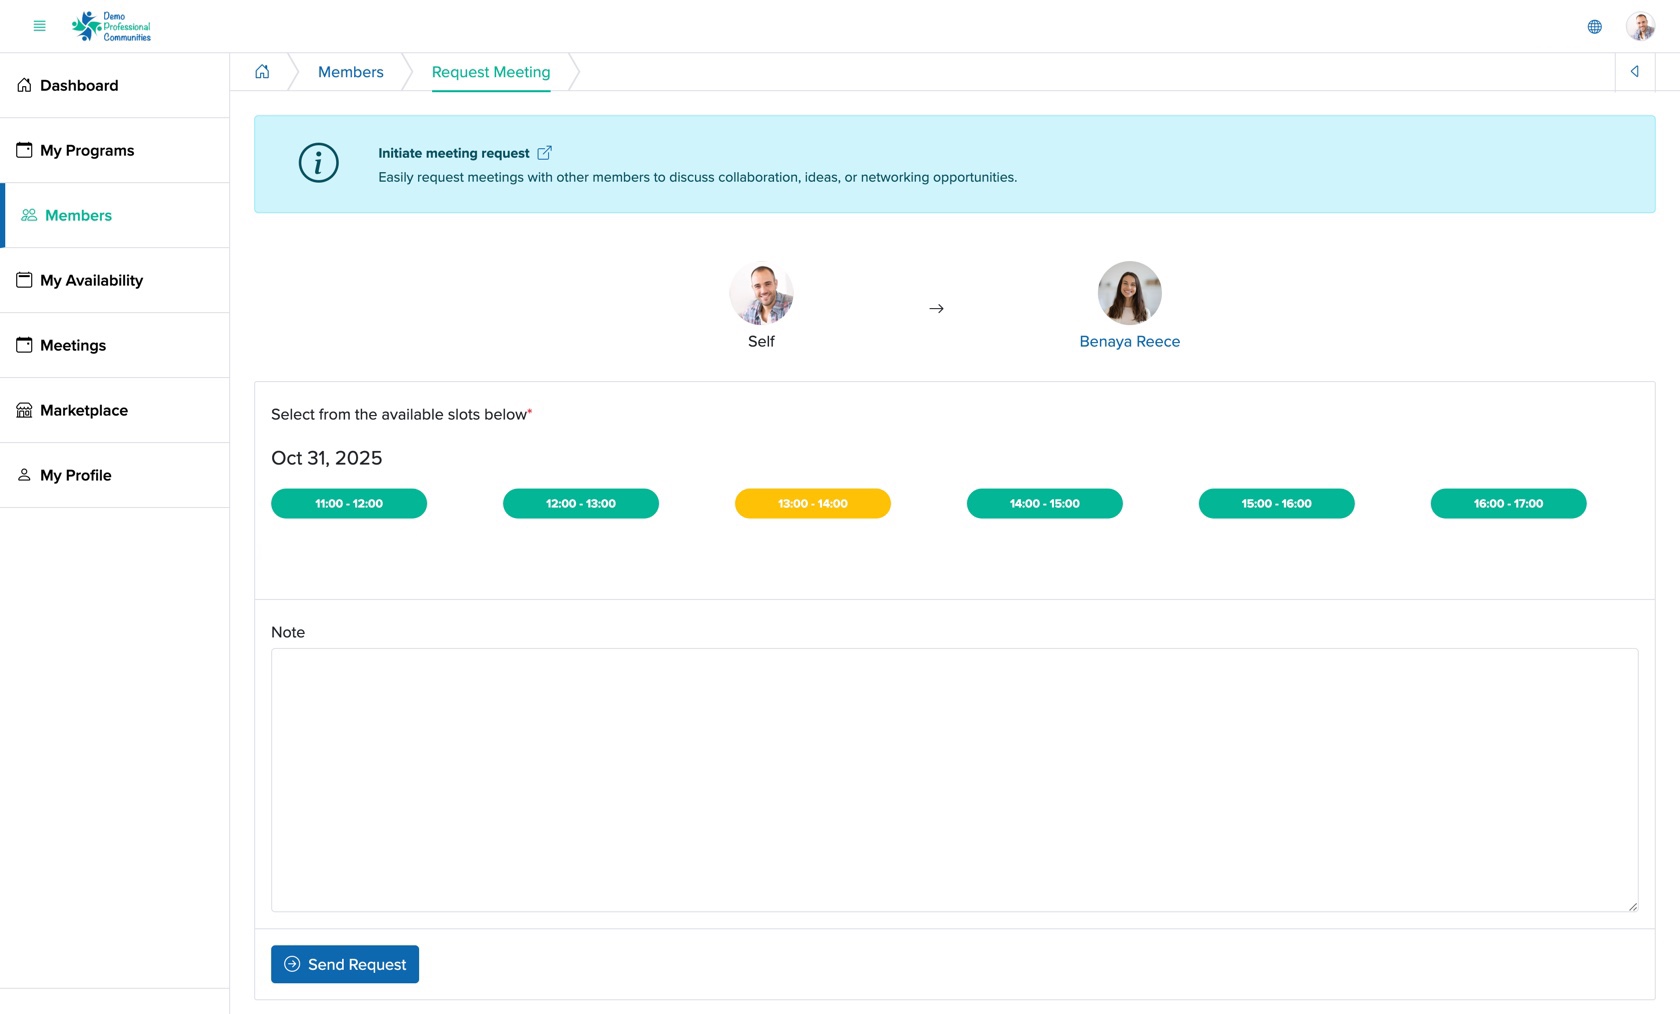
On the request meeting page, you can see all the available meeting slots with durations as green buttons, as shown in Figure 9 above.
Click on any one available slot and it will become Yellow. Add your request note to the note section and click on the Send Request button as shown in Figure 9 above.
Meeting Dashboard
Click the View icon associated right side of each meeting, as shown in Figure 6 above and the meeting dashboard will open, as shown in Figure 10 below.
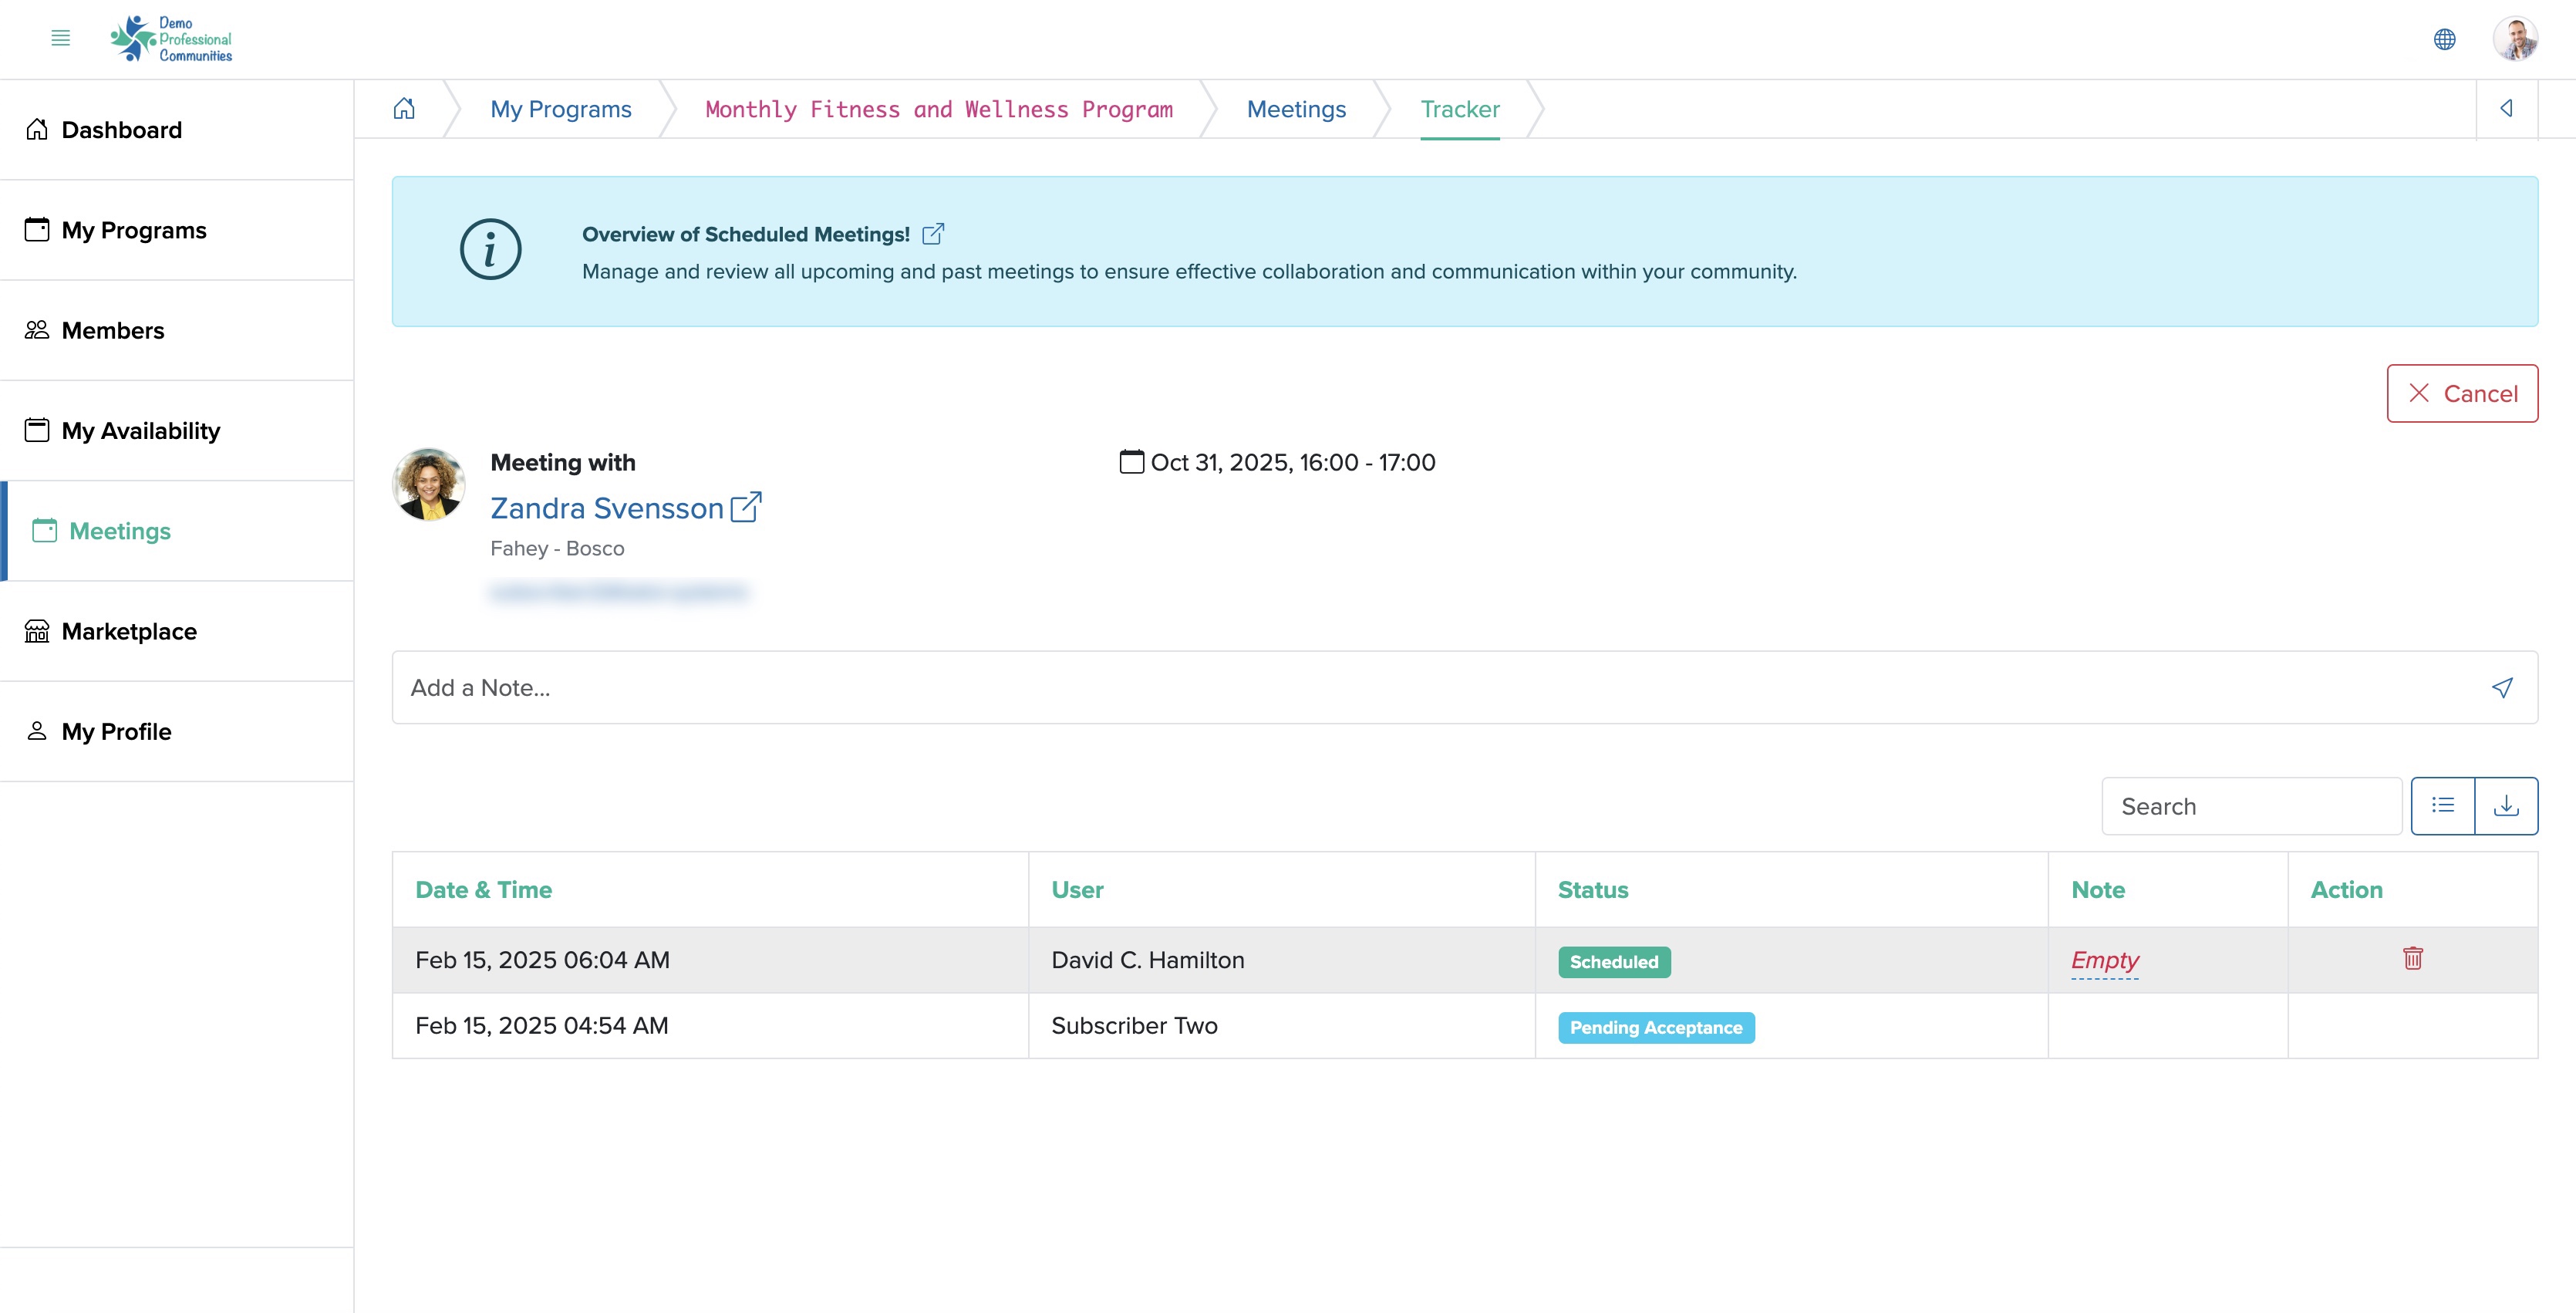
You can add notes regarding the meeting on the Add a Note textbox, as shown in Figure 10 above. All the one-to-one discussions through adding notes will be listed in a tabular format below the meeting dashboard screen, as shown in Figure 10 above. You can delete your note by clicking the delete icon associated with the note, as shown in Figure 10 above.
To cancel the meeting, click the Cancel button at the top right of the screen, as shown in Figure 10 above.
Once the meeting is approved by the member, the Didn’t Happen and Completed button will appear on the top right side of the screen, as shown in Figure 11 below.
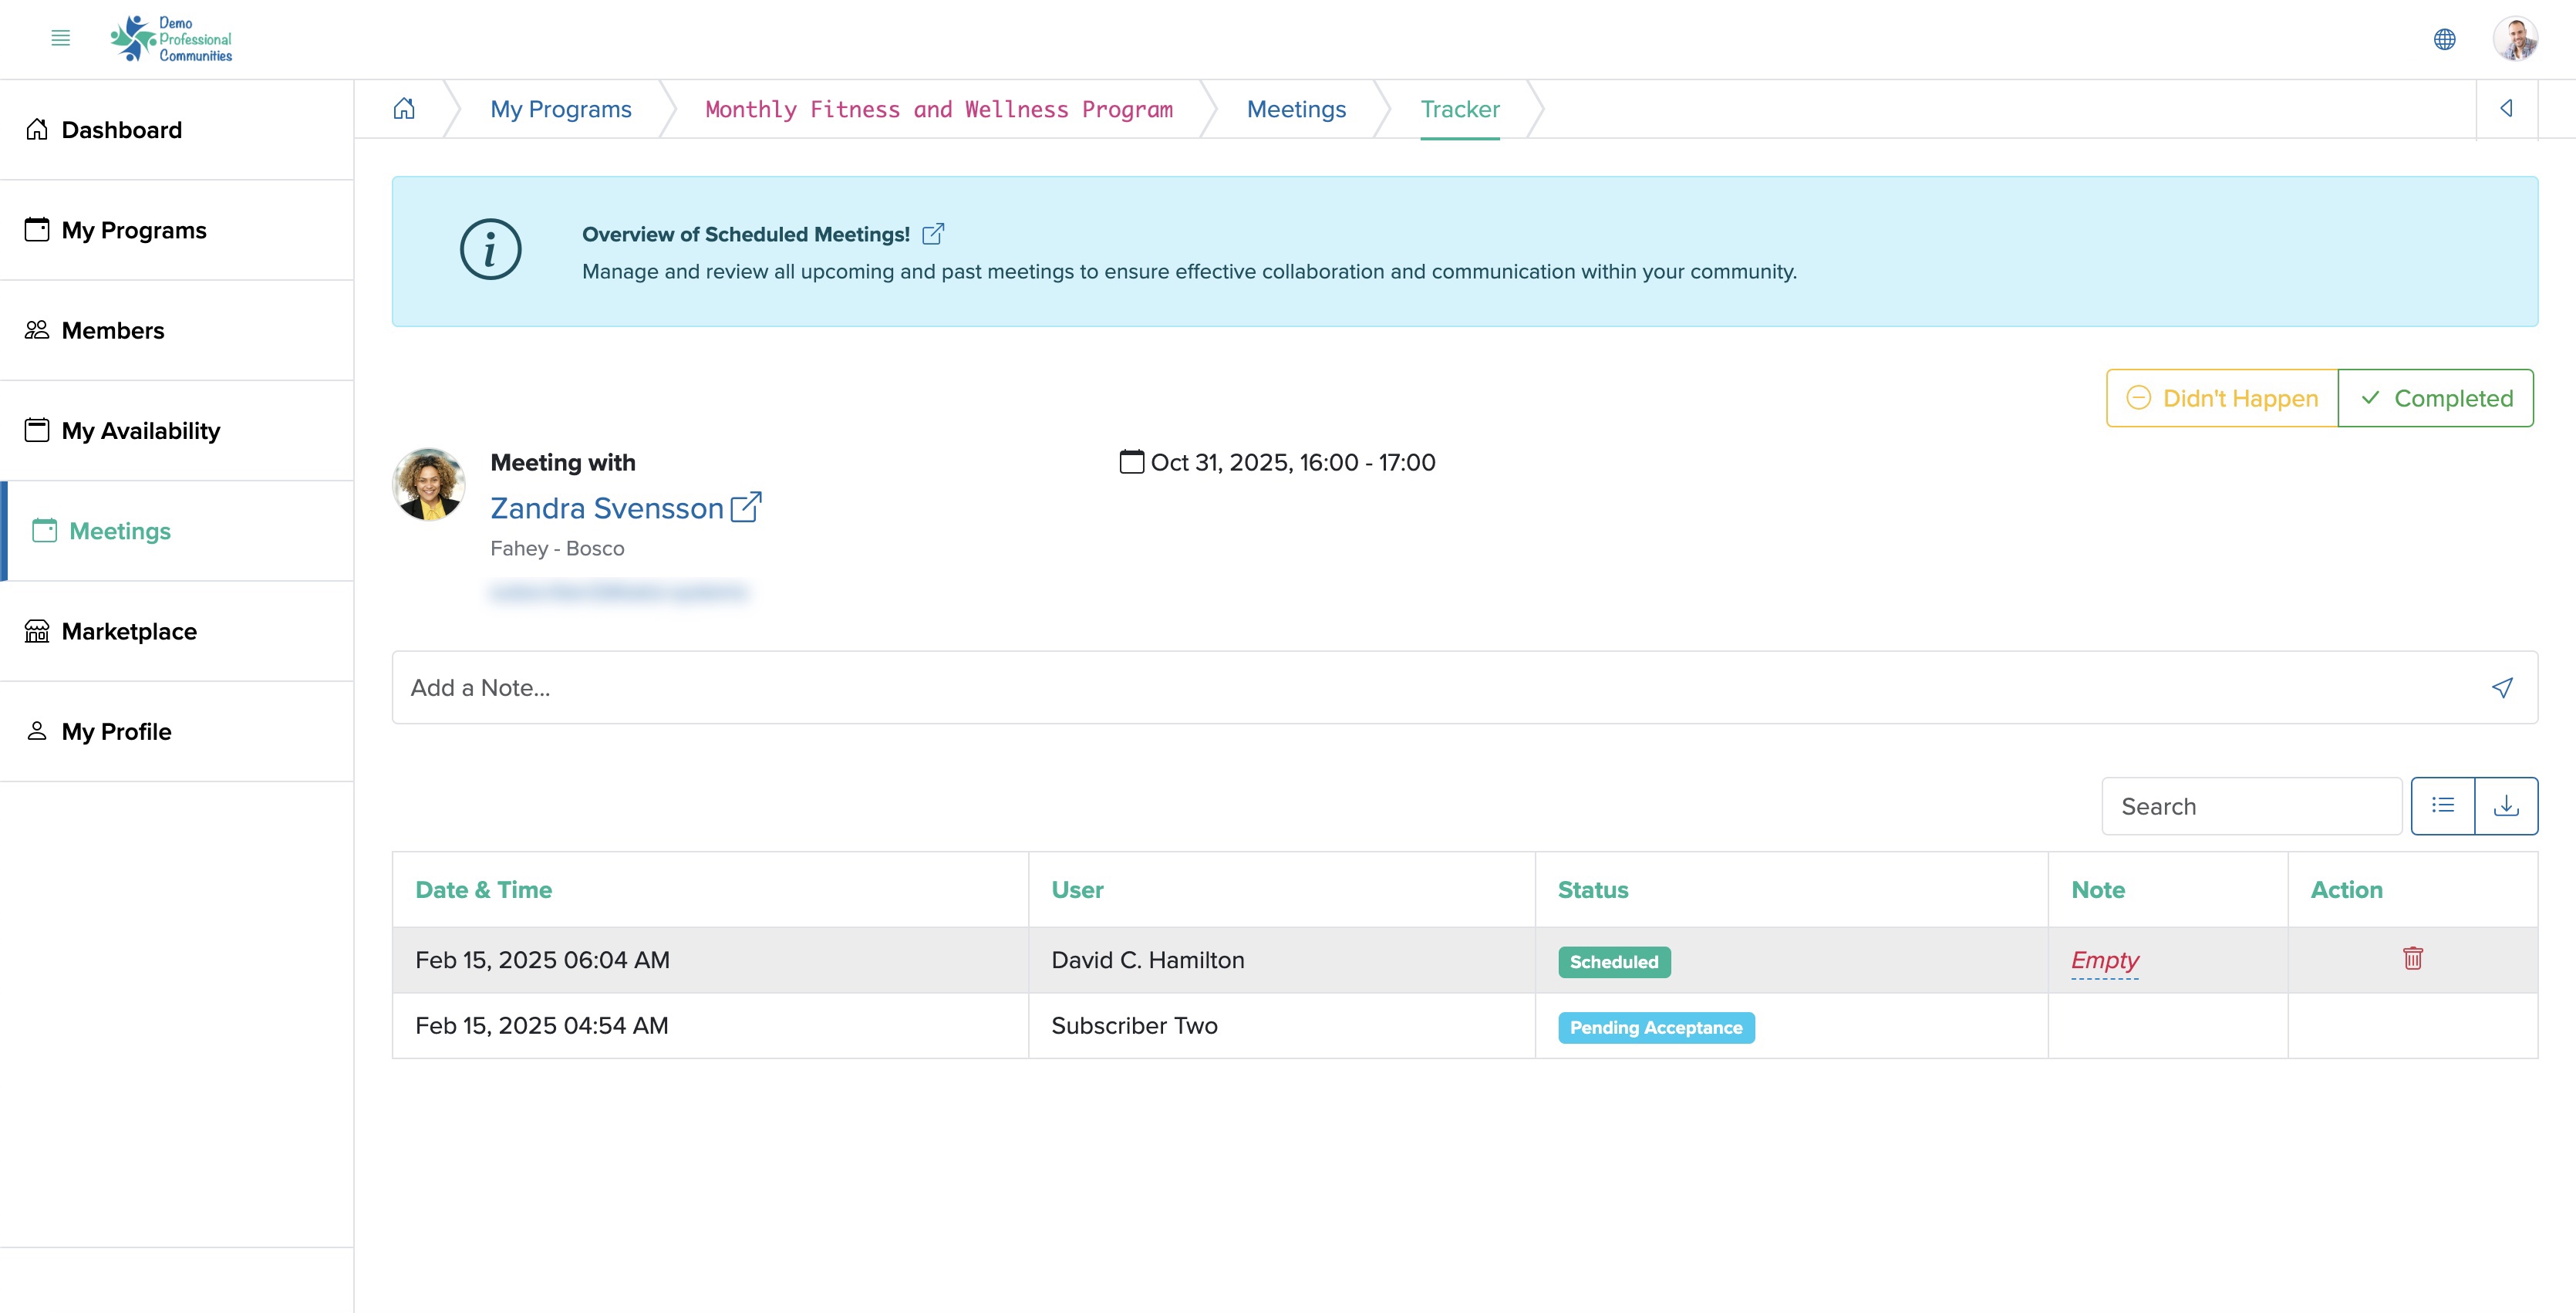
Click on the Didn’t Happen button if the meeting was not done as per the schedule and click the Completed button if the meeting is done as per the schedule, as shown in Figure 11 above.